24.
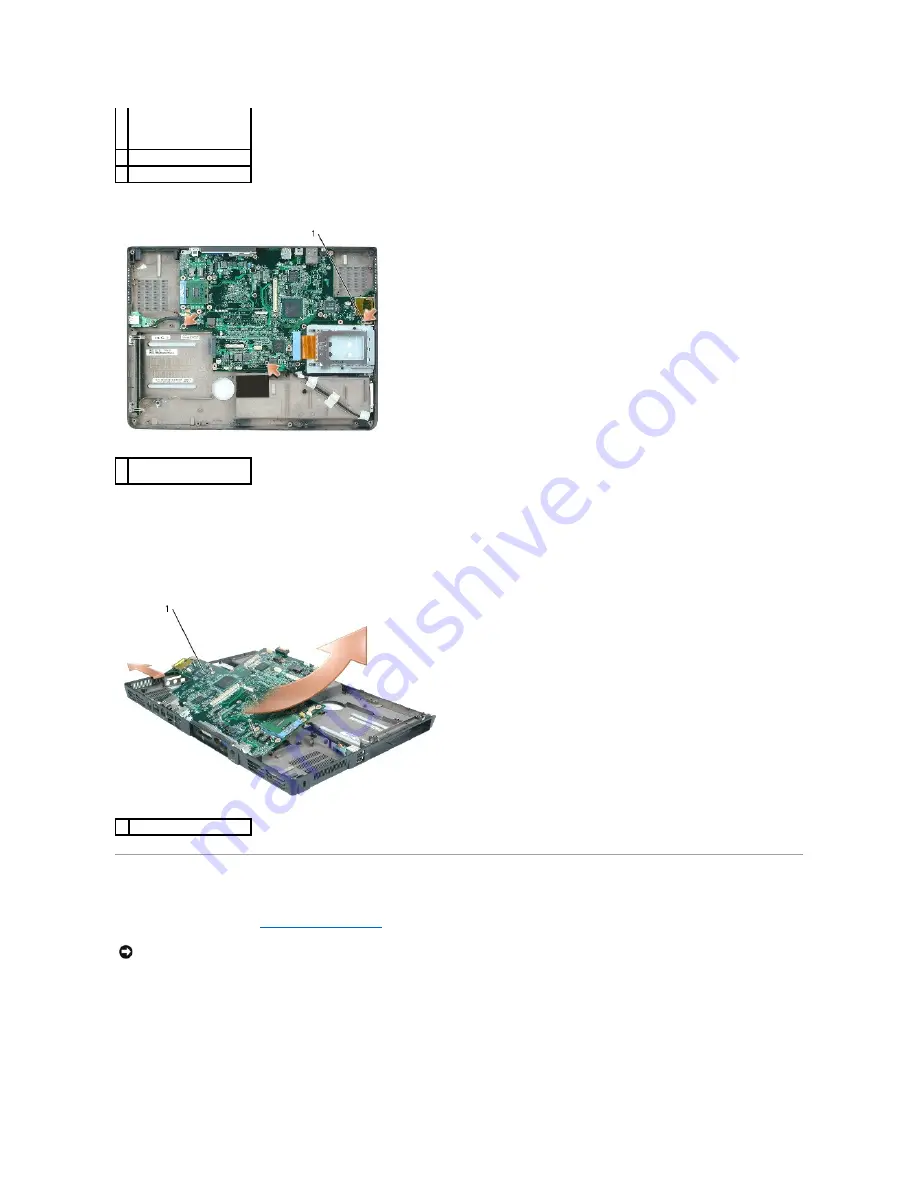
Remove the three M2.5 x 5-mm screws from the system board.
25.
Remove the system board, slowly easing the connectors out of their access holes on the back and side of the computer base:
a.
With the back of the computer facing you, grasp the upper-right corner of the system board and lift it slightly.
b.
Pull the system board assembly away from you toward the front of the computer and slightly to the right; at the same time, use your left hand to
release the audio connectors by carefully pulling the side of the computer base slightly to the left.
c.
Grasp the lower-right corner of the system board and slide it toward the right to remove the system board from the computer base.
Replacing the System Board
1.
Perform all of the steps in "
Removing the System Board
" in reverse order.
2.
Turn on the computer.
3.
Insert the flash BIOS update program CD that accompanied the replacement system board into the optical drive. Follow the instructions that appear on
the screen.
4.
Enter the system setup program to update the BIOS on the new system board with the computer Service Tag sequence.
3 cable connector for
internal card with
Bluetooth wireless
technology
4 speaker connector
5 subwoofer connector
1 system board M2.5 x 5-mm
screws (3)
1 system board assembly
NOTICE:
Before turning on the computer, replace all screws and ensure that no stray screws remain inside the computer. Failure to do so may result in
damage to the computer.
Содержание Inspiron XPS
Страница 11: ...Back to Contents Page ...
Страница 25: ......
Страница 33: ...Back to Contents Page ...
Страница 52: ......
Страница 57: ...3 Replace the cover Back to Contents Page 1 antenna cables 2 ...
Страница 75: ...Back to Contents Page ...
Страница 80: ...2 Tighten the four captive screws on the video card thermal cooling assembly Back to Contents Page ...
Страница 82: ...Back to Contents Page ...
Страница 90: ......
Страница 95: ...3 Replace the cover Back to Contents Page 1 antenna cables 2 ...
Страница 101: ...8 Replace the display assembly 9 Replace the keyboard 10 Replace the center control cover Back to Contents Page ...
Страница 110: ...Back to Contents Page ...
Страница 113: ...Back to Contents Page ...
Страница 118: ...2 Tighten the four captive screws on the video card thermal cooling assembly Back to Contents Page ...
Страница 120: ...Back to Contents Page ...


