


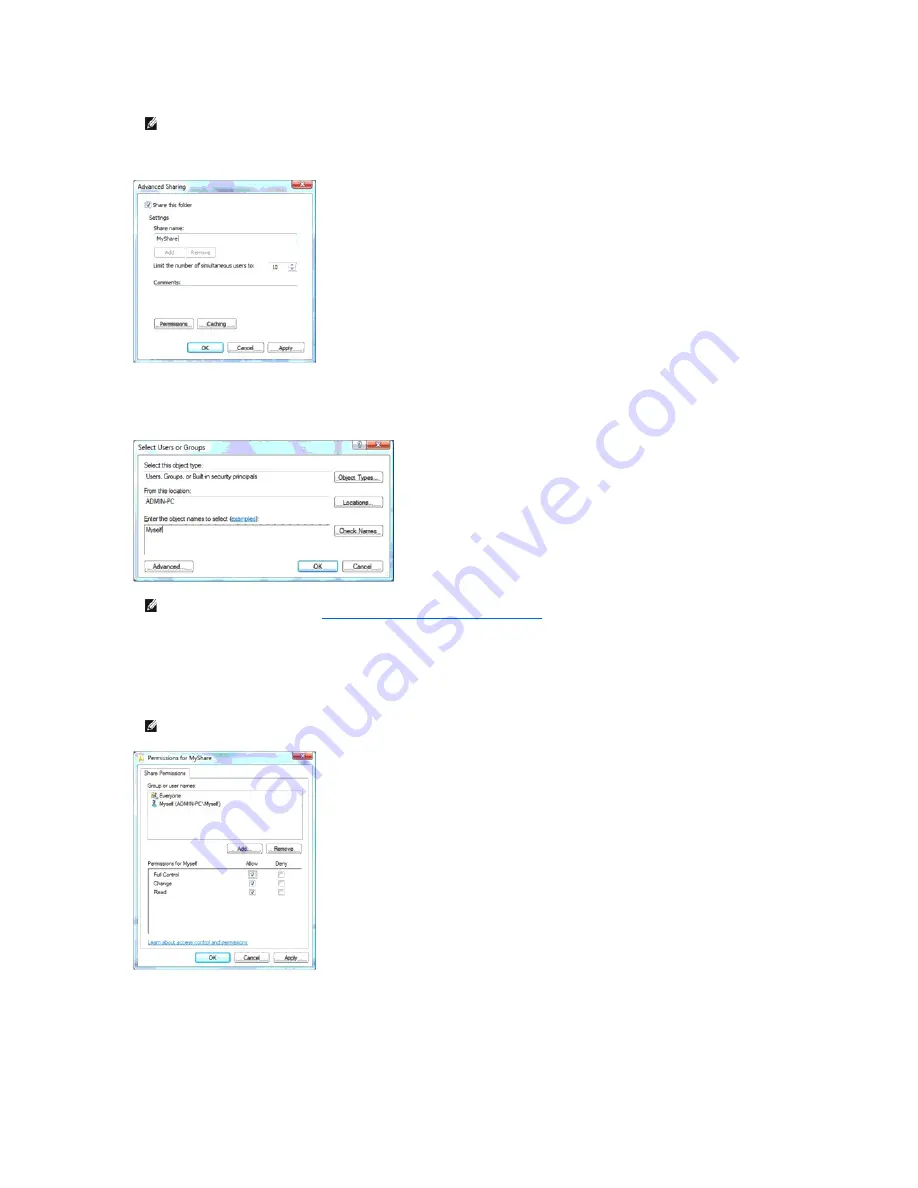
6.
Click on
Permissions
to create a write permission for this folder.
7.
Click
Add
.
8.
Enter your user login name in the
Enter the object names to select
box (Example of user login name,
Myself
).
9.
Click
OK
when you are done.
10.
Click on the user login name that you have just entered. Select
Full Control
check box. This will grant you permission to send the document into this
folder.
Setting Up the Address Book
To setup the Scan to Server/Computer address book through the network, you will first need to locate the IP address of the printer. You can obtain this IP
address from the System Settings page by performing the following steps:
NOTE:
Note down the shared name as you need to use this name in the next setting procedure.
NOTE:
User login account with empty password will be rejected in the Scan to Folder authentication. Ensure that all user login accounts have a
valid and non-empty password. See
"Creating a Password for Your User Login Account"
for details on how to assign a password for your user
login account.
NOTE:
Do not use
Everyone
as the user login name.
Содержание 2135 Color Laser
Страница 98: ......
Страница 100: ...Example of an entry for Scan to Server FTP ...
Страница 106: ...5 Press to send e mail Back to Contents Page ...
Страница 132: ...Back to Contents Page Symbol Wingdings ITC ZapfDingbats MS ...
Страница 139: ...Back to Contents Page ...


