38
s
ectiOn
7— s
ervice
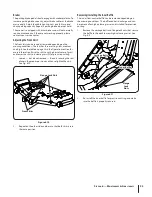
Use a 1-
4.
1⁄8
” socket wrench on the pulley side of the spindle
bolt. See Fig. 7-5.
Remove the hex nut at the blade using a 1-
5.
1⁄8
” wrench.
Remove the blade.
6.
To replace the blade reverse the above process and tighten
7.
nut to 100-120 lb ft.
NOTE:
Add a small amount of multi-purpose grease to the
bolt threads to avoid corrosion and galvenic action.
WARNING!
never mow with dull blades. Blades
that are bent should be replaced. The cutting blades
are sharp and can cause severe injury. Wrap the
cutting surface of the blade with a rag to avoid
injury.
Sharpening the Blades
Set the parking brake.
1.
Clean any debris from the blades. Keep blades sharp and
2.
free of build up at all times.
Sharpen blades evenly at the original 30° angle to maintain
3.
balanced cutting blades. Do not sharpen the underside of
the blades. Use a electric blade sharpener, a conventional
electric grinder or a hand file to sharpen the blades.
Replace any blade with severe nicks or dents that cannot
4.
be removed by filing.
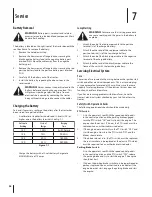
Check the balance of the blade after sharpening by placing
5.
it on a blade balancer. Do not use un-balanced blades.
If the blade dips on one end, file stock off of the cutting
6.
surface on that end.
NOTE:
Replace any blades that cannot easily be balanced.
Replacing the Blades
WARNING!
Before performing any maintenance,
place the PTO switch in the “OFF” position, engage
the parking brake lever, turn the ignition key to the
“OFF” position and remove the key from the switch.
Protect your hands by using heavy gloves when
handling the blades. When servicing the mower
deck, be careful not to cut yourself on the
sharpened blades.
Remove the key from the ignition and disconnect the spark
1.
plugs.
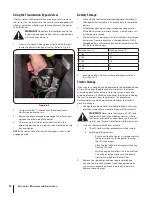
Jack up the front of the mowing deck about one foot and
2.
block it in that position.
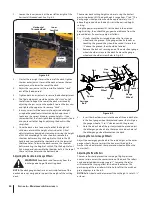
Wrap a rag around one end of the blade and grasp it to
3.
prevent it from turning, or secure the blade by placing a
block of wood between the blade and the deck housing.
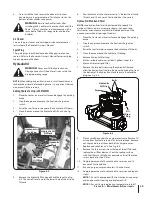
See Fig. 7-4.
Figure 7-4
Flange Lock Nut
Blade
Hex Screw
Figure 7-5
Содержание Tank S S7237
Страница 45: ...Notes 12 45 ...

