Performing Basic Equalizer Configuration
Equalizer Installation and Administration Guide
45
Changing Equalizer’s Console Password
The console password is the password for the
eqadmin
account, which automatically displays the Equalizer
Configuration Utility when you log in via
ssh
or the serial port. The factory-installed password for this account is
equalizer
. To change Equalizer’s console password, follow these steps:
1. In the
Equalizer Configuration Menu
window, select option 5,
Console
. Then press
Enter
.
2. Type the new password; it can include any combination of printable characters (except spaces) up to 20
characters.
3. When prompted, enter the password again to confirm the change. The new password takes effect immediately.
Upgrading Equalizer Software
After you have finished connecting Equalizer to your network, you can use the Equalizer Configuration Utility to
install the latest Equalizer software upgrade from Coyote Point. (You can also upgrade Equalizer software using the
graphical, browser-based Administrative Interface; please see “Upgrading Equalizer Software” on page 108.)
In order to upgrade:
•
Equalizer must be licensed; see “Licensing Equalizer” on page 82 for more information.
•
Equalizer must be able to access the Internet using FTP, or have access to a local FTP server that already
has the upgrade image.
The procedure below contains the basic upgrade instructions for the current Equalizer software release. Please visit
the
Documentation Repository
at
docs.coyotepoint.com
for detailed upgrade instructions (including version
compatibility charts for all releases), and other useful documentation.
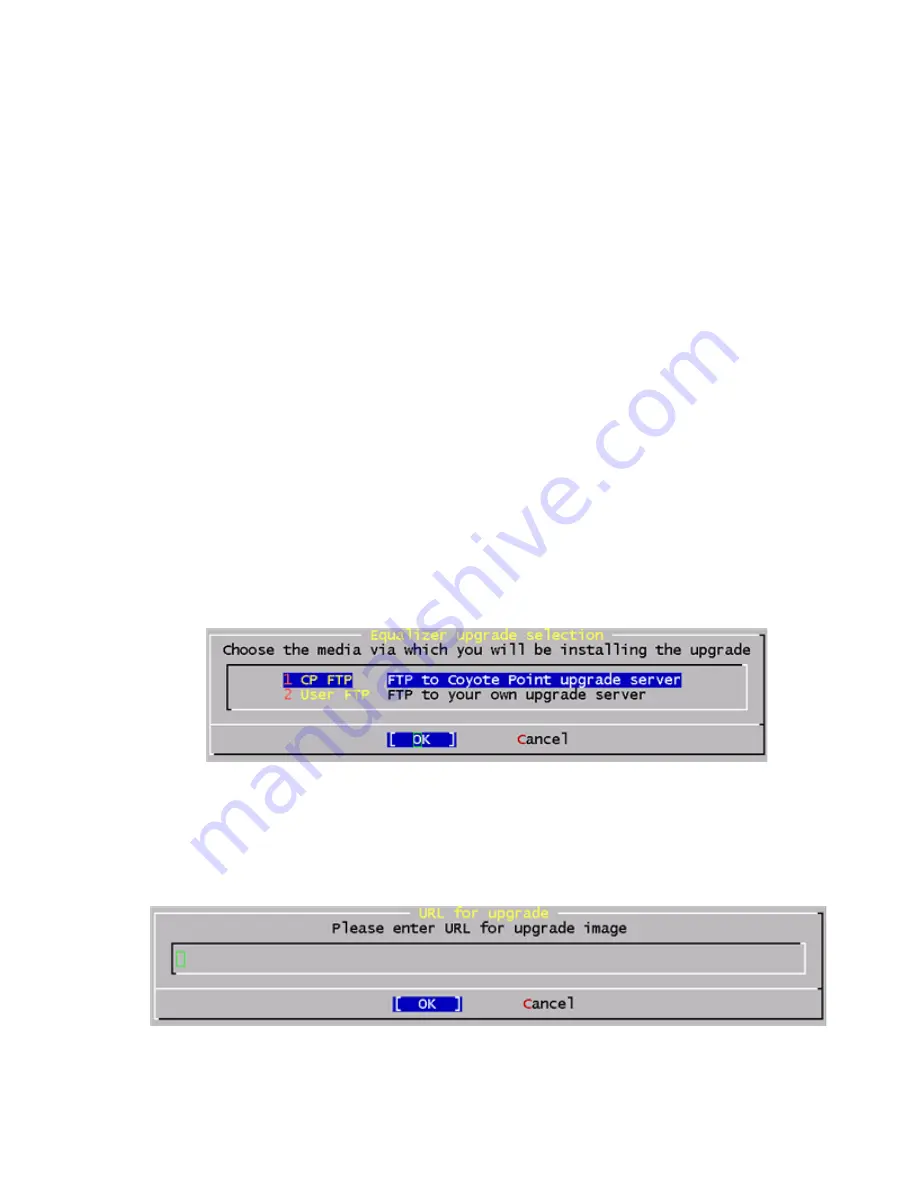
1. In the
Equalizer Configuration Menu
window, select option 8,
Upgrade
, and press
Enter
. You are prompted to
choose the location of the upgrade image:
•
Use the first option to connect to the Coyote Point FTP server to download the upgrade image.
•
Use the second opton to specify a local FTP server, to which you have already downloaded the upgrade
image from the Coyote Point FTP server.
Use the arrow or number keys to choose the appropriate location and then press
Enter
.
2. The upgrade utility prompts you to enter the upgrade URL:
Enter the URL appropriate for the option you selected in
Step 1
:
Содержание E350GX
Страница 18: ...Chapter Preface 18 Equalizer Installation and Administration Guide ...
Страница 38: ...Chapter 1 Equalizer Overview 38 Equalizer Installation and Administration Guide ...
Страница 50: ...Chapter 2 Installing and Configuring Equalizer Hardware 50 Equalizer Installation and Administration Guide ...
Страница 62: ...Chapter 3 Using the Administration Interface 62 Equalizer Installation and Administration Guide ...
Страница 80: ...Chapter 4 Equalizer Network Configuration 80 Equalizer Installation and Administration Guide ...
Страница 110: ...Chapter 5 Configuring Equalizer Operation 110 Equalizer Installation and Administration Guide ...
Страница 208: ...Chapter 7 Monitoring Equalizer Operation 208 Equalizer Installation and Administration Guide ...
Страница 240: ...Chapter 8 Using Match Rules 238 Equalizer Installation and Administration Guide ...
Страница 258: ...Chapter 9 Administering GeoClusters 254 Equalizer Installation and Administration Guide Envoy Configuration Worksheet ...
Страница 262: ...Appendix A Server Agent Probes 258 Equalizer Installation and Administration Guide ...
Страница 274: ...Appendix B Timeout Configuration 270 Equalizer Installation and Administration Guide ...
Страница 280: ...Appendix D Regular Expression Format 276 Equalizer Installation and Administration Guide ...
Страница 296: ...Appendix E Using Certificates in HTTPS Clusters 292 Equalizer Installation and Administration Guide ...
Страница 310: ...Appendix F Equalizer VLB 306 Equalizer Installation and Administration Guide ...
Страница 318: ...Appendix G Troubleshooting 314 Equalizer Installation and Administration Guide ...


