background image

1 - 10 Keyboard

Quick Start Guide

1

Keyboard

The keyboard features function keys to allow you to change operational features in-
stantly.

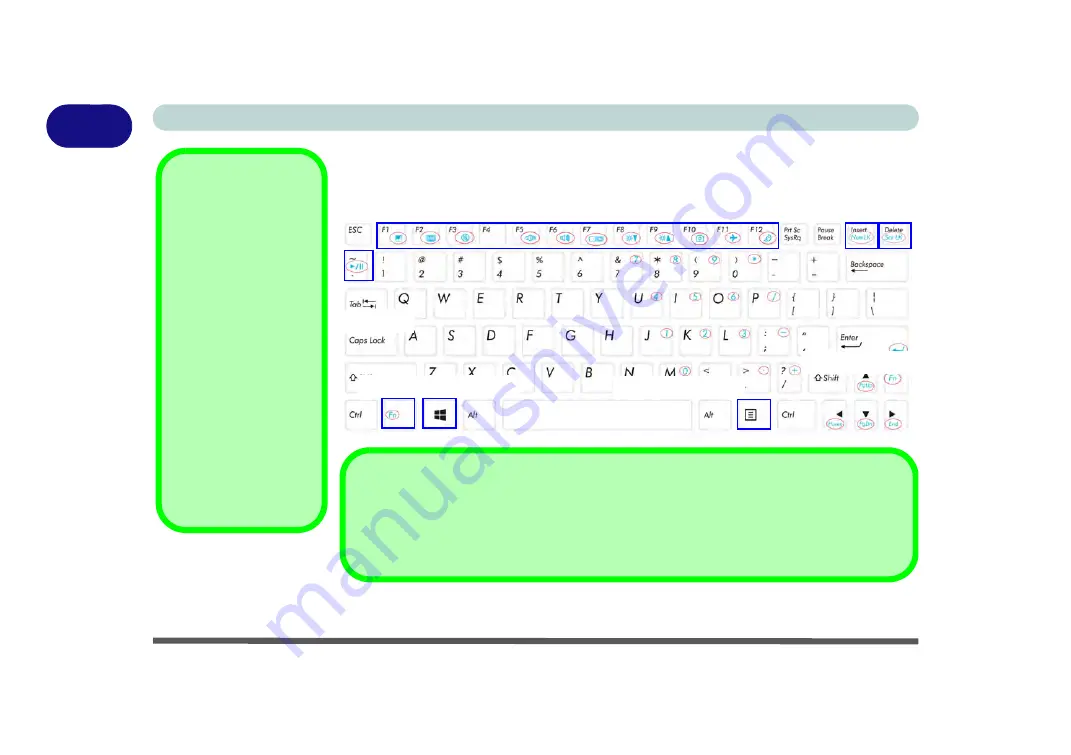
Figure 1 - 4

 - Keyboard

Other Keyboards

If your keyboard is dam-
aged or you just want to
make a change, you can
use any standard USB
keyboard. The system will
detect and enable it auto-
matically. However spe-
cial functions/hot-keys
unique to the system’s
regular keyboard may not
work.

NumLk & Scr Lk

Hold down the 

Fn Key

and either Num Lk or Scr
Lk to enable number or
scroll lock, and check the
LED indicator for status.

Play/Pause

Fn Key / Windows Logo Key

Menu / Application Key

Numerical Keypad

Function Keys

Scr Lk

NumLk

Special Characters

Some software applications allow the number-keys to be used with 

Alt

 to produce special characters.

These special characters can only be produced by using the numeric keypad. Regular number keys (in
the upper row of the keyboard) will not work. Make sure that 

NumLk

 is on.

Содержание W515GU

Страница 1: ...V18 1 00 ...

Страница 2: ......

Страница 3: ...ation This publication and any accompanying software may not in whole or in part be reproduced translated trans mitted or reduced to any machine readable form without prior consent from the vendor manufacturer or creators of this publication except for copies kept by the user for backup purposes Brand and product names mentioned in this publication may or may not be copyrights and or registered tr...

Страница 4: ...um Liechtenstein Denmark Lux embourg Finland Netherlands France Norway Germany Portugal Greece Spain Iceland Sweden Ireland United Kingdom Cyprus Czech Republic Estonia Hungary Latvia Lithuania Malta Slovakia Poland Slov enia ErP Off Mode Power Consumption Statement The figures below note the power consumption of this computer in compliance with European Commission EC regulations on power consumpt...

Страница 5: ...owed to sell his product in the European market This product conforms to the essential requirements of the R TTE directive 1999 5 EC in order to attain CE Marking A notified body has determined that this device has properly demonstrated that the requirements of the directive have been met and has issued a favorable certificate of expert opinion As such the device will bear the notified body number...

Страница 6: ...o communications However there is no guarantee that interference will not occur in a particular installation If this equipment does cause harmful interference to radio or television reception which can be determined by turning the equipment off and on the user is encouraged to try to correct the interference by one or more of the following measures Re orient or relocate the receiving antenna Incre...

Страница 7: ...t forth for an uncontrolled environment This equipment should be installed and operated with a minimum distance of 20 centimeters between the radiator and your body Warning Use only shielded cables to connect I O devices to this equipment You are cautioned that changes or modifications not ex pressly approved by the manufacturer for compliance with the above standards could void your authority to ...

Страница 8: ...h a telephone line other than a cordless type during an electrical storm There may be a remote risk of electrical shock from lightning 3 Do not use the telephone to report a gas leak in the vicinity of the leak 4 Use only the power cord and batteries indicated in this manual Do not dispose of batteries in a fire They may explode Check with local codes for possible special disposal instructions 5 T...

Страница 9: ...ind of heating ele ment This is an electrical appliance If water or any other liquid gets into it the computer could be badly dam aged Do not expose the computer to any shock or vibration Do not place it on an unstable surface Do not place anything heavy on the computer Do not expose it to excessive heat or direct sunlight Do not leave it in a place where foreign matter or mois ture may affect the...

Страница 10: ... and don t forget to save your work Remember to periodically save your data as data may be lost if the battery is depleted 5 Take care when using peripheral devices Do not turn off the power until you properly shut down all programs Do not turn off any peripheral devices when the computer is on Do not disassemble the com puter by yourself Perform routine maintenance on your computer Use only appro...

Страница 11: ... the computer has been dropped or damaged do not touch the poisonous liquid if the LCD panel breaks If there is an unusual odor heat or smoke coming from your computer Bottom Cover Removal Warning Do not remove any cover s and or screw s for the purposes of device upgrade as this may violate the terms of your war ranty If you need to replace remove the hard disk RAM optical device etc for any reas...

Страница 12: ...plug the power cord be sure to disconnect it by the plug head not by its wire Make sure the socket and any extension cord s you use can support the total current load of all the connected devices Before cleaning the computer make sure it is disconnected from any external power supplies i e AC DC adapter or car adapter Do not plug in the power cord if you are wet Do not use the power cord if it is ...

Страница 13: ...on or swelling however this is part of the battery s safety mechanism and is not a cause for concern Use proper handling procedures when using Polymer Lithium Ion batteries Do not use Polymer Lithium Ion batteries in high ambient temperature environments and do not store unused batteries for extended periods If you are working in areas of low temperature use the AC DC adapter to power the computer...

Страница 14: ...ntative or qual ified service personnel Keep children away from and promptly dispose of a damaged battery Always dispose of batteries carefully Batteries may explode or leak if exposed to fire or improperly handled or discarded Keep the battery away from metal appliances Affix tape to the battery contacts before disposing of the battery Do not touch the battery contacts with your hands or metal ob...

Страница 15: ...me computer models in this series come supplied with a light blue cleaning cloth To clean the computer case with this cloth follow the instructions below 1 Power off the computer and peripherals 2 Disconnect the AC DC adapter from the computer 3 Use a little water to dampen the cloth slightly 4 Clean the computer case with the cloth 5 Dry the computer with a dry cloth or allow it time to dry befor...

Страница 16: ...r frayed If the computer has been exposed to rain or other liquids If the computer does not work normally when you follow the operating instructions If the computer has been dropped or damaged do not touch the poisonous liquid if the LCD panel breaks If there is an unusual odor heat or smoke coming from your computer Removal Warning When removing any cover s and screw s for the purposes of device ...

Страница 17: ...pters 6 Put the notebook in its carrying bag and secure it with the bag s straps 7 If you re taking any peripherals e g a printer mouse or digital camera pack them and those devices adapters and or cables 8 Anticipate customs Some jurisdictions may have import restrictions or require proof of ownership for both hard ware and software Make sure your papers are handy Power Off Before Traveling Make ...

Страница 18: ...data Pass your computer and disks around the devices Ask security officials to hand inspect them you may be asked to turn it on Note Some airports also scan luggage with these devices Fly safely Most airlines have regulations about the use of computers and other electronic devices in flight These restrictions are for your safety follow them If you stow the notebook in an overhead compartment make ...

Страница 19: ...arms wrists and hands in a relaxed position Your knees should be slightly higher than your hips Place your feet flat on the floor or on a footrest if necessary Use a chair with a back and adjust it to support your lower back comfortably Sit straight so that your knees hips and elbows form approximately 90 degree angles when you are working Take periodic breaks if you are using the computer for lon...

Страница 20: ... take the following precautions Set the Windows Power Plans to turn the screen off after a few minutes of screen idle time Use a rotating moving or blank screen saver this prevents an image from being displayed too long Rotate desktop background images every few days Turn the monitor off when the system is not in use LCD Electro Plated Logos Note that in computers featuring a raised LCD electro pl...

Страница 21: ... Care and Operation VII Servicing IX Power Safety X Polymer Lithium Ion Battery Precautions XI General Battery Precautions XII Cleaning XIII Cleaning Instructions XIII Servicing XIV Travel Considerations XV Quick Start Guide Overview 1 1 Advanced Users 1 2 Beginners and Non Advanced Users 1 2 Warning Boxes 1 2 Not Included 1 3 System Startup 1 4 ...

Страница 22: ...tem Map Front Left Views 1 13 System Map Right Rear Views 1 14 System Map Bottom View 1 15 Removing the Battery Model A 1 16 Inserting the Battery Model A 1 17 Removing the Battery Model B 1 18 Inserting the Battery Model B 1 19 Windows 10 Start Menu 1 20 Right Clicking the Windows Logo In Start Menu 1 21 Start Menu Apps Tiles 1 22 Windows 10 Control Panel 1 24 Settings 1 25 Windows 10 Taskbar 1 2...

Страница 23: ...d and Buttons Mouse 2 4 Touchpad Sensitivity 2 4 Touchpad and Buttons Mouse 2 5 Touchpad Sensitivity 2 5 Mouse Properties Control Panel 2 6 Mouse Touchpad Devices 2 8 Audio Features 2 15 Setup for Audio Recording 2 16 Power Management Overview 3 1 The Power Sources 3 2 AC DC Adapter 3 2 Battery 3 2 Turning On the Computer 3 3 Shutting the Computer Down 3 4 ...

Страница 24: ...16 Battery Power 3 16 Power Slider Settings 3 17 Conserving Battery Power 3 18 Battery Life 3 19 New Battery 3 19 Recharging the Battery with the AC DC Adapter 3 19 Proper handling of the Battery Pack 3 20 Battery FAQ 3 21 Removing the Battery Model A 3 25 Inserting the Battery Model A 3 26 Removing the Battery Model B 3 27 Inserting the Battery Model B 3 28 Intel Dynamic Platform Thermal Framewor...

Страница 25: ... Updating Reinstalling Individual Drivers 4 5 User Account Control 4 6 Windows Security Message 4 6 New Hardware Found 4 6 Driver Installation Procedure 4 7 Chipset 4 7 Video VGA 4 7 Intel TXE 4 7 LAN 4 7 TouchPad 4 8 CardReader 4 8 Control Center 4 8 Intel HID Filter Driver 4 8 Intel Dynamic Platform Driver 4 8 Audio 4 8 Optional Drivers 4 9 ...

Страница 26: ...plorer 5 7 Administer Secure Boot 5 8 Setup Utility Main Menu 5 10 Setup Utility Advanced Menu 5 12 Setup Utility Security Menu 5 16 Setup Utility Boot Menu 5 19 Setup Utility Exit Menu 5 21 Modules Options Overview 6 1 Wireless LAN Module 6 2 Intel WLAN Driver Installation 6 3 WLAN Configuration in Windows 6 4 Bluetooth WLAN Combo Module 6 7 Intel Bluetooth Combo Driver Installation 6 8 ...

Страница 27: ...odule 6 14 Camera App 6 15 Taking Pictures Capturing Video 6 18 4G Module 6 20 4G Configuration in Windows 10 6 22 Trusted Platform Module 6 23 Enabling Activating TPM 6 24 TPM Management in Windows 6 25 TPM Actions 6 27 Troubleshooting Overview 7 1 Basic Hints and Tips 7 2 Backup and General Maintenance 7 3 Viruses 7 4 Upgrading and Adding New Hardware Software 7 5 Problems and Possible Solutions...

Страница 28: ...Video Memory Technology C 1 Intel HD Graphics Control Panel C 2 Display Devices Options C 15 Attaching Other Displays C 16 Configure Other Displays Using Project C 19 You can configure attached displays from Project C 19 Configuring an External Display In Windows C 20 HDMI Audio Configuration C 21 Wireless Display Configuration C 24 Specifications Display D 2 Memory D 2 ...

Страница 29: ...2 Keyboard Pointing Device D 2 Interface D 2 Card Reader D 2 Slots D 2 Communication D 2 Power Management D 3 Power D 3 Indicators D 3 BIOS D 3 Security D 3 Features D 3 Operating System D 3 Environmental Spec D 3 Dimensions Weight D 3 ...

Страница 30: ...XXVIII Preface ...

Страница 31: ...ons Chapter 4 The installation of the drivers and utilities essential to the operation or improvement of some of the computer s subsystems Chapter 5 An outline of the computer s built in software or BIOS Basic Input Output System Chapter 6 A quick guide to the computer s PC Camera Wireless LAN and Combo Bluetooth WLAN modules some of which may be optional depending on your purchase configuration C...

Страница 32: ...cumentation more detailed descriptions of the functions setup and system controls are covered in the remainder of the User s Manual but do not worry if you do not understand every thing the first time Keep this manual nearby and refer to it to learn as you go You may find it useful to refer to the notes marked with a as indicated in the margin For a more detailed description of any of the interfac...

Страница 33: ...hat you install the drivers in the order listed You will be unable to use most advanced controls until the necessary drivers and utilities are properly installed If your system hasn t been properly configured your service representative may have already done that for you refer to Chapter 4 for installation instructions You will need to attach an optical device drive to the computer in order to acc...

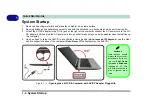
Страница 34: ...r and then plug the AC power cord into an outlet make sure you use the adapter when first setting up the computer 4 Use one hand to raise the lid LCD to a comfortable viewing angle do not exceed 130 degrees use the other hand to support the base of the computer Note Never lift the computer by the lid LCD Figure 1 1 Opening the Lid LCD Computer with AC DC Adapter Plugged In 130 Shutdown Note that y...

Страница 35: ...ed on the following pages is for Windows 10 64 bit only Windows OS In order to run Windows 10 64 bit without limitations or decreased performance your computer requires a minimum 4GB of system memory RAM Note that all Windows screens and control panels pictured throughout this manual and the instructions for use are correct at the time of going to press However the Windows OS is subject to constan...

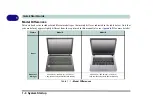
Страница 36: ...he table below Note that your model may appear slightly different from those pictured in this manual also see Appendix D for more details Table 1 1 Model Differences Feature Model A Model B Model Dimensions Weight 292 4mm w 210 5mm d 22 7mm h 1 2kg Barebone System with 31WH Battery 292 4mm w 206 5mm d 23 9mm h 1 2kg Barebone System with 31WH Battery ...

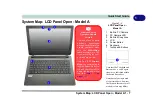
Страница 37: ... dotted lines above Note that only a single mod el is pictured here however the layout is the same for all models colors may differ 3 5 1 7 4 6 2 Wireless Device Operation Aboard Aircraft The use of any portable electronic transmission devices aboard aircraft is usually prohibited Make sure the WLAN Blue tooth module s are OFF if you are using the com puter aboard aircraft Use Fn F11 Airplane Mode...

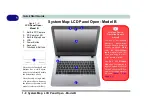
Страница 38: ... dotted lines above Note that only a single mod el is pictured here however the layout is the same for all models colors may differ 3 5 1 7 4 6 2 Wireless Device Operation Aboard Aircraft The use of any portable electronic transmission devices aboard aircraft is usually prohibited Make sure the WLAN Blue tooth module s are OFF if you are using the com puter aboard aircraft Use Fn F11 Airplane Mode...

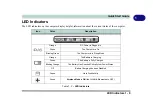
Страница 39: ...ators Icon Color Description Orange DC Power is Plugged In Green The Computer is On Blinking Green The Computer is in Sleep Mode Orange The Battery is Charging Green The Battery is Fully Charged Blinking Orange The Battery Has Reached Critically Low Power Status Off Battery Charging has been Disabled Green Hard Disk Activity Green Airplane Mode is ON the WLAN Bluetooth are OFF ...

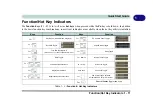
Страница 40: ...e to the system s regular keyboard may not work NumLk Scr Lk Hold down the Fn Key and either Num Lk or Scr Lk to enable number or scroll lock and check the LED indicator for status Play Pause Fn Key Windows Logo Key Menu Application Key Numerical Keypad Function Keys Scr Lk NumLk Special Characters Some software applications allow the number keys to be used with Alt to produce special characters T...

Страница 41: ...on Hot Key Indicators Keys Function Keys Function Fn Play Pause in Audio Video Programs Fn PC Camera Power Toggle Fn TouchPad Toggle Fn Airplane Mode Toggle Fn Turn LCD Backlight Off Press a key to or use TouchPad to turn on Fn Sleep Toggle Fn Mute Toggle Fn NumLk Number Lock Toggle Fn Volume Decrease Increase Fn ScrLk Scroll Lock Toggle Fn Display Switch Menu Caps Lock Caps Lock Toggle Fn Brightn...

Страница 42: ...ontrol Center on off The Con trol Center gives quick access to frequently used controls and enables you to quickly turn the camera touch pad on off see Appendix B for full details Figure 1 5 Control Center Control Center Access To run the Control Center press the Fn Esc key combination or double click the icon in the notification area of the task bar Close the Control Center by clicking the close ...

Страница 43: ...ck 1 USB 3 0 USB 3 1 Gen 1 Port OR USB 2 0 Port This model includes 1 USB 3 0 USB 3 1 Gen 1 port and 2 USB 2 0 ports The USB 3 0 port is denoted by its blue color the USB 2 0 ports are colored black Optical Device Drives To install applications and drivers etc you will need to attach an external optical CD DVD device to the USB ports HDMI Port Note that the HDMI Port supports video and audio signa...

Страница 44: ... denoted by its blue color the USB 2 0 ports are colored black 5 3 2 W255EU 4 Battery Information Always completely discharge then fully charge a new battery before using it Completely discharge and charge the battery at least once every 30 days or after about 20 partial discharges See Battery Information on page 3 16 for full instructions Multi In 1 Card Reader The card reader allows you to use t...

Страница 45: ...e while the computer is in use Note that only a single model is pictured here however the layout is the same for all models col ors may differ 1 3 Bottom Cover Removal Warning Do not remove any cover s and or screw s for the purposes of device upgrade as this may violate the terms of your warranty If you need to replace remove the hard disk RAM optical device etc for any reason please contact your...

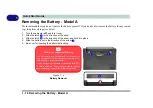
Страница 46: ...w 3 Slide the latch in the direction of the arrow and hold it in place 4 Slide the battery out in the direction of the arrow 5 See over for inserting the battery instructions 1 2 3 2 1 3 Bottom Cover Removal Warning Do not remove any cover s and or screw s for the purposes of device upgrade as this may vio late the terms of your warranty If you need to replace remove the hard disk RAM optical devi...

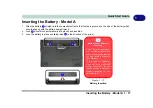
Страница 47: ...k automatically into place upon insertion 3 Lock the battery in place by sliding latch in the direction of the arrow 1 2 3 1 2 3 Bottom Cover Removal Warning Do not remove any cover s and or screw s for the pur poses of device upgrade as this may violate the terms of your warranty If you need to replace re move the hard disk RAM optical device etc for any reason please contact your distributor sup...

Страница 48: ...the latch in the direction of the arrow and hold it in place 4 Turn the battery in the direction of the arrow and lift it out 5 See over for inserting the battery instructions 1 2 3 4 2 1 3 Bottom Cover Removal Warning Do not remove any cover s and or screw s for the purposes of device upgrade as this may vio late the terms of your warranty If you need to replace remove the hard disk RAM optical d...

Страница 49: ...in place by sliding latch in the direction of the arrow 1 2 3 1 4 5 1 2 3 Bottom Cover Removal Warning Do not remove any cover s and or screw s for the pur poses of device upgrade as this may violate the terms of your warranty If you need to replace re move the hard disk RAM optical device etc for any reason please contact your distributor supplier for fur ther information Figure 1 12 Battery Inse...

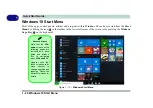
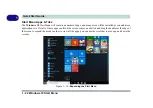
Страница 50: ...askbar in the lower left corner of the screen or by pressing the Windows Logo Key on the keyboard Figure 1 13 Windows Start Menu Desktop Windows Screens Note that the Win dows screens on the following pages are included as a basic guide and introduc tion to navigating around Windows 10 However note that these screens are al ways subject to change upgrade and redesign Check the Microsoft website fo...

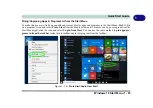
Страница 51: ...Menu icon or use the Windows Logo Key X key combination to bring up an advanced Context Menu of useful features such as Apps and Features Power Options Task Manager Search File Explorer Device Manager Computer Management and Network Connections etc Figure 1 14 Right Click Windows Logo in Start Menu Right Click Icon ...

Страница 52: ...apps and many more will be installed as you add more applications etc Not all of these apps can fit on the screen so may need click and drag the handles at the edge of the screen to expand the menu in order to view all the apps you can use the scroll bar to move up and down the screen Figure 1 15 Expanding the Start Menu ...

Страница 53: ...programs to the Start Menu Right Click on a program s icon and select Pin to Start from the drop down menu To remove an app or program from the Start Menu right click the icon and select Unpin from Start You can use the same method to pin apps pro grams to from the taskbar select pin to taskbar unpin this program from the taskbar Figure 1 16 Pin to Start Unpin from Start ...

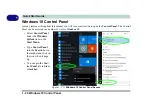
Страница 54: ...pen the Control Panel The Control Panel can be accessed in a number of ways in Windows 10 Figure 1 17 Windows 10 Control Panel Access Select Control Panel under the Windows System item in the Start Menu Type Control Panel into the Search box in the taskbar and click on the icon when it pops up You can pin the Con trol Panel tile to Start or taskbar ...

Страница 55: ...e Start Menu and also as an App gives you quick access to a number of system settings control panels allowing you to adjust settings for System Devices Network internet Personalization Apps Accounts Time language Gaming Ease of Access Privacy and Update security Figure 1 18 Settings ...

Страница 56: ... the taskbar in the bottom right of the screen Some of the Control Panels and appli cations referred to throughout the course of this manual can be accessed from here Figure 1 19 Taskbar You can pin unpin apps to from the taskbar in much the same way as you can to the Start screen see Pining Unpinning Apps Programs to from the Start Menu on page 1 23 Taskbar Taskbar Pinned Programs and Apps Notifi...

Страница 57: ...Center appears as a vertical panel on the right side of the screen when you swipe in from the right or click the button in the notification tray This gives you access to commonly needed functions like Network All Settings Airplane Mode and Project etc Figure 1 20 Action Center ...

Страница 58: ...dows logo key on your keyboard and the P key To Configure Displays using Project Figure 1 21 Project Devices 1 Attach your display to the appropriate port and turn it on 2 Press the P key combination 3 Click on any one of the options from the menu to select PC screen only Duplicate Extend or Second screen only 4 You can also click Connect to a wireless display at the bottom of the Project screen a...

Страница 59: ...Settings 2 Adjust the settings for Brightness and color Scale and layout Resolution and Orientation from the menus 3 When and external display is attached you can arrange the display configuration from the Multiple Displays menu and arrange the configuration from Select and rearrange displays 4 Click Apply to save any changes made Figure 1 22 Display Settings ...

Страница 60: ...D Graphics Control Panel 1 Right click the desktop and select Intel R Graphics Settings from the menu OR 2 Click the icon in the notification area of the Desktop taskbar and select Intel R Graphics Settings from the menu Figure 1 23 Intel UHD Graphics Control Panel ...

Страница 61: ... or Restart you can also add Hibernate Sleep to the menu see page 1 32 To fully control all the power options including Hibernate mode go to the Power Options control panel and configure the power button sleep button and lid to perform the function selected Figure 1 24 Shut Down Restart Using the Power Button 1 Go to the Start Menu 2 Click the Power button 3 Select the power state required from th...

Страница 62: ...ge a password Task Manager and Switch User If you click the Power icon in the lower right corner of the screen a power management option menu appears to display Sleep Hibernate Shut down and Restart Adding Hibernate Sleep to the Power Men 1 Go to the Power Options Hardware and Sound control panel or go to Windows Settings Power sleep Additional power settings 2 Click Choose what the power buttons ...

Страница 63: ...ettings 1 Windows 10 has minimum screen resolution requirements 2 Right click a blank area of the Desktop and select Display Settings 3 Adjust the Resolution to make sure that it is at least 1024 768 although preferably 1366 768 or above Figure 1 26 Display Resolution ...

Страница 64: ...Quick Start Guide 1 34 1 ...

Страница 65: ... Chapter 2 Features Components Overview Read this chapter to learn more about the following main features and components of the computer Hard Disk Drive Solid State Drive Multi In 1 Card Reader Touchpad and Buttons Mouse Audio Features ...

Страница 66: ...drives see Storage on page D 2 for specification information how ever you will need to contact your distributor supplier to do this in order to avoid violating the terms of your warranty Bottom Cover Removal Warning Do not remove any cov er s and or screw s for the purposes of device upgrade as this may vio late the terms of your warranty If you need to replace remove the hard disk for any reason ...

Страница 67: ...ay as your hard disk s Make sure you install the card reader driver see CardReader on page 4 8 Note The PC adapters are usually supplied with these cards Card Reader Cover Make sure you keep the rubber cover provided in the card reader when not in use This will help prevent foreign objects and or dust getting in to the card reader Figure 2 1 Right View 1 Card Reader MMC MultiMedia Card RSMMC SD Se...

Страница 68: ...ress the left button zone for a left click and right button zone for a right click action Touchpad Active Areas Note that the pointing active area is clearly defined from the but ton active area as il lustrated Mouse Driver If you are using an ex ternal mouse your op erating system may be able to auto configure your mouse during its installation or only en able its basic func tions Be sure to chec...

Страница 69: ...and the left and right buttons are divided roughly down the middle Press the left button zone for a left click and right button zone for a right click ac tion Touchpad Cleaning In order to improve pad performance it is neces sary to keep the surface clean and free of finger prints and marks etc Use a soft dry cleaning cloth to keep the pad surface clean Disabling the Pad Use the Fn F1 or Con trol ...

Страница 70: ...options from Mouse in Windows Settings see page 2 9 2 Click Mouse Hardware and Sound Devices and Printers 3 Click the menu headings tabs to adjust your mouse preferences Disabling the Touchpad If you need to disable the Touchpad for any reason e g you may find that when using the computer s internal keyboard you acciden tally trigger the Touch pad when resting your wrists or palms on it you can do...

Страница 71: ...Features Components Mouse Properties Control Panel 2 7 2 Figure 2 4 Mouse Properties Control Panels ...

Страница 72: ...o configure the functions from the Mouse or Touchpad control panels in Devices in the Settings control panel as follows 1 Click the Settings item in the Start Menu or All Settings in the Action Center 2 Click Devices 3 Click Mouse or Touchpad Figure 2 5 Windows Settings Mouse Touchpad ...

Страница 73: ... Components Mouse Touchpad Devices 2 9 2 Mouse Settings You can select the primary mouse button and scrolling options and access Mouse Properties from Additional mouse options Figure 2 6 Windows Settings Mouse ...

Страница 74: ...ing the Touchpad button to turn it off You can set the system to automatically disable the internal Touchpad when an ex ternal USB point device e g a USB mouse is attached Click Leave touchpad on when a mouse is connected to off Figure 2 7 Windows Settings Touchpad Touchpad turned off when mouse connected ...

Страница 75: ...ad by ac cident by recognizing when your palm is resting on it or brushing its surface while you are typing Click in the check box to enable disable the different gestures or taps on the surface of the pad to perform specific actions to manipulate documents objects and applica tions Figure 2 8 Windows Settings Touchpad Sensitivity Taps ...

Страница 76: ... separated on the Touchpad surface and slide both fingers in the direction required in a straight con tinuous motion The two finger pinch to zoom gesture can be used to perform the same function as a scroll wheel in Windows applications that support CTRL scroll wheel zoom functionality Place two fingers on the pad for best results use the tips of the fingers and slide them apart to zoom in or clos...

Страница 77: ... The three finger and four finger swipes and taps can be configured for a number of different functions Select the appropriate function from the drop down menu Figure 2 11 Three Finger Gestures Swipes Taps Figure 2 12 Four Finger Gestures Swipes Taps ...

Страница 78: ...ents 2 14 Mouse Touchpad Devices 2 The following is an overview of some of the main gestures you can use with your Touchpad however these can be configured from the Touchpad menus Figure 2 13 Touchpad Gesture Examples ...

Страница 79: ...ea control panel right click the taskbar notification area icon to bring up an audio menu The volume may also be adjusted by means of the volume icon in the taskbar or the audio slider in the Settings menu see sidebar Volume Adjustment The sound volume level can be clicking using the volume control icon in the notification area of the taskbar Figure 2 14 Realtek Audio Manager Right click the icon ...

Страница 80: ...altek HD Audio Manager Hardware and Sound or right click the taskbar icon and select Sound Manager 3 Click Microphone Effects tab in Microphone tab and then click to select Noise Suppression button or adjust the Recording Volume level to around 60 to obtain the optimum recording quality 4 Click OK to close the control panel and save the settings Figure 2 15 Realtek Audio Manager Recording Setup ...

Страница 81: ...g the Battery Model A Removing the Battery Model B Intel Dynamic Platform Thermal Framework The computer uses enhanced power saving techniques to give the operating system OS direct control over the power and thermal states of devices and processors For example this enables the OS to set devices into low power states based on user set tings and information from applications Note Systems with 32GB ...

Страница 82: ...locked to not power the system until first connected to the AC DC adapter 2 Raise the lid LCD to a comfortable viewing angle 3 Press the power button to turn On Battery The battery allows you to use your computer while you are on the road or when an electrical outlet is unavailable Battery life varies depending on the applications and the configuration you re using To increase battery life let the...

Страница 83: ...tton when it is pressed for less than 4 seconds pressing and holding the power button for longer than this will shut the computer down Use Power Options Hardware and Sound in the Windows control panel to configure this feature Power Button as Stand by or Hibernate Button You can use the OS s Power Options control panel to set the power button to send the system into Stand by or Hibernate mode see ...

Страница 84: ...rd disk or system problems Right click the Power item in the Start Menu and select Shut down If you want to add Hiber nate Sleep to the Power Menu see Adding Hibernate Sleep to the Power Menu on page 3 10 You can also use the context menu right click the Start Menu icon or press the Windows logo X key combination to Sign out Sleep Hibernate Shut down and Restart Figure 3 1 Shut Down Restart ...

Страница 85: ...ff after a specified time and to send the computer into Sleep after a period of inactivity Click Change plan settings and then click Change advanced power settings to ac cess further configuration options in Advanced Settings Resuming Operation See Table 3 1 on page 3 11 for informa tion on how to resume from a power saving state Password It is recommended that you enable a password on system resu...

Страница 86: ...cially under DC battery power Click Create a power plan to create a custom plan which you can base around Pow er saver bear in mind that this scheme may slow down the overall performance of the computer in order to save power for maximum power saving when the computer is battery DC power powered High performance for maximum performance when the computer is powered from an AC power source or Balanc...

Страница 87: ... the application s and file s you last used If your mobile PC in Sleep is running on battery power the system will use only a minimum amount of power After an extended period the system will save all the information to the hard disk and shut the computer down before the battery becomes depleted To add Sleep to the Power Menu see Adding Hibernate Sleep to the Power Menu on page 3 10 Note that syste...

Страница 88: ...urn you to where you last left off within seconds You should put your mobile PC into Hibernate if you will not use the computer for a period of time and will not have the chance to charge the battery To add Hibernate to the Power Menu see Adding Hibernate Sleep to the Power Menu on page 3 10 Shut down You should Shut down the computer if you plan to install new hardware plan to be away from the co...

Страница 89: ...r buttons do on the left menu in Power Options to bring up the menu Password Protection It is recommended that you enable a password on wake up in order to protect your data However you can dis able this setting from the Power Options menu by clicking Require a password on wakeup in the left menu and se lecting the options click Change settings that are currently unavail able Figure 3 5 Power Opti...

Страница 90: ...s 1 Go to the Power Options Hardware and Sound control panel 2 Click Change settings that are currently unavailable 3 Click Choose what the power buttons do 4 Click to put a check in the Hibernate Sleep box under Shutdown settings 5 Click Save Changes and close the control panel Figure 3 6 Power Options Define Power Buttons Shutdown Settings ...

Страница 91: ...n F12 Key Combo Hibernate Off battery Press the Power Button Orange AC DC adapter Display Turned Off Green Press a Key or Move the Mouse Touchpad Table 3 1 Resuming Operation Closing the Lid If you have chosen to send the computer to Sleep when the lid is closed raising the lid will wake the system up Power Button When the computer is on you can use the power button as a Sleep Hibernate Shut Down ...

Страница 92: ...itch User Sign out Change a password and Task Manager options If you click the Power icon in the lower right corner of the screen a power management option menu ap pears to display Sleep Shut down and Restart To fully control all the power options including Hibernate mode go to the Power Options control panel and configure the power button sleep button and lid to per form the function selected Fig...

Страница 93: ...er Controls The Settings item in the Start Menu or via the Action Center gives you access to a number of power settings control panels which enable you to quickly adjust power options Click System to access the menu including the power option settings Figure 3 8 Settings ...

Страница 94: ...level and by clicking Battery usage by app you can see the current state of battery usage by application etc The Battery saver can be level can be adjusted to be turned on if the battery level falls below a certain level to limit background activity and push notifications Figure 3 9 Settings Battery Battery Saver ...

Страница 95: ...ttings Menu Power Controls 3 15 3 Power Sleep Power sleep gives you quick access to Screen and Sleep settings Click Addi tional power settings to go to the main power options control panel Figure 3 10 Settings Power Sleep ...

Страница 96: ...levels from power plan Change plan settings Change advanced power settings see Figure 3 3 on page 3 6 Click the battery icon in the notification area to see the current battery level and charge status You can also adjust the Power Slider towards Best battery life or Best performance or click Battery Settings to quickly adjust battery settings Power Slider The Power Slider click the battery icon in...

Страница 97: ...s Slightly Favors Performance Over Power Favors Performance Over Power Windows Features Throttled Screen Brightness Reduced Default Position Auto Enabled at 20 of Battery Capacity Battery Saver Note that some Win dows features and back ground applications may behave differently or may be blocked when the system is in Battery Saver mode check with Microsoft for details Table 3 2 Power Slider Settin...

Страница 98: ... it is not powered by the AC DC adapter Reduce the amount of time before the display is turned off Close wireless Bluetooth modem or communication applications when they are not being used Disconnect remove any unnecessary external devices e g USB devices ExpressCards etc Windows Mobility Center The Windows Mobility Center control panel provides an easy point of access for information on battery s...

Страница 99: ...ays completely discharge then fully charge a new battery see Battery FAQ on page 3 21 for instructions on how to do this Recharging the Battery with the AC DC Adapter The battery pack automatically recharges when the AC DC adapter is attached and plugged into an electrical outlet If the computer is powered on and in use it will take several hours to fully recharge the battery When the computer is ...

Страница 100: ... Discard used battery according to the manufacturer s in structions Damaged Battery Warning Should you notice any physical defects e g the battery is bent out of shape after being dropped or any unusual smells emanating from the notebook battery shut your computer down immediately and contact your distributor supplier If the battery has been dropped we do not recommend using it any further as even...

Страница 101: ...s down due to a low battery Don t turn off the computer even if a message indicates the battery is critically low just let the computer use up all of the battery power and shut down on its own 1 Save and close all files and applications 2 Create a power plan for discharging the battery and set all the options to Never Figure 3 13 Power Plan Create ...

Страница 102: ...anagement 3 22 Battery Information 3 3 Click Change plan settings after creating it and click Change plan settings Change advanced power settings Figure 3 14 Change Plan Settings Change Advanced Power Settings ...

Страница 103: ... battery options 5 Choose the options below click Yes if a warning appears Low battery levels 0 Critical battery Levels 1 Low battery action Do Nothing Critical battery action On battery Shut Down Critical battery action Plugged in Do Nothing Figure 3 15 Power Options Advanced Settings Battery ...

Страница 104: ...harge the battery When charging the battery don t stop until the LED charging indicator light changes from orange to green How do I maintain the battery Completely discharge and charge the battery at least once every 30 days or after about 20 partial discharges ...

Страница 105: ...ide the latch in the direction of the arrow and hold it in place 4 Slide the battery out in the direction of the arrow 5 See over for inserting the battery instructions Bottom Cover Removal Warning Do not remove any cov er s and or screw s for the purposes of device upgrade as this may vio late the terms of your warranty If you need to replace remove the hard disk RAM optical device etc for any re...

Страница 106: ...t into the compartment note that there are grooves on the side of the battery which should align up with the battery compartment 2 Lock should lock automatically into place upon insertion 3 Lock the battery in place by sliding latch in the direction of the arrow Figure 3 17 Battery Insertion Model A 1 2 3 1 2 3 ...

Страница 107: ...latch in the direction of the arrow and hold it in place 4 Turn the battery in the direction of the arrow and lift it out 5 See over for inserting the battery instructions Bottom Cover Removal Warning Do not remove any cov er s and or screw s for the purposes of device upgrade as this may vio late the terms of your warranty If you need to replace remove the hard disk RAM optical device etc for any...

Страница 108: ...he Battery Model B 1 Insert the battery by aligning the battery with the pins 2 Turn the battery in the direction of the arrow 3 Lock the battery in place by sliding latch in the direction of the arrow Figure 3 19 Battery Insertion Model B 1 2 3 1 4 5 1 2 3 4 4 1 5 ...

Страница 109: ...mal technologies Simply install the driver as instruct ed below and the technology will provide a set of policies to effect the power man agement of the CPU versus the system temperature Intel DPTF Driver Installation 1 Make sure the system is not in Airplane Mode and then insert the Device Drivers Utilities User s Manual disc into the DVD drive 2 Click Install Drivers button 1 Click 10 Install Dy...

Страница 110: ...Power Management 3 30 3 ...

Страница 111: ...ser s Manual disc contains the drivers and utilities neces sary for the proper operation of the computer Table 4 1 on page 4 4 lists what you need to install and it is very important that the drivers are installed by the method outlined in this chapter and in the order indicated Note that the infor mation included on the following pages is for Windows 10 only Module Driver Installation The procedu...

Страница 112: ...e Drivers Utilities User s Manual disc into an attached USB DVD drive 2 Click the message Tap to choose what happens with this disc 3 Click Run autorun exe 4 Click Install Drivers button or Option Drivers button to access the Optional driver menu Figure 4 1 Drivers Installer Screen 1 ...

Страница 113: ...installed in this order which is the same as that listed in the Drivers Installer menu below 6 Click to select the driver you wish to install you should note down the drivers as you install them 7 Follow the instructions for each individual driver installation procedure as listed on the following pages Figure 4 2 Install Drivers ...

Страница 114: ...ions Driver Page 6 13 LAN Page 4 7 PC Camera Module No driver required Page 6 14 TouchPad Page 4 8 4G Module No driver required Page 6 20 CardReader Page 4 8 Trusted Platform Module No driver required Page 6 23 Control Center Page 4 8 All drivers provided are for the Windows 10 64 bit op erating system Note that you need to install both the WLAN Blue tooth drivers for the WLAN Bluetooth Combo mod ...

Страница 115: ...o uninstall the original driver To do this go to the Control Panel in the Windows OS and double click the Programs and Features icon Pro grams Uninstall a program Click to select the driver if it is not listed see below and click Uninstall and then follow the on screen prompts it may be nec essary to restart the computer Reinstall the driver as outlined in this chapter If the driver is not listed ...

Страница 116: ...ification for Windows New Hardware Found If you see the message New Hardware Found dur ing the installation procedure other than when out lined in the driver install procedure click Cancel to close the window and follow the installation proce dure Driver Installation General Guidelines The driver installation procedure outlined in this Chapter and in Chapter 6 Options Modules are accurate at the t...

Страница 117: ... restart the computer Note After installing the video driver go to the Dis play Display Settings control panel to adjust the vid eo settings to the highest resolution Intel TXE 1 Click 3 Install TXE Driver Yes 2 Click Next 3 Click the check box to accept the license agree ment and click Next 4 Click Next Finish LAN Note If the computer enters a deep sleep mode during installation you will be promp...

Страница 118: ...Click Next 3 Click Yes to accept the license 4 Click Next 5 Click Finish to restart the computer Intel Dynamic Platform Driver 1 Click 9 Install Dynamic Driver Yes 2 Click Next 3 Click Yes to accept the license 4 Click Next Finish Audio 1 Click 10 Install Audio Driver Yes 2 Click Next 3 Click Finish to restart the computer Note that after installing the audio driver the system will not return to t...

Страница 119: ...ll the latest security up dates etc all updates will include the latest hotfixes from Microsoft To enable Windows Update make sure you are con nected to the internet 1 Go to the Control Panel 2 Click Windows Update System and Security Security 3 Click Check for updates button 4 The computer will now check for updates you need to be connected to the internet 5 Click Install now button to begin chec...

Страница 120: ...Drivers Utilities 4 10 Driver Installation 4 tion Figure 4 3 Drivers Installer Options Note that you need to install both the WLAN Bluetooth drivers for the WLAN Bluetooth Combo modules ...

Страница 121: ...on could be useful if your system ever needs servicing There is one general rule Don t make any changes unless you are sure of what you are doing Many of the settings are required by the system and changing them could cause it to become unstable or worse If you have any doubts consult your service representative To enter BIOS turn on the computer and press F2 as the system Boots up BIOS Screens No...

Страница 122: ...rating system Once that starts you can t get into BIOS without rebooting The Setup BIOS Utility tells the system how to configure itself by translating in structions from the operating system and other software into instructions that the computer hardware understands manage basic features identify installed devices and subsystems e g port configuration BIOS Settings Warning Incorrect settings can ...

Страница 123: ...s will not appear However you can still press F2 to enter the setup or F7 to choose the preferred boot device if you press the key immediately the system boots up To enter BIOS turn on the computer and press F2 as the system Boots up If the computer is already on reboot using the Ctrl Alt Delete combination and then hold down F2 when prompted The BIOS main menu will appear To see the boot options ...

Страница 124: ... with the Start Screen with 5 menu icons date and time information CPU temperature information and navigation and Help icons at the bottom of the screen You can use the Touchpad an attached mouse or the cursor arrow keys to navigate the menus and press Enter to access the submenu Figure 5 1 Insyde BIOS Start Screen ...

Страница 125: ...ot From File Press Enter here or click Boot From File to select a file or device to Boot from Administer Secure Boot Press Enter here or click Administer Secure Boot to proceed with a Secure Boot process This will take you to the Secure Boot screen which allows you to manage secure boot settings Setup Utility Press Enter here or click Setup Utility to access the BIOS settings in the Setup Utility ...

Страница 126: ...e in the order specified in the Boot Option Menu Press Enter to access the menu use the arrow keys to move up and down the menu and press Enter to select a device Figure 5 2 Boot Manager BIOS Screens Note that the BIOS screens pictured on these pages are intend ed for guidance in set ting up your system s BIOS BIOS versions are sub ject to constant change and revision therefore your computer s act...

Страница 127: ...rom File File Explorer If you need to boot from a file e g on a USB flash drive then access this menu and use the cursor keys to select the device or file you can press Enter to explore for a file on an attached device Figure 5 3 Boot From File File Explorer ...

Страница 128: ...revents unauthorized operating systems and software from loading during the startup process You can select a trusted UEFI file to execute the BIOS make sure that you Enforce Secure Boot Erase all Secure Boot Settings or Restore the Factory Settings Figure 5 4 Administer Secure Boot ...

Страница 129: ...ey Management database if required by accessing the advanced secure boot options for Platform Key PK Options Key Ex change Key KEK Options Allowed Signatures Database DB Options and For bidden Signatures Database DBX Options Figure 5 5 Administer Secure Boot Advanced Secure Boot Options ...

Страница 130: ...ies 5 10 Setup Utility Main Menu 5 Setup Utility Main Menu SATA Port Main Menu Pressing Enter opens the sub menu to show the configuration of a optical Device HDD on the computer s SATA Ports Figure 5 6 Main Upper ...

Страница 131: ... settings Some applications may also alter data files to reflect these changes System Extended Memory Main Menu This item contains information on the system memory and is not user configurable The system will auto detect the amount of memory installed MB Series BIOS Revision KBC EC firmware Revision MAC Address This item contains information on the BIOS version network adapter address etc and is n...

Страница 132: ...Advanced Menu 5 Setup Utility Advanced Menu SATA Mode Advanced Menu The SATA Serial ATA control for this system is configured to operate in AHCI Advanced Host Controller Interface mode and this is not changeable Figure 5 8 Advanced Menu ...

Страница 133: ...nable disable the beep as the computer starts up Battery Low Alarm Beep Advanced Menu Use this menu item to enable disable the battery low alarm beep Advanced Chipset Control Advanced Menu The sub menu here allows you to enable disable FlexiCharger VT d and Fast Boot Figure 5 9 Advanced Chipset Control Menu ...

Страница 134: ...e g 100 and of course this stop charge level must be higher then the start charge level See the sidebar warning for information on running the FlexiCharger for an ex tended period as this is not recommended FlexiCharger Warning If you leave the FlexiCh arger continuously En abled for a period of three months or more the battery meter s read ing accuracy will deteri orate To reset this set the Flex...

Страница 135: ...chnology for Directed I O VT d from this menu This extends Intel s Virtualization Technology VT by providing hard ware assists for a virtualization solution Fast Boot Advanced Menu Advanced Chipset Control Use this menu item to enable disable the Fast Boot option which when enabled helps reduce the time it takes to boot the computer ...

Страница 136: ...access to the computer OS only the BIOS An on screen keyboard is available to assist with keyboard input Security Menu The changes you make here affect the access to the BIOS utility itself and also access to your machine as it boots up after you turn it on These settings do not affect your machine or network passwords which will be set in your software OS Figure 5 11 Security Menu ...

Страница 137: ...e menu items in the BIOS cannot be modified in user mode Note You can only set the user password after you have set the supervisor pass word Power on Password Security Menu Specify whether or not a password should be entered to boot the computer you may only set a Power on Password if a supervisor password is enabled If Enabled is selected only users who enter a correct password can boot the syste...

Страница 138: ...rusted Platform Module TPM support and to configure the TPM State Select TPM Configuration and press En ter to access the sub menu Press Enter to access the Security Device Support menu and select Enable to support TPM To reset the TPM select Clear TPM to clear ex isting TPM information Figure 5 12 Security Menu TPM Configuration ...

Страница 139: ... which to boot under EFI Figure 5 13 Boot Menu EFI BIOS Screens Note that the BIOS screens pictured on these pages are intend ed for guidance in set ting up your system s BIOS BIOS versions are sub ject to constant change and revision therefore your computer s actual screens may appear slightly different from those pictured on these pages ...

Страница 140: ...vides a clean in terface between operating systems and platform firmware at boot time In contrast to BIOS UEFI defines a set of standard boot and runtime services The Network Stack item can be enabled disabled as an option under UEFI Setting and PXE Boot capability can be enabled disabled and configured here Figure 5 14 UEFI Setting ...

Страница 141: ...sing Exit Discarding Changes will wipe out any changes you have made to the Setup and exit the BIOS You can also choose to Load Optimal Defaults or press F9 to return the BIOS to its original state and erase any previous changes you have made in a previous session Select Discard Changes to cancel any changes made in the current session Figure 5 15 Exit Menu ...

Страница 142: ...BIOS Utilities 5 22 5 ...

Страница 143: ...upplier Wireless Device Operation Aboard Aircraft The use of any portable electronic transmission devices aboard aircraft is usually prohibited Make sure the WLAN Bluetooth and 3G 4G modules are OFF if you are using the com puter aboard aircraft by putting the system in to Airplane Mode see Table 1 3 on page 1 11 Wireless LAN Module Bluetooth WLAN Combo Module Intel Software Guard Extensions Drive...

Страница 144: ...4 1 on page 4 4 Note that you need to install both the WLAN Bluetooth drivers for the WLAN Bluetooth Combo modules See overleaf for the appropriate driver installation instructions Wireless Device Operation Aboard Aircraft The use of any portable electronic transmission devices aboard aircraft is usually prohibited Make sure the WLAN Bluetooth modules are OFF if you are using the computer aboard a...

Страница 145: ...t the Device Drivers Utilities User s Manual disc into an attached DVD drive 2 Click Option Drivers button 3 Click 1 Install WLAN Driver Yes 4 Click in the check box to agree to the End User License Agreement and click Install 5 Click Finish 6 The operating system is the default setting for Wireless LAN control in Windows see page 6 4 ...

Страница 146: ...LAN module is turned on and not in Airplane Mode before configuration begins 1 Click the Wireless icon in the notification area of the taskbar 2 Make sure that Airplane mode is off the Airplane mode icon should be gray 3 A list of available access points will appear 4 Double click an access point to connect to it or click it and click Connect Figure 6 1 WiFi Network Connections ...

Страница 147: ...int it will display Connected status 8 Select any connected network and click Disconnect to disconnect from a connected access point Figure 6 2 Network Connected Click Disconnect Wireless Device Operation Aboard Aircraft The use of any portable electronic transmission devices aboard aircraft is usually prohibited Make sure the module is either OFF or in Airplane mode if you are using the computer ...

Страница 148: ...lane Mode or turn the WLAN module off aboard aircraft 11 Network Internet in Windows Settings will bring up a more comprehensive list of network and internet settings including Wi Fi can be turned on off Airplane mode Airplane mode and Wireless devices can be turned on off VPN Dial up Ethernet and Proxy Figure 6 3 Network Internet Settings ...

Страница 149: ...aboard aircraft is usually prohibited Make sure the WLAN Bluetooth modules are OFF if you are using the computer aboard aircraft by putting the system in to Airplane Mode see Table 1 3 on page 1 11 Bluetooth Data Transfer Note that the transfer of data between the computer and a Bluetooth enabled device is supported in one direction only simultaneous data transfer is not supported Therefore if you...

Страница 150: ...ers Utilities User s Manual disc into an attached DVD drive 2 Click Option Drivers button 3 Click 2 Install Combo BT Driver Yes 4 Click Next Next 5 Click in the check box to accept the license and click Next 6 Select the setup type Typical is recommended and click Install 7 Click Finish 8 See Bluetooth Configuration in Windows on page 6 9 for configura tion instructions ...

Страница 151: ...es or click the Bluetooth icon in the taskbar and click Add a Bluetooth Device 2 Click Bluetooth other devices and make sure Bluetooth is On 3 Click Add Bluetooth or other device Bluetooth Add a device and a list of discovered devices will appear Figure 6 4 Settings Bluetooth Other Devices Add a Bluetooth Device Figure 6 5 Add a Device ...

Страница 152: ...LAN Combo Module 6 4 Double click the device you want to pair with the computer and click Connect if the PIN matches that on the device to which you wish to connect you may need to click paid on the device Figure 6 6 Bluetooth Connect ...

Страница 153: ...Modules Options Bluetooth WLAN Combo Module 6 11 6 5 Select a device and click Remove Device to disconnect from any device click Yes to confirm Figure 6 7 Bluetooth Remove Device ...

Страница 154: ...en Settings 2 Click Bluetooth other devices and click More Bluetooth options 3 In Bluetooth Settings make sure that Allow Bluetooth devices to find this PC check box Discovery has a check inside it 4 Make sure that the Alert me when a new Bluetooth device wants to connect check box Notifications has a check inside it if you want to be notified when a Bluetooth device wants to connect Figure 6 8 Bl...

Страница 155: ...ing user level code a degree of security and privacy from the oper ating system Intel SGX Driver Installation 1 Insert the Device Drivers Utilities User s Manual disc into an attached DVD drive 2 Click Option Drivers button 3 Click 3 Install Intel SGX Driver Yes 4 Click Next 5 Click in the check box to accept the license and click Next 6 Click Install 7 Click Finish to complete the installation ...

Страница 156: ...ators on page 1 11 or Control Center button to toggle power to the PC Camera module When the PC Camera is in use the LED indicator to the left of the camera will be illuminated see Figure 1 2 on page 1 7 Figure 1 3 on page 1 8 Note that you need to use the Camera app in Windows to take pictures and cap ture video 2 ...

Страница 157: ...e camera into the search box to find the Camera app 3 The interface displays two buttons on the right of the screen one for photo and one for video 4 Simply click on the appropriate button to switch to either photo or video modes 5 You can use the buttons at the top of the screen to access the Settings and Auto Pro menus for Self Timer or Exposure compensation Figure 6 9 Camera App Mode Icons Figu...

Страница 158: ...rid to help you line up pictures Time lapse can be set to keep taking photos until the camera but ton is pressed again The Video recording resolution and frame rate can be set to any supported by the system Note that capturing high resolution vid eo files requires a substantial amount of disk space for each file After recording video check the video file size right click the file and select Proper...

Страница 159: ...Modules Options PC Camera Module 6 17 6 7 With the Pro menu expanded you can access the Exposure compensation button to adjust the brightness Figure 6 12 Camera Brightness Adjustment ...

Страница 160: ... on the Camera app icon you can type camera into the search box to find the Camera app 3 Click to select either photo or video modes 4 Click the photo icon to take a picture 5 Click on the video icon to start video capture when video capture begins a timer will appear at the bottom of the screen 6 To stop video capture click the stop button you can also pause the video capture Figure 6 13 Video Ca...

Страница 161: ... to the Photos app stored in the Start menu type Photos into the search box if you cannot find the app You can also access the photos from the Camera roll icon at the bottom right of the Camera app screen Figure 6 14 Photos App For Captured Photos Videos Camera Roll in the Camera App ...

Страница 162: ...ited Make sure the 3G 4G module is OFF or the system is in Airplane Mode if you are using the computer aboard aircraft see Table 1 3 on page 1 11 Important Notice If your purchase option includes both Wireless LAN and 3G 4G modules then the appro priate antennas will be installed Note that In order to comply with FCC RF exposure com pliance requirements the antenna must not be co located or operat...

Страница 163: ... undertake any installation procedures make sure that you have turned off the power and disconnected all peripher als and cables USIM Card Orientation Note that the USIM card s readable side with the gold colored contacts should face upwards as il lustrated Figure 6 15 USIM Card Insertion 1 2 3 4 2 1 3 4 USIM Card Ejection Simply press on the USIM card to eject it however do not do this while a co...

Страница 164: ...Cellular a list of available access points will appear 3 Click the access point and click Connect 4 The system will connect to your network 5 Connected will appear under the connection 6 You can then access the internet download e mail etc as per any internet connection 7 To disconnect you can select the connection and click Disconnect 8 You need to use Airplane Mode aboard aircraft 9 You can also...

Страница 165: ...zations and therefore requires implementation by a sys tem administrator before users can access security features Make sure you have administrator s rights to your computer and have a Windows password enabled for full security protection In addition Make sure you prepare a removable media e g a USB flash drive to store passwords etc before begin ning the TPM initialization process Before setting ...

Страница 166: ...ect the Security menu 4 Click TPM Configuration and select Enable for Security Device Support 5 You will then need to save the changes and restart the computer Clearing TPM Information You can click Clear TPM which will toggle the setting between En abled Disabled If set to Enabled this will clear existing TPM in formation in order to re set the TPM Figure 6 16 Security Trusted Computing ...

Страница 167: ...6 TPM Management in Windows You can manage your TPM settings from within Windows 1 Go to the Control Panel 2 Click BitLocker Drive Encryption System and Security 3 Click TPM Administration Figure 6 17 BitLocker Drive Encryption TPM Administration ...

Страница 168: ...s you to configure the TPM within Windows As TPM is usually administered within large enterprises and organizations your system administrator will need to assist you in managing the information here Figure 6 18 Trusted Platform Module TPM Management on Local Computer Administration ...

Страница 169: ...ably require a restart of the computer and confirmation of the setting changes after restart by pressing the appropriate key 2 After the restart the TPM will be prepared and you can then use the Actions menu to Turn TPM off Change Owner Password Clear TPM or Reset TPM Lockout 3 A wizard will help take you through any setup steps Figure 6 19 TPM Actions Menu ...

Страница 170: ...the disk Access the Microsoft BitLocker Drive Encryption control panel applet from the Windows control panel System and Security 1 Click Turn on Bit Locker 2 Follow the on screen instructions to setup BitLocker and make sure you have a removable media e g a USB flash drive to store saved recovery keys etc Figure 6 20 BitLocker Drive Encryption ...

Страница 171: ...ges make sure you have followed the instructions carefully and observed the safety precautions in the preface If all else fails talk to your service representative You should also make a record of what happened and what remedies you tried Of course if something goes wrong it will happen at the most inconvenient time possible so you should preview this section just in case If after you ve tried eve...

Страница 172: ... status Connections Check all the cables to make sure that there are no loose connections anywhere Power Savings Make sure that the system is not in Hibernate or Sleep mode by pressing the keys config ured in your Power Options see Power Saving States on page 3 7 the Fn F12 key combination or power button to wake up the system Brightness Check the brightness of the screen by pressing the Fn F8 and...

Страница 173: ...d free with your OS or buy the more powerful dedicated programs to do so Write down your passwords and keep them safe away from your computer This is especially important if you choose to use a Boot password for the SCU see Setup Utility Security Menu on page 5 16 Keep copies of vital settings files such as network dialup settings mail settings etc even if just brief notes Bottom Cover Removal War...

Страница 174: ...ow Viruses are often triggered from within e mail attachments so take care when opening any attached file You can configure most Anti Virus pro grams to check all e mail attachments Note You should also beware of files from people you know as the virus may have infected an address book and been automatically forwarded without the person s knowl edge Keep a Bootable CD ROM DVD ROM USB storage devic...

Страница 175: ...are caused by the installation of new hardware and or software Always refer to the documentation of any new hardware and or software and pay particular attention to files entitled READ ME or READ ME FIRST When installing a new device always make sure the device is powered on and in many cases you will need to restart the computer Always check that all the cables are correctly connected Make sure y...

Страница 176: ...er has many devices plugged into its ports and a number of programs running then it will be difficult to determine the cause of a problem Try disconnecting all of the devices and restarting the computer with all the peripheral devices unplugged A process of elimination adding and removing devices and restarting where necessary will often find the source of a problem although this may be time consu...

Страница 177: ...rt up immediately turn it off then on again You are losing battery power too quickly The system is using too much power If your OS has a Power Options scheme see Power Plans on page 3 5 check its settings You may also be using a peripheral device USB device that is drawing a lot of power Actual battery operating time is shorter than expected The battery has not been fully discharged before being r...

Страница 178: ...LAN is supported in AC mode only When the system enters a power saving state the plugged in AC DC adapter should be connected and should remain connected in order to allow the system to wake up on network activity Unplugging the adapter and then plugging it back in again will not allow the system to wake up on network activity Nothing appears on screen The system is in a power saving mode Toggle t...

Страница 179: ... set too low Check the volume control in the Volume Control Panel in the Windows notification area or use the key combination Fn F5 and F6 see Function Hot Key Indicators on page 1 11 to adjust No sound can be heard through an HDMI connected display You have not configured the HDMI audio output See HDMI Audio Configuration on page C 21 Unwelcome numbers appear when typing Num Lock is turned ON see...

Страница 180: ... system s power saving features have timed out Use the AC DC adapter press the sleep Fn F12 key combination or press the power button if no LEDs are lit The system never goes into a power saving mode Power Options features are not enabled Go to the Windows Power Options menu and enable the features you prefer see Power Saving States on page 3 7 Make sure you have enabled Hibernate mode from the co...

Страница 181: ...e instructions for the appropriate module in Modules Options on page 6 1 A file cannot be copied to from a connected Bluetooth device The transfer of data between the computer and a Bluetooth enabled device is supported in one direction only simultaneous data transfer is not supported If you are copying a file from your computer to a Bluetooth enabled device you will not be able to copy a file fro...

Страница 182: ...rocedure after every boot up restart or when the system resumes from hibernation 1 Go to the Devices Printers control panel in Windows 2 Double click the Bluetooth headset 3 Click Connect to complete the stereo connection OR 1 Go to the Sound control panel in Windows 2 Right click in the Playback tab the Bluetooth Stereo Audio device the default device is Headset 3 Click Connect to complete the st...

Страница 183: ...control panel Settings Devices Bluetooth open When transferring data between the computer and a Bluetooth enabled device make sure that the Bluetooth control panel is closed Problem Possible Cause Solution Bluetooth Control Panel Settings Devices Close the Bluetooth con trol panel pictured on the right when transferring data between the comput er and a Bluetooth enabled device ...

Страница 184: ...Troubleshooting 7 14 7 ...

Страница 185: ... Ports Jacks A 1 A Appendix A Interface Ports Jacks Overview The following chapter will give a quick description of the interface ports jacks which allow your computer to communicate with external devices connect to the internet etc ...

Страница 186: ...port allows you to connect an external monitor or Flat Panel Display to get dual video or simultaneous display on the LCD and external monitor FPD HDMI Out Port The HDMI Out High Definition Multimedia Interface is an audio video connector interface for transmitting uncompressed digital streams This allows you to connect an external monitor TV or Flat Panel Display etc as a display device by means ...

Страница 187: ...2 0 compatible ports USB 2 0 is fully USB 1 1 compliant are for low speed peripherals such as keyboards mice or scanners and for high speed peripherals such as external HDDs digital video cameras or high speed scanners etc Devices can be plugged into the computer and unplugged from the computer without the need to turn the system off if the power rating of your USB device is 500mA or above make su...

Страница 188: ...Interface Ports Jacks A 4 A ...

Страница 189: ...d controls and settings Click the Control Center icons to toggle the appro priate function or hold the mouse button down and move the dial control where applicable Figure B 1 Control Center Control Center Access To run the Control Center press the Fn Esc key combination or double click the icon in the notification area of the task bar Close the Control Center by clicking the close icon in the top ...

Страница 190: ...B 2 Control Center B Control Center Menus The Control Center contains 2 menu headings Basic Setting Extra Setting The Extra Setting tab al lows you to adjust the app skin color to your choice Figure B 2 Extra Setting ...

Страница 191: ...ill affect Airplane Mode and PC camera power Figure B 3 Power Modes In Power Saving Mode the Airplane Mode will be ON and the PC Camera will be turned OFF In Quiet Mode the Airplane Mode will be ON In Performance Mode and Entertainment Mode the Airplane Mode will be OFF Clicking the Default button in Entertainment will reset the default settings for this mode ...

Страница 192: ...r status or to turn the Left Windows Key func tionality on off The button under the icon will appear highlighted when it is enabled Note that the power status of the camera module is also effected by the Power Mode selected see Power Modes on page B 3 Fan Speed You can set the fan speed to Maximum full power Automatic or Silent the system can override the Silent fan if re quired from this menu ite...

Страница 193: ...fore the system switches to the power saving mode and will need to click OK to con firm Volume The Volume icon will show the current volume level You can use the dial to adjust the Volume or the Fn F5 F6 key combinations or use the Fn F3 key combination to mute the volume Caps Lock Scroll Lock Number Lock Airplane Mode Click the button to toggle the appropriate lock mode and Airplane Mode ...

Страница 194: ...Control Center B 6 B ...

Страница 195: ...l VGA Driver Yes 2 Click Next Yes Next Next 3 Click Finish to restart the computer Dynamic Video Memory Technology Intel DVMT automatically and dynamically allocates as much system memory RAM as needed to the integrated video system the video driver must be in stalled DVMT returns whatever memory is no longer needed to the operating sys tem Video Card Options Note that card types specifications an...

Страница 196: ...ntrol Pan el To access the control panel see below and overleaf 1 Right click the Desktop and select Intel R Graphics Settings from the menu OR 2 Click the icon in the notification area of the Desktop taskbar and select Intel R Graphics Settings from the menu Figure C 1 Right Click Desktop Intel Graphics Settings Figure C 2 Taskbar Notification Area Icon Menu ...

Страница 197: ...Video Driver Controls Intel HD Graphics Control Panel C 3 C OR 3 Double click the Intel R HD Graphics control panel in the Windows Control Panel Figure C 3 Control Panel Intel Graphics Settings ...

Страница 198: ...may make changes to any of the graphics properties by clicking the appropriate menu panel and adjusting the settings from the menus Home Click the Home button to return to the main menu screen in any of the sub menu screens Figure C 4 Intel UHDGraphics Control Panel ...

Страница 199: ...eral Settings or Color Settings to make display adjustments in cluding configuration for any attached external displays Multiple Display At least one other dis play must be attached in order to view multiple display selection op tions Figure C 5 Intel UHD Graphics Control Panel Display ...

Страница 200: ...ay mode of any attached dis plays see Attaching Other Displays on page C 16 Click Apply to save any changes made Multiple Display At least one other dis play must be attached in order to view multiple display selection op tions Audio Settings Any attached active dis plays must have audio capacity to allow audio configuration Figure C 6 Intel UHD Graphics Control Panel Display Multiple Displays ...

Страница 201: ...ay or any at tached display to any width height refresh rate color depth and underscan percent age of your choice Note that incorrect settings can cause system instability and even possible component damage so this is adjusted at your own risk Figure C 7 Intel UHD Graphics Control Panel Display Settings Custom Resolutions ...

Страница 202: ...ance gives the smoothest motion of images Quality displays the most detail Balanced Mode provides better computer performance with good quality and Custom allows you to configure the Anisotropic Filtering and Vertical Sync and features to your prefer ences Click Apply to save changes Figure C 8 Intel UHD Graphics Control Panel 3D ...

Страница 203: ...ntrol Panel C 9 C Options and Support Hot Key Manager in Options and Support allows you to create hot keys for open ing the application and scaling etc Click Apply to save changes Figure C 9 Intel UHD Graphics Control Panel Options and Support ...

Страница 204: ...mation the Built In Display and any attached displays Preferences Go to the Preferences sub menu in Options to configure the preferences for the Intel HD Graphics Control Panel Make sure you click En able under Tray Icon to display the Intel HD Graphics Control Panel icon in the notification area of the taskbar as below Figure C 10 Intel HD Graphics Control Panel Options Information Center ...

Страница 205: ...switch to vivid col ors The Preview image will display a sample image using the current settings You can Save Profile and name the Profile to recall the settings at any time Click Apply to save changes select Color Enhancement or Image Enhancement from the menu Figure C 11 Intel UHD Graphics Control Panel Video Color Enhancement ...

Страница 206: ...he top of the screen to display the sub menus The Image Enhancement menu allows you to adjust the Sharpness Skin Tone Enhance ment Noise Reduction Contrast Enhancement and Film Mode Detection Click Apply to save changes Figure C 12 Intel UHD Graphics Control Panel Video Image Enhancement ...

Страница 207: ...Power The battery life can be extended through dynamic control of the frame rate if Ex tended Battery Life for Gaming is enabled Settings can be selected for when the system is powered by battery or is plugged in Figure C 13 Intel UHD Graphics Control Panel Power ...

Страница 208: ...ance Video Colors from the menu on the left Alternatively you can go through the menus to make adjustments to your preferences for Display Color Video Op tions and Support and Power tick any boxes for the settings required and then Save the settings to a profile which may be imported or exported Figure C 14 Intel UHD Graphics Control Panel Profiles ...

Страница 209: ...treated as separate devices and act as a virtual desktop Collage A number of connected displays are combined into a single unified higher resolution for larger screen sizes Hybrid A number of connected displays are combined and can be configured in a combination of Clone and Extended modes 4K2K Videos on 4K2K External Displays Note you may experi ence some video lag when playing 4K2K vid eos on an...

Страница 210: ...Graphics Control Panel control panel and click Display Multiple Displays sub menu 3 Click Clone from the Select Display Mode menu 4 Click Apply and OK to confirm the settings change 5 Select the displays from the Select One or More Active Displays menu Multiple Display At least one other dis play must be attached in order to view Multiple Display selection op tions Figure C 15 Display Multiple Dis...

Страница 211: ...m the settings change Display Settings Extended Desktop You can have different Colors Screen Area and Monitor Refresh Rates for each display device provided your monitor can support them You can drag the moni tor icons to match the physical layout of your displays Icons and pro grams may also be dragged between the displays Figure C 16 Display Multiple Displays Extended Click the appropriate monit...

Страница 212: ...play Multiple Displays sub menu 3 Click Collage from the Select Multiple Display Mode menu 4 Click Enable Collage and click On 5 Click Vertical or Horizontal to arrange and displays as required 6 Click Apply and OK to confirm the settings change Collage Mode Collage mode is used to combine a number of displays into a single unified higher resolution for larger screen sizes Figure C 17 Display Mult...

Страница 213: ... your display to the appropriate port and turn it on 2 Press the P key combination 3 Click on any one of the options from the menu to select PC screen only Duplicate Extend or Second screen only 4 You can also click Connect to a wireless display at the bottom of the Project screen and follow the steps to connect to any wireless enabled display Figure C 18 Project ...

Страница 214: ...e displays 1 Attach your external display to the appropriate port and turn it on 2 Click the Start Menu and click Settings System or right click the desktop and select Display Settings 3 Click the Multiple Displays menu and select Duplicate these displays Extend these displays or Show only on 1 2 4 Click Keep changes to save any changes made Figure C 19 System Display Multiple Displays ...

Страница 215: ...ure the HDMI audio output as per the instructions below 1 Go to the Sound control panel 2 Click Playback tab 3 The playback device will be selected 4 You may need to select the audio device and click Set Default button 5 Double click the device to access the control panel tabs Volume Adjustment The sound volume level can be clicking using the volume control icon in the notification area of the tas...

Страница 216: ...Video Driver Controls C 22 HDMI Audio Configuration C 6 Adjust the HDMI settings from the control panel tabs 7 Click OK to close the Sound control panel Figure C 21 HDMI Device Properties ...

Страница 217: ...ideo Configuration 1 Connect an HDMI cable from the HDMI Out port to your external display 2 Configure your external display as per the instructions in Attaching Other Displays on page C 16 3 Set up your external display TV or LCD for HDMI input see your display device manual 4 You can now play video audio sources through your external display Other Applications If you are using a third party appl...

Страница 218: ...ess the P key combination 3 Click Connect to a wireless display at the bottom of the Project screen and follow the steps to connect to any wireless enabled display 4 The system will then search for compatible display devices this may take up to 60 seconds so allow time for this to complete 5 Double click any detected display device in the list Figure C 22 Add a Wireless Display ...

Страница 219: ...ect for specific settings for your display see the documentation supplied with your compatible adapter display for full details 8 Go to the Project menu and click Disconnect to temporarily disconnect from the wireless display 9 To permanently disconnect from the display you will need to go back through the connection process again you can select it in Devices and click Remove Device Yes ...

Страница 220: ...Video Driver Controls C 26 C ...

Страница 221: ...edule Check with your distributor supplier for details Note that this computer model series may support a range of CPUs and or video adapters To find out which CPU is installed on your system go to the Start menu and select Settings and then select System and click About This will also provide information on the amount of Installed RAM etc To get information on your system s video adapter go to th...

Страница 222: ...Two USB 2 0 Ports One USB 3 0 Port USB 3 1 Gen 1 One HDMI Out Port One External Monitor Port One Headphone Out Jack One Microphone In Jack One RJ 45 LAN Jack One DC in Jack Card Reader Embedded Multi In 1 Card Reader MMC RS MMC SD Mini SD SDHC SDXC Note Some of these cards require PC adapters which are usually supplied with the cards Slots One M 2 2230 WLAN Combo Module with PCIe USB CNVi Interfac...

Страница 223: ...l B Removable 3 Cell Smart Lithium Ion Battery Pack 31WH Indicators LED Indicators Power Suspend Battery HDD Airplane Mode Camera BIOS One 64Mb SPI Flash ROM Insyde BIOS Security Security Kensington Type Lock Slot BIOS Password Intel PTT Features FlexiCharger Fan Silent Mode Supports Windows 10 Cortana with Voice Technology Supports Windows 10 Jumpstart Operating System Windows 10 64 bit Environme...

Страница 224: ...Specifications D 4 D ...

Отзывы: