background image

Managing the Shares

Adding a DFS Shared Folder

Cisco Small Business NSS2000 Series Administration Guide

107

6

-

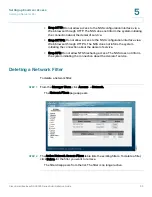
Link Name: This is the name of the link that appears as a folder within the 
share. When users click this link, they are redirected to the target share 
on the remote server. Enter any name of up to 255 characters.

-

Server Name: Enter the name of the remote server on which the target 
share is located.

-

Share: Enter the name of the target share. 

Import an Entire Remote Server: Select this option to automatically create 
links for all shares on the remote server. Fill in the following fields from the 
Import Remote Server table:

-

Server Name: Enter the name of the remote server.

-

Username: Enter the username of the account with access to the server.

-

Password: Enter the password for the above account.

STEP 6

If you are adding a folder to DFS, click OK. If you are importing a remote server, 
click Import. 

Restrictions using Microsoft DFS from the NSS

To use DFS folders from the NSS, it is important to understand the limitations or 
restrictions involved and how to best configure your system:

User Credentials must be Recognized by the Remote Server: Re-direction 
to a remote file-server is only successful if the current user credentials (i.e., 
the user’s NSS username and password) are recognized by the remote 
server. Microsoft DFS (MSDFS) operates optimally if the PC-user’s login 
username and password are recognized as valid on all file servers being 
accessed. Otherwise, an authentication error occurs and the user may not 
be able to re-authenticate with different user credentials. As a workaround 
in a non-domain (workgroup) environment, pre-map a file-share to each file 
server that needs special user credentials (other than the logged-in 
username and password). In this case, the MSDFS redirect proceeds 
smoothly because the PC-client already has an established session with 
the target file-server. When the user’s login is different on the DFS leaf than 
the DFS root, they can pre-login to the leaf. When they then login to the root, 
they can access the linked DFS share.

Make sure you review the restrictions and 
recommendations for using Microsoft DFS from 
the NSS.

Содержание NSS2000 - Gigabit Storage System Chassis

Страница 1: ...Cisco Small Business NSS2000 Series Network Storage System ADMINISTRATION GUIDE ...

Страница 2: ... id i Z jbVc CZildg VgZ igVYZbVg h0 8 Vc c i Z LVn LZ Ldg A kZ EaVn VcY AZVgc VcY 8 hXd HidgZ VgZ hZgk XZ bVg h0 VcY 6XXZhh GZ higVg 6 gdcZi 6hncXDH 7g c c i Z BZZi c Id Ndj 8ViVanhi 8896 889E 88 88 E 88C6 88CE 88HE 88KE 8 hXd i Z 8 hXd 8Zgi ZY ciZgcZildg meZgi ad d 8 hXd DH 8 hXd EgZhh 8 hXd HnhiZbh 8 hXd HnhiZbh 8Ve iVa i Z 8 hXd HnhiZbh ad d 8 hXd Jc in 8daaVWdgVi dc L i dji A b iVi dc i Zg Vhi...

Страница 3: ...rts 7 Storage Status 7 Network Status 8 Shares Status 8 Backup Status 8 Power Status 9 System Status 9 Viewing the Hardware Monitor 10 Viewing and Managing the System Logs 11 Configuring the System for UPS Support 13 NSS supported UPS Product Families 14 Chapter 3 Adding the NSS to your Network 15 Physical Interfaces 15 Virtual Interfaces 16 Viewing the Network Settings 17 Configuring the Network ...

Страница 4: ...figuring the Network Ports 34 Setting up the Ethernet Frame Size Advertising Modes 36 Chapter 4 Configuring your Storage 38 Disk Status Table 38 RAID Arrays Table 39 Volumes Table 40 USB Storage Status 41 Managing RAID Arrays 42 About the RAID Arrays Page 42 Choosing a RAID Array Level 42 Creating a RAID Array 45 Deleting an Array 46 Migrating a RAID Array to another Storage Device 48 Virtualizing...

Страница 5: ...2 Logging into the NSS as a Local User 73 Deleting a User Profile 73 Working with Groups 74 Creating a Group 74 Changing the Users Assigned to a Group 76 Integrating Groups from an Active Directory NTv4 or NIS Domain 77 Deleting a Group 78 Managing Volume Quotas 79 Changing the User s Primary Group 79 About the Volume Quota Page 80 Creating Volume Quota for a User or Group 80 Setting up the Grace ...

Страница 6: ...kup of a Share 114 Creating a Scheduled Backup for a Share 115 Initiating a Backup for a Share 117 Deleting Backup Images 118 Configuring the Connection Profile 119 Chapter 7 Maintaining the NSS 120 Rebooting or Shutting Down the NSS 121 Upgrading the NSS Firmware 122 Restoring the Factory Default Configuration 125 Managing the NSS Configuration 126 Saving the Current Configuration 127 Restoring a...

Страница 7: ...dix A Troubleshooting 148 Power LED Button Front Panel 148 System LED Front Panel 149 Reset Button Front Panel 149 LAN LED Front Panel 150 Hard Disk Drive LEDs Front Panel 150 UPS LED Back Panel 151 Repairing a Degraded Array 151 Working with a Failed Array 153 Drive Error LED Remains On 154 Firmware Upgrade Failed 154 Free Bound Virtualized Storage when the Master System Fails 155 All CIFS Connec...

Страница 8: ...e of NFS Transfers 159 Appendix B Glossary of Storage Related Terms Acronyms 160 Appendix C Environmental Specifications 176 Appendix D Additional Information 177 Regulatory Compliance and Safety Information 177 Warranty 177 End User License Agreement EULA 177 Appendix E Support Contacts 178 ...

Страница 9: ... completely dedicated to storage ensuring the integrity reliability and accessibility of your data for a relatively low cost The NSS lets you install up to two physical disk drives The NSS uses the most common file based protocols such as NFS CIFS and FTP for file sharing Benefits The NSS offers the following main advantages to your business Cross platform File Sharing Share files easily and inexp...

Страница 10: ...Manager Menu The Manager Menu forms the left side of the configuration interface window It contains the menu options that represent the major configuration areas for the NSS For example System Network Share Storage When you click an option a sub menu of related options appears Clicking a topic opens the associated topic in the Topic page in the right side of the window Topic Page When you select a...

Страница 11: ...bout the details that appear on the System Status page Refreshing the GUI Pages Although certain GUI pages automatically refresh at a preselected time interval some pages do not refresh until they are reselected The best way to manually refresh a GUI page is to reselect it through the options in the Manager Menu on the left side of the GUI window For example to refresh the NTP Configuration page f...

Страница 12: ...zard you should choose depends on the way the camera transfers the video clips Note that you only need to run the wizard once and then you must configure each the camera to output the video to the configured share To run either of the following wizards make sure you have created a RAID array a volume and any users that you want to grant access to the surveillance videos After running this wizard y...

Страница 13: ...oduct support information offered on the Cisco website www cisco com for a list of recommended disk drives When you select a disk drive consider the type of RAID levels required to service your business needs For example if you are creating a RAID versus a JBOD make sure that each of the disks used in the array have the same disk capacity The RAID is built using the capacity of the smallest disk i...

Страница 14: ...lume is approaching its full capacity and if an array rebuild is complete You can also view the current status of any of the following storage shares backups network power and system details Status pages like the System Status page automatically refresh on a regular interval and are helpful for monitoring the progress of certain processes such as building a RAID The following sections provide a de...

Страница 15: ...RAID array is in a failed condition Warning These types of messages indicate there is a problem with the NSS that requires eventual action For example if the amount of storage used for a volume is over 90 Notification These types of messages are simply to advise of changes to the NSS For example the RAID rebuild is complete Storage Status The Storage area displays details about the configured stor...

Страница 16: ...LANs configured on the NSS Link IP The IP address of the Ethernet link Shares Status The Shares area displays the status of the following Shares The number of configured shares Connected Users The total number of user sessions currently connected to the NSS FTP The FTP access state enabled or disabled NFS The NFS access state enabled or disabled Backup Status The Backup area displays the following...

Страница 17: ... the NSS or is not enabled Online A UPS is connected to the NSS and is enabled The NSS is deriving power from the mains power On Battery The NSS is currently deriving its power from the UPS battery The percentage of power still available is also listed System Status The System area displays the following Serial Number The serial number of the NSS Firmware Version The current version and date of th...

Страница 18: ...d of attention red Fans The fan speed for each chassis fan If the fan has stalled the reading is color coded red Normal fan operation is color coded green Temperatures The NSS has temperature sensors located at various parts of the chassis Temperature readings are done from these sensors as well as from any installed disks if the disk has an internal temperature sensor If a disk does not have a te...

Страница 19: ...re overwritten once the space is filled To work with the log files STEP 1 From the Manager Menu click System Logs The System Logs page appears STEP 2 You can view download or delete any of the following types of log files Admin A full list of time stamped actions that were initiated through the NSS configuration interface Web Access This log displays IP addresses of the systems that accessed the N...

Страница 20: ...he Administrator Log STEP 3 Choose where you want to store the log files Locally To store the log files on the NSS select Store Logs Locally and then select the volume to which you want to store the logs from the options in the Store Logs to drop down menu Remotely To store the log files on a remote server select Forward Log Messages and then enter the hostname or IP address of the server in one o...

Страница 21: ...nformation about the functioning of the UPS refer to the UPS documentation Disconnected A UPS is not currently connected to the NSS or has not yet been enabled Online A UPS is connected to the NSS and is enabled The NSS is deriving power from the mains power On Battery The NSS is currently deriving its power from the UPS battery Battery Status The percentage of power still available is also listed...

Страница 22: ...TEP 1 From the Manager Menu click System Power The System Power page appears STEP 2 Select Enable UPS support STEP 3 Click Update NSS supported UPS Product Families The NSS supports the following UPS product families APC Back UPS Pro USB APC Back UPS RS USB APC Back UPS USB APC Back UPS LS USB APC Back UPS ES CyberFort 350 APC Smart UPS USB ...

Страница 23: ...l Ethernet link connected to the NSS Link The number of the physical link attached to the NSS The number appears as 1 Status The status of the physical link Options include Up The link is up color coded green and operational Down The link is down color coded red and not operational If a cable is connected to the Ethernet port check the cable integrity and the status of the device switch router or ...

Страница 24: ...mber of IP packets transmitted since the last boot Dropped Pkts The total number of IP packets dropped since the last boot Virtual Interfaces The VLAN Status area of the Network Status page displays the current status and details regarding each configured VLAN Link The number that appears in this column identifies the physical link on which the VLAN is configured VLAN The VLAN number Priority The ...

Страница 25: ...e Settings page from the Manager Menu click Network IP The Network Device Settings table displays the following Link The number of the physical link attached to the NSS It appears as 1 VLAN The ID assigned to the virtual interface For physical interfaces this column is blank NOTE If you hotplug the Ethernet link after the initial installation of the NSS make sure you wait 15 seconds between the ti...

Страница 26: ...terface IP Address The IP address for the physical or virtual interface Netmask The netmask for the physical or virtual interface Gateway The address of the gateway for the physical or virtual interface Configuring the Network Link IP You need to configure the method for assigning an IP configuration to each interface connected to the NSS To set the IP address allocation method for an interface ST...

Страница 27: ...ration page appears STEP 3 Select one of the following Obtain IP Address Automatically Use a DHCP server to retrieve the IP address netmask and gateway address for the interface Use the Following IP Address Enter the IP configuration details manually for the IP address netmask and gateway in dotted quad notation i e set of four digits separated by periods where each digit is in the range of 0 255 ...

Страница 28: ... on a Link You can force a renewal of the DHCP lease on the physical link or VLAN that is configured for DHCP STEP 1 From the Manager Menu click Network IP The Network IP page appears listing each physical and virtual interface STEP 2 Click Edit on the row of the link IP you want to reset The Network Link Configuration page appears STEP 3 Click Update ...

Страница 29: ...To configure a port based VLAN configure the switch to assign the port to which the NSS is connected to the desired VLAN In this case no NSS configuration changes are required To view the VLANs currently configured on the NSS STEP 1 From the Manager Menu click Network VLAN The VLAN Configuration page appears STEP 2 View the following details for each existing VLAN that appears in the VLAN Configur...

Страница 30: ...ion is used solely as a reference within the NSS interface and does not affect its operation Allowing a VLAN Access to the NSS Configuring a VLAN to connect to the NSS depends if it is trunk based or port based To configure a trunk based VLAN follow the steps described next To configure a port based VLAN configure the switch to assign the port to which the NSS is connected to the desired VLAN In t...

Страница 31: ...t priority tag ranging from 0 to 7 where 0 is best effort and 7 is network critical traffic Label Enter a text description for the VLAN for example Data Voice Video etc It can be made up of alphanumeric characters Note that this description is used solely as a reference within the NSS interface and does not affect its operation STEP 3 Click Add The newly added VLAN appears in the VLAN Configuratio...

Страница 32: ...DHCP server to retrieve the IP address netmask address and gateway address for the VLAN Use the Following IP address Enter the IP configuration details manually STEP 7 Click Update Changing a VLAN Configuration After you set up a VLAN to access the NSS you can change its configuration details To edit a VLAN configuration STEP 1 From the Manager Menu click Network VLAN The VLAN Configuration page a...

Страница 33: ...nfiguration fields as required STEP 4 Click Update Removing a VLAN s Access to the NSS All connected VLANs appear when you first display the VLAN Configuration page You can delete the connection between a VLAN and the NSS Note that deleting the VLAN only affects the VLAN s ability to access the NSS It does not impact the VLANs operation within your network To disconnect a VLAN s access to the NSS ...

Страница 34: ...000 Series Administration Guide 26 3 STEP 1 From the Manager Menu click Network VLAN The VLAN Configuration page appears STEP 2 From the VLAN Configuration table click Delete for the VLAN you want to remove The VLAN disappears from the VLAN Configuration table and can no longer access the NSS ...

Страница 35: ...ou join the NSS to an NTv4 or Active Directory Service ADS domain do the following Configure the IP and DNS information Set up your user and group ID ranges on the User Group Settings page from the Manager Menu click Access and then Options If you make a change to the range after the domain is joined you must rejoin the NSS to the domain after the change is made Set up the Home Directory Location ...

Страница 36: ...ned STEP 3 To assign the hostname for the NSS using the DHCP server select Assign automatically via DHCP If the DHCP server is not available or if it is not configured to supply a hostname the NSS hostname is assigned using the information entered in the Hostname field STEP 4 In the Description field enter the textual description for the NSS as you want it to appear in the file manager window for ...

Страница 37: ...he NSS part of an Active Directory ADS domain If you select this option set up the following fields Active Directory Domain Enter the domain name Note that you might have to use the DNS fully qualified domain name For example domain com versus just domain Kerberos Realm Enter the name of your Kerberos realm If you are not sure what to enter here enter the domain name In most standard Windows domai...

Страница 38: ... changes to the fields on this page make sure you re enter the domain password as the NSS automatically rejoins the domain when you click Update Configuring DNS or WINS for Name Resolution Within a network DNS and WINS are used to translate hostnames into IP addresses For example the hostname myserver might translate to 172 1 135 6 Configuring how the NSS works with name resolution depends on what...

Страница 39: ...lect this to assign the IP address for the DNS server using the DHCP server If the DHCP server cannot be found or times out the DNS server IP address is assigned the IP address manually entered in the Primary or Alternate DNS Server fields Primary WINS server If your network has a WINS server enter its address or hostname This field is optional Alternate WINS server If your network has a secondary...

Страница 40: ...o configure the NSS for NIS STEP 1 From the Manager Menu click Network NIS The NIS Configuration page appears STEP 2 Select Enable NIS STEP 3 Enter the NIS domain name in the NIS Domain Name field STEP 4 Set the bind state by clicking one of the following NOTE Before you join a NIS domain make sure you set up or make changes to the NIS domain users and groups ID range on the User Groups Settings p...

Страница 41: ...xplorer Restrictions Access Control Lists ACLs are used to set user and group access privileges for specific files and folders stored on the NSS There are certain restrictions to be aware of as you work with ACLs through Windows Explorer Group versus User ACLs You can only set up an ACL for individual users You cannot set up a group ACL NIS domain You cannot create or edit ACLs for NIS domain user...

Страница 42: ...the test result If the link is down you cannot access the Configuration Manager Configuring the Network Ports By default the NSS runs network services on their well known IETF defined port numbers You can change the port on which any particular service runs When you disable WAN access for a given service only hosts on the same subnet as the NSS may connect to that service This is in essence a shor...

Страница 43: ...TPS Port The well known port setting is 21 Select Disable WAN Access to disallow FTP and FTPS protocol access to the NSS from a WAN Web Server Port The well known port setting is 80 Note that to access the NSS configuration interface you must have either the HTTP port or HTTPS port enabled Select Disable WAN Access to disallow HTTP protocol access to the NSS from a WAN SSL Web Server Port The well...

Страница 44: ...smission Unit MTU in bytes in the MTU field This is the largest Ethernet frame that your network can handle The default MTU size is 1500 bytes MTU sizes greater than 1500 bytes are considered jumbo frames STEP 3 To assign the link MTU size automatically using the DHCP server click Assign automatically via DHCP In this case the value entered in the MTU field is used as a backup if the DHCP server d...

Страница 45: ...Adding the NSS to your Network Setting up the Ethernet Frame Size Advertising Modes Cisco Small Business NSS2000 Series Administration Guide 37 3 STEP 5 Click Update ...

Страница 46: ...l disk To display the Storage Status page from the Manager Menu click Storage Status Status pages like the Storage Status page automatically refresh on a regular interval and are helpful for monitoring the progress of certain processes such as checking the condition of a drive Disk Status Table The Disk Status table lists each of the physical disks installed in the NSS The table is made up of the ...

Страница 47: ...the disk drive Options include Online The disk drive is spun up Standby The disk drive is idle and is spun down Offline The disk drive is failed Action There are available action buttons associated with each installed disk drive Get Details View the current detailed S M A R T report for the disk drive RAID Arrays Table The RAID Arrays table lists each array either RAID or JBOD currently configured...

Страница 48: ...y blinks green Stopped A RAID array has been stopped by the system through degraded mode management due to it being in degraded mode for the amount of time configured in the Storage Options page Volumes associated with a stopped array are unmounted and unusable To start the RAID array click the Start button Volumes Table The Volumes table provides a list of the existing volumes The table is made u...

Страница 49: ... the back of the chassis must be off before you can safely remove the USB flash device If you remove the USB flash device in a mounted state you risk corrupting the files or filesystem The USB Storage Status table provides the following details about the mounted USB flash device Disk The type of disk in this case is the USB flash Total Space The total amount of space both used and available on the...

Страница 50: ...AID array gives you the benefit of speed and performance storage capacity decreased downtime costs and increased availability fault tolerance and higher data security About the RAID Arrays Page The RAID Arrays page is where you manage the local RAID and JBOD arrays To display the RAID Arrays page from the Manager Menu click Storage RAID Choosing a RAID Array Level RAID Redundant Array of Inexpensi...

Страница 51: ...ay causes the entire array to fail Mirror RAID1 RAID1 writes the same data to each disk in the array The disks are referred to as mirrors because each one mirrors the data stored on the others As long as one disk in the array is intact all data can be read back from the array If a disk fails in the array and is then replaced the array must copy the entire contents of a good disk to the new disk Th...

Страница 52: ...apacity when using mixed sized disks JBOD offers no performance increase compared to the component disks It has lower reliability than the component disks as the failure of a single disk results in general in the failure of the whole array Depending on how you create volumes on the JBOD array you may be able to recover data when one or more disks in the JBOD fail This however is not guaranteed Min...

Страница 53: ...ty see Storage Options section on page 65 to determine how you want to allocate the system resources for the rebuild To create an array STEP 1 From the Manager Menu click Storage RAID The RAID page appears NOTE When adding disks to an array we recommend you use the same model of disk with the same capacity With the exception of a JBOD RAIDs are configured to use the maximum of the smallest disk ca...

Страница 54: ...D level You can monitor the progress of the RAID build from the Storage Status page When the build is finished the array appears in the RAID Arrays table The disks used in the array are no longer available for creating additional arrays Deleting an Array You can remove an existing array and release the disks used in the array back into available storage Note that deleting an array also deletes any...

Страница 55: ...1 From the Manager Menu click Storage RAID STEP 2 Click Delete in the row of the RAID array that you want to delete A warning message appears STEP 3 To continue click OK The deleted array disappears from the list of existing arrays The disks used in the array are released back into available storage and appear in the New RAID Device table ...

Страница 56: ...Power down the NSS from which you are removing the RAID array STEP 2 Remove each of the disk drives that make up the RAID array to be moved STEP 3 Power down the NSS to which you are migrating the RAID array STEP 4 Insert each of the disk drives in the RAID array into the new NSS STEP 5 When all the disk drives are installed power up the NSS STEP 6 If any local users were assigned permissions to s...

Страница 57: ...Size The size of the exported storage Exported As The serial number of the exported NSS Imported by The serial number of the NSS that has imported the storage If the exported disk or array has not yet been imported by the master NSS None appears in this column Action Click the Unexport button to stop the NSS from exporting the associated drive or array This frees up the drive or array for use in l...

Страница 58: ...ing an NSS might impact users of the virtualized storage While the logical storage is controlled from the master NSS the physical device including the disk drives is still controlled through the slave s configuration interface and is affected by the conditions of the physical unit To export storage to the network STEP 1 Log into the configuration interface for the device from which you are exporti...

Страница 59: ...ed storage is to assign a master storage unit the master must be an NSS6000 series model The designated master unit then becomes the configuration point for all your storage related management Exported storage can be used to create a JBOD which can then be used to set up volumes and shares Keep in mind that although the storage is managed through the master unit the physical device that contains t...

Страница 60: ... Exported disks from other NSS units in the network appear in the New RAID Device table STEP 3 From the New RAID Device table click the disks or arrays that you want to include in the JBOD STEP 4 Select JBOD as the RAID level STEP 5 Click Add The JBOD appears in the RAID Arrays listing You can now create volumes from the virtualized JBOD ...

Страница 61: ...ny RAID arrays see the Deleting an Array section on page 46 associated with the storage you want to unexport STEP 2 Display the Configuration Interface for the slave device that contains the storage you want to unexport STEP 3 From the Manager Menu click Storage Virtualization The Storage Virtualization page appears STEP 4 Click Unexport for the device you want to release from the network The disk...

Страница 62: ...array on which the volume is located Total Space The amount of space allocated for the volume in MB GB or TB Used The amount of space as a percentage that is currently used Crypto Whether the volume is encrypted or not Note that file transfer performance to encrypted volumes is generally lower than to non encrypted volumes Action Click Edit to make changes to the current volume Click Delete to rem...

Страница 63: ...click Storage Volumes The Storage Volumes page appears STEP 2 From the New Volume area set up the following fields Array Click the drop down menu to select the array on which you want to create the volume Name Enter the name you want to give the volume The volume name must consist of at least one alphanumeric character must begin with a letter but cannot contain any spaces Size Enter the size for ...

Страница 64: ...be a minimum of one character no maximum STEP 5 Re enter the password in the Confirm Password field STEP 6 Click Add NOTE Once the volume is created you can expand the volume but you cannot reduce its size NOTE You can encrypt the volume only when the volume is first created After a volume is created you cannot change whether it is encrypted or unencrypted File transfer performance to encrypted vo...

Страница 65: ...ion Guide 57 4 Expanding a Volume After a volume is created you can increase its size provided there is available space on the array To increase the size of a volume STEP 1 From the Manager Menu click Storage Volumes The Volumes page appears STEP 2 Click Edit for the volume you want to expand ...

Страница 66: ...nds up the total space to the nearest 32 MB boundary Resulting Size Select this option to resize the volume to the space entered in the Size field For example if the volume currently has 224 MB of space and you want it to have 928 MB select Resulting Size and then enter 928 in the Size field Note The system rounds up the total space to the nearest 32 MB boundary STEP 4 Depending on your choice in ...

Страница 67: ... volume STEP 1 From the Manager Menu click Storage Volumes The Storage Volumes page appears STEP 2 From the Volumes area click Delete for the volume you want to delete CAUTION Deleting the volume removes any shares or data currently saved to that volume If the volume was assigned as the users Home Directory Location you must reassign the Home Directory Location to another volume ...

Страница 68: ...ration Guide 60 4 Volume Encryption Overview The Volumes page lists both the encrypted and unencrypted volumes and lets you create a volume and lock unlock or change the password for encrypted volumes NOTE File transfer performance to encrypted volumes is generally lower than non encrypted volumes ...

Страница 69: ...king a volume means that it becomes unmounted and is unusable you cannot create or use shares stored on the locked volume This provides an extra layer of security against the theft of data To lock a volume STEP 1 From the Manager Menu click Storage Volumes The Volumes page appears The Crypto column displays whether the volume is encrypted Yes or not encrypted No STEP 2 Click Lock to lock the volum...

Страница 70: ...ither automatically as a result of the NSS being rebooted or manually locked through the configuration interface you must unlock it before it can be used for tasks such as creating shares or quotas To unlock a volume STEP 1 From the Manager Menu click Storage Volumes The Volumes page appears STEP 2 Click Unlock for the volume you want to unlock The Unlock Volume page appears ...

Страница 71: ...ou can change the password at any time The password must be entered under two conditions when the NSS is started up after a power interruption or the volume has been manually locked To change the password on an existing encrypted volume CAUTION Because the password is required to de crypt a locked volume keep a backup of the password to ensure that it is accessible when required There is no way to...

Страница 72: ...rd for an Encrypted Volume Cisco Small Business NSS2000 Series Administration Guide 64 4 STEP 1 From the Manager Menu click Storage Volumes The Volumes page appears STEP 2 Click Edit for the volume you want to change The Edit Volume page appears ...

Страница 73: ... up a significant amount of the available percentage of CPU processing power You can control how the system prioritizes the rebuild and allocates the system s resources based on your system s current workload and need for responsiveness To set the RAID rebuild priority choose one of the following from the RAID Rebuild Priority field High The CPU focuses on the RAID rebuilding process This setting ...

Страница 74: ...the period of time after which the system automatically shuts down degraded arrays You can manually restart a RAID array that has been automatically stopped by the degraded mode management feature Warning messages are sent out periodically while the RAID array is degraded If you make changes to any of the storage options click Update ...

Страница 75: ... file sharing protocol used The page displays the username the name of the host from which the user is currently connected and the share or path that the user is accessing Status pages like the Access Status page automatically refresh on a regular interval and are very helpful for monitoring the progress of certain processes such as the current end user connections to the NSS ...

Страница 76: ...ile is created you cannot rename the username To rename an existing user profile delete the user profile and then create a new one User profiles are maintained by the administrator Users cannot make changes to their passwords Creating a User Profile Depending on your network setup you might administer users and groups locally or via the domain controller The NSS configuration interface gives you r...

Страница 77: ...m of 32 characters This field is required STEP 4 Select the group you want to assign as the user s primary group from the Primary Group field If there are no groups configured the only available choice is the default group nasusers This field is required NOTE Although you can assign the user to multiple groups through the Add Group or Edit Group page the primary group is the group against which qu...

Страница 78: ...eld STEP 7 To record the user s full name enter it in the Real Name field This field is optional Note that you cannot enter the character in this field STEP 8 To record the user s email address enter it in the Email Address field This field is optional STEP 9 Click OK to create the user and exit the New User page Click Apply to create the user and then add another new user NOTE All password change...

Страница 79: ... a new one Domain user profiles are read only with the exception of their email address which you can add or edit directly from the NSS Configuration Manager All password changes for end user accounts set up directly through the NSS configuration pages must be done by the Administrator To edit an existing user profile STEP 1 From the Manager Menu click Access Users The Configured Users page appear...

Страница 80: ... entire user list from the Configured Users page but can only edit or delete locally created users not domain users The one exception to this is that you can edit the email address directly from the Configuration Manager The naming conventions use the NetBIOS format with the domain name as a prefix of the username The primary group for users set up within the ADS NTv4 or NIS domain is taken from t...

Страница 81: ...e user would need to log in as NASadmin bob in the login dialog Deleting a User Profile You can delete user profiles that were created via the NSS Note When you delete a user profile the user s home directory and any files or folders created by the user on the various shares are not deleted As an administrator you can log into CIFS using the administrator account to delete the user s data as requi...

Страница 82: ... quota charges for storage usage are applied is set up in the Primary Group field of the user s profile A group called nasusers is automatically created when you first install the NSS This group is the default primary group when you create new users Creating a Group Groups let you specify the share access privileges for a set of users After you create a group you can define the group s access priv...

Страница 83: ...om the Manager Menu click Access Groups The Configured Groups page appears STEP 2 Click Add The New Group page appears STEP 3 In the Group Name field type the name you want to assign to the group The name can only contain lower case alphanumeric characters and underscores i e a z 0 9 _ to a maximum of 32 characters ...

Страница 84: ...figured Groups page Click Apply to save the current group and remain in the New Group page to add another group Changing the Users Assigned to a Group After you create a group you can delete or add to the list of users that belong to that group To change the group membership STEP 1 From the Manager Menu click Access Groups The Configured Groups page appears STEP 2 From the list of configured group...

Страница 85: ...egrating Groups from an Active Directory NTv4 or NIS Domain When the NSS is joined to an Active Directory NTv4 or NIS domain domain groups only appear on the Shares page they do not appear in the list of configured groups Group membership for imported domain groups are read only The naming conventions use the NetBIOS format with the domain name as a prefix of the group name For example DOMAINNAME ...

Страница 86: ... page Highlight the group you want to delete from the Configured Groups table and then click Delete To delete multiple groups use the following key mouse combination Shift click To select a contiguous list of groups that you want to delete hold down the Shift key then click the first group and then the last group in the series Click Delete to delete the highlighted groups Ctrl click To select a no...

Страница 87: ...the Filesystem Quota page This delay is due to the caching in the filesystem used to provide high performance Changing the User s Primary Group Quotas are charged to the group assigned as the user s primary group at the time of file creation If the user s primary group changes files created under the previous group continue to be charged against that group Note that if the user s primary group cha...

Страница 88: ...oup You can set up a quota on a volume for each user or group This quota limits the user or group to the allocated amount of space within the volume To give certain users or groups assigned to a volume full access to the space on the volume do not create a quota for that user or group NOTE Before you can create quota on an encrypted volume make sure it is unlocked You also need to set up the Warn ...

Страница 89: ...dministration Guide 81 5 To create a quota for a user or group STEP 1 From the Manager Menu click Access Quota The Filesystem Quota page appears STEP 2 Click Create Quota The New Filesystem Quota page appears STEP 3 Select the volume on which you want to set the quota from the New Quota on FS drop down list ...

Страница 90: ...begins The user has the amount of time set in the grace period to reduce the amount of space used to under the space set in the Warning at field or they are not allowed to write further data to the volume Another way to think about this field is as a soft quota STEP 6 In the Space Limit field enter the amount of space that the user or group has available to use and then select the size unit from t...

Страница 91: ...ce period expires or the user reaches the hard quota the user is automatically denied write access to the volume To set up the grace period for a volume STEP 1 From the Manager Menu click Access Quota The Filesystem Quota page appears STEP 2 To set up the grace period after which if the soft limit set for the user or group is still exceeded the user or group is denied write access enter the time p...

Страница 92: ...black type When a user reaches their soft quota limit the amount listed on Filesystem Quota page turns red STEP 3 Click Update STEP 4 Repeat steps 2 and 3 for each applicable volume Changing a Volume Quota for a User or Group After a quota is created you can increase or decrease it You can also change the limit at which the user or group receives a warning message and the grace period begins To ch...

Страница 93: ...isco Small Business NSS2000 Series Administration Guide 85 5 STEP 2 Click Edit for the user or group for which you want to change the quota The Edit Quota page appears STEP 3 Make the required changes to the soft warning or hard quota space limit limits STEP 4 Click Update ...

Страница 94: ...at the user or group no longer has a space limitation on their use of the associated volume other than the actual unused storage space on the volume To clear a quota for a user or group STEP 1 From the Manager Menu click Access Quota The Filesystem Quota page appears Quotas are displayed according to their associated volume STEP 2 Click Clear for the user or group whose quota you want to remove ...

Страница 95: ...ork filters STEP 1 From the Manager Menu click Access Network The Network Filters page appears STEP 2 You can do any of the following Set the default network policy to control what happens to traffic not explicitly covered by defined filters See the Defining the Default Network Policy section on page 88 View or delete the existing filters defined for the NSS from the Active Network Access Filters ...

Страница 96: ...Network The Network Filters page appears STEP 2 From the Default Network Policy drop down menu click one of the following Accept Traffic Allow the NSS to communicate with all initiating hosts Select this option if you have a limited number of systems that you want to disallow When you set up your individual filters select those filters that disallow i e drop or reject certain types of connections ...

Страница 97: ... Each device in your network is assigned a fixed 48 bit MAC address and changeable 32 bit IP address When you define a filter it grants or denies access via the specified protocol from the specified IP MAC address or range of IP addresses NOTE If you set the default policy to Drop and you want to enable FTP connections make sure you set the FTP connection type on the host to active If you set the ...

Страница 98: ... following format first address last address Where the first IP address in the range is entered first followed by a hyphen and then the last IP address in the range A Subnet Enter the subnet to set a filter for all the addresses within the subnet The format should appear as shown in the following example 192 168 1 0 24 where the digits following the slash represent the number of bits in the networ...

Страница 99: ... next to the Filter field on the Network Filters page Allow All This is the default filter It tells the NSS to accept traffic via all supported protocols Allow CIFS Allow CIFS filesharing access NOTE Rejecting versus Dropping Traffic When incoming traffic matches a reject filter the NSS drops the traffic and then sends a notice to the initiating system of the denial of service When incoming traffi...

Страница 100: ...ot allow access to the NSS configuration interface via a Web browser through HTTP The NSS informs the system initiating the connection about the denial of service Reject HTTPS Do not allow access to the NSS configuration interface via a Web browser through HTTPS The NSS informs the system initiating the connection about the denial of service Reject NFS Do not allow NFS filesharing access The NSS i...

Страница 101: ...er through HTTPS The NSS does not inform the system initiating the connection about the denial of service Drop NFS Do not allow NFS filesharing access The NSS does not inform the system initiating the connection about the denial of service Deleting a Network Filter To delete a network filter STEP 1 From the Manager Menu click Access Network The Network Filters page appears STEP 2 The Active Networ...

Страница 102: ...ng the ID ranges you also need to define which volume you are using to store your users home directories To set up the ID ranges and home directory location STEP 1 From the Manager Menu click Access Options The User Group Settings page appears STEP 2 Set up the following ID Ranges Local Users and Groups ID Range This ID range applies to any users or groups created from the NSS configuration interf...

Страница 103: ...ADS domain are mapped to local user or group IDs within this range It is important to set this range before you join the NTv4 or ADS domain After you join the NTv4 or ADS domain the ID range should not change STEP 3 Set the volume that you want to assign as the home directory location for your users via the Home Directory Location field The hostname must start with a letter it can be any character...

Страница 104: ...out the shares currently defined on the NSS You can add new shares by clicking the Create Share button There is a limit of 21 users and groups the combined total that you can assign access privileges to a share If you have a number of users that exceeds the limitation assign the applicable users to a group or groups and then assign the group to the share There is no limit to the number of users th...

Страница 105: ...is a limit of 21 users and groups the combined total that you can assign access privileges to a share If you have a number of users that exceeds the limitation assign the applicable users to a group or groups and then assign the group to the share There is no limit to the number of users that you can assign to an individual group NOTE You cannot create a share on a locked volume If the volume is l...

Страница 106: ...e STEP 4 From the Location field select the volume on which you want to configure the share STEP 5 Add a description or comment about the share in the Comment field This comment appears when you browse the NSS from My Network Places as the tooltip when you hover over the share or if you select the Details viewing mode This field is optional STEP 6 Click the Share Attributes options to configure th...

Страница 107: ...ed to the file have read permission The group is assigned during file creation For files created via NFS the owner can manually set the group permissions when the file is created and can edit them at a later time For files created via CIFS the group is automatically assigned as the owner s default group This group cannot be edited at a later time Group Writable Members of the group assigned to the...

Страница 108: ...te To allow NFS access to the share the NSS must also be configured to allow NFS access FTP Enable FTP access to the share Note To allow FTP access to the share the NSS must also be configured to allow FTP access STEP 10 To assign users access to the share move the users into one of the following boxes The single angled bracket or moves the selection in the direction of the bracket The double angl...

Страница 109: ... users into one of the following boxes The single angled bracket or moves the selection in the direction of the bracket The double angled bracket or moves the entire list in the direction of the bracket Read Only Groups These groups have read only access to the share Read Write Groups These groups have full read write access to the share STEP 12 Click OK ...

Страница 110: ...r Menu click Shares Shares STEP 2 Click Edit for the share you want to change The Edit Share page appears STEP 3 You can change the comment from the Comment field as required This comment appears when you browse the NSS from My Network Places as the tooltip when you hover over the share or if you select the Details viewing mode STEP 4 Change the setting for the Allow users to delete or rename othe...

Страница 111: ... following CIFS File Creation Attributes checkboxes Group Readable Members of the group assigned to the file have read only permissions The group is assigned during file creation For NFS files the owner can manually set the group permissions when the file is created and can edit them at a later time For CIFS files the group is automatically assigned as the owner s default group This group cannot b...

Страница 112: ...es The single angled bracket or moves the selection in the direction of the bracket The double angled bracket or moves the entire list in the direction of the bracket Read Only Users Usernames that appear in this list have read only access to the share Read Write Users Usernames that appear in this list have read write access to the share STEP 9 Use the last two tables in the window to set up your...

Страница 113: ...olders When you create a DFS shared folder from a share note that the user must have privileges set up to access that share on the remote system After the user accesses the DFS shared folder through the NSS DFS root share the user s rights to the DFS shared folder are those assigned to the corresponding target share on the remote system To add a DFS root directory to a share that has been set as a...

Страница 114: ...inistration Guide 106 6 The Edit Share page appears STEP 4 Click Add Shared Folder The Add Folder page appears STEP 5 Select one of the following Add a Folder to DFS Select this option to create a single DFS shared folder Fill in the following fields from the Add DFS Shared Folder table ...

Страница 115: ...it is important to understand the limitations or restrictions involved and how to best configure your system User Credentials must be Recognized by the Remote Server Re direction to a remote file server is only successful if the current user credentials i e the user s NSS username and password are recognized by the remote server Microsoft DFS MSDFS operates optimally if the PC user s login usernam...

Страница 116: ...able CIFS as you can for NFS and FTP you can allow or disallow CIFS access on a per share basis The CIFS Networking Configuration page lets you specify the length of time CIFS connections to the NSS can be idle before being automatically disconnected To set up the idle disconnect time for a CIFS connection to the NSS STEP 1 From the Manager Menu click Shares CIFS Setup The CIFS Networking Configur...

Страница 117: ...x activates the other NFS configuration options on this page STEP 3 To enable the optional asynchronous write option click Use Asynchronous Writes Asynchronous writes allow applications running on the NFS client to not block until write requests are complete on the NSS as they normally would Instead they continue immediately after committing the write This can improve performance if the NSS is hea...

Страница 118: ...FTP Access You can configure the NSS to allow the FTP protocol to be used for file transfers between the NSS over the Internet The NSS supports both FTP faster but not as secure and FTPS not as fast as FTP but more secure Note that the NSS only supports Explicit FTPS versus Implicit FTPS The NSS does not support SFTP After you globally enable FTP access you can allow or disallow FTP access on a pe...

Страница 119: ...e NSS STEP 4 To allow only file transfers using FTPS FTP over SSL click Allow only FTPS Connections make sure the Allow Anonymous Access checkbox is deselected STEP 5 To allow anonymous FTP access click Allow Anonymous Access STEP 6 If you allow anonymous access select the volume that you want to set as the anonymous root directory from the Anonymous Root Directory drop down menu STEP 7 To allow a...

Страница 120: ...hen a file is created using FTP via the following Default File Creation Attributes checkboxes Note that unlike CIFS permissions which are set on a share by share basis the FTP permissions are global to all files and folders created via FTP regardless of the share to which they are assigned Group Readable Members of the user who created the file or folder s primary group have read permission Group ...

Страница 121: ...pass through a firewall and you want to control the passive mode range Minimum port for passive mode PASV connections If your network has FTP connections that pass through a firewall set the minimum port for the port range The default is 1024 If your FTP connections do not go through a firewall leave this blank Maximum port for passive mode PASV connections Set the maximum port number for the port...

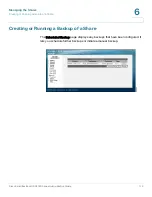
Страница 122: ...of a Share Cisco Small Business NSS2000 Series Administration Guide 114 6 Creating or Running a Backup of a Share The Scheduled Backup page displays any backups that have been configured It lets you schedule further backups or initiate a manual backup ...

Страница 123: ...cheduled Backups page appears STEP 3 Move the shares you want to include in the backup from the Available Shares list to the Shares to Backup list The single angled bracket or moves the selection in the direction of the bracket The double angled bracket or moves the entire list in the direction of the bracket STEP 4 Click one of the following to determine the destination for the backup Remote CIFS...

Страница 124: ...kly Select the day of the week on which you want the backup to occur Monthly Select the day of the month on which you want the backup to occur Make sure you select a day that is 28 or less If you select the 29th 30th or 31st day the backup does not run during months that do not contain that day STEP 8 In the Run Backup at field set up the specific time hour minute at which time the backup occurs W...

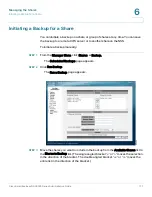
Страница 125: ...nother share on the NSS To initiate a backup manually STEP 1 From the Manager Menu click Shares Backup The Scheduled Backups page appears STEP 2 Click Run Backup The Run a Backup page appears STEP 3 Move the shares you want to include in the backup from the Available Shares list to the Shares to Backup list The single angled bracket or moves the selection in the direction of the bracket The double...

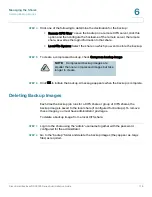
Страница 126: ...heck Compress backup image STEP 6 Click OK to initiate the backup A message appears when the backup is complete Deleting Backup Images Each time the backup job runs for a CIFS share or group of CIFS shares the backup image is saved to the local share if configured for backups To remove these images you must have administrator privileges To delete a backup image from a local CIFS share STEP 1 Login...

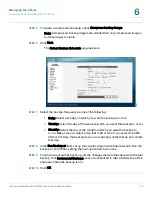
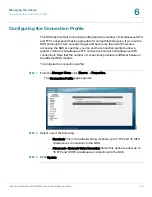
Страница 127: ...n set the connection profile to allow a greater number of simultaneous FTP connections and less simultaneous CIFS connections Note that the number of connections possible is different between the different NSS models To configure the connection profile STEP 1 From the Manager Menu click Shares Properties The Connection Profile page appears STEP 2 Select one of the following Standard This is the de...

Страница 128: ... you can do from the System Details page Rebooting or Shutting down the system See Rebooting or Shutting Down the NSS section on page121 Upgrading the firmware See Upgrading the NSS Firmware section on page122 Restoring configuration settings to factory defaults See Restoring the Factory Default Configuration section on page125 ...

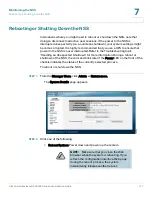
Страница 129: ...s never interrupted Refer to the Troubleshooting topic Handling an Unexpected Shutdown for more information During a reboot or shutdown of the NSS the color and blink rate of the Power LED on the front of the chassis indicates the status of the currently selected process To reboot or shut down the NSS STEP 1 From the Manager Menu click Admin Maintenance The System Details page appears STEP 2 Click...

Страница 130: ... message appears STEP 3 Click OK to continue STEP 4 You can view the Power LED on the front of the chassis during the reboot or shutdown process It changes to indicate the current status of the process When the NSS is fully powered up the Power LED is solid green When the shutdown is complete the Power LED is off You need to unlock any encrypted volumes following any reboot or power up of the NSS ...

Страница 131: ...rom the support website to your local computer STEP 3 From the Manager Menu click Admin Maintenance The System Details page appears STEP 4 In the Firmware image file field either enter the location of the firmware file or click Browse to locate it CAUTION When you upgrade the firmware avoid using a wireless connection to the NSS as wireless connections can be unreliable and cause image corruption ...

Страница 132: ...ait until the Power LED is solid green before you log back into the configuration interface If the upgrade is not successful a message appears The Power LED appears solid yellow until you click OK after which the system reboots with the current version of the firmware For more information about the behavior of the Power LED refer to the LEDs Buttons section on page123 STEP 7 After the firmware upg...

Страница 133: ...figuration interface To reset the NSS STEP 1 From the Manager Menu click Admin Maintenance STEP 2 Depending on the nature of the problem choose one of the following ways to reset the configuration Delete the entire configuration with the exception of the storage details When you reset the configuration through the configuration interface the RAID volume share and quota configuration is maintained ...

Страница 134: ...r default Link Addressing DHCP NSS Hostname nas MAC address of primary link For example nas0123456789ab Network Ports The network ports are reset to their default as described in the Network Ports topic See Configuring the Network Ports section on page 34 VLANs All configured VLANs are deleted ADS Server ADS server settings are cleared DNS DNS settings are cleared Administrator Password admin Netw...

Страница 135: ...Saving the Current Configuration You can save a copy of the NSS configuration that can be used should you need to restore the settings at a later time When you save the configuration file it saves a date stamped version of the current configuration settings to the specified volume on the NSS You can choose to save the current configuration settings to a specified volume on the NSS or you can save ...

Страница 136: ...on Manager page appears STEP 3 Select the location where the backup is saved from the Stored Configuration Location drop down menu To save the configuration file to a USB flash device select the AUX 1 port as the location You can then copy the configuration file from the USB flash device to another location on your network STEP 4 Click Update STEP 5 Click Save to save the configuration settings If...

Страница 137: ...you saved the file to the USB flash device display the Storage Status page STEP 7 Click Unmount STEP 8 When the AUX 1 LED on the chassis is off you can safely remove the unmounted USB flash device from the AUX 1 port NOTE Removing the USB flash device in a mounted state means that you risk causing file or filesystem corruption ...

Страница 138: ...Configuration The Configuration Manager page appears STEP 2 If the configuration file is not located on a volume in the NSS copy it onto a USB flash device and then insert the USB flash device into the AUX 1 port STEP 3 From the Stored Configuration Location field select the location of the saved configuration file STEP 4 Click Update NOTE If you restore a configuration file that was saved in an o...

Страница 139: ...e configuration backup does not decrease the security of the encryption because this same header would be available to any attacker with physical access to the system You can choose to restore these keys or not depending on the reason you are doing the restore If the encryption header on an encrypted volume becomes corrupted restoring the header may allow you to unlock the volume Also if you have ...

Страница 140: ...d the file to the USB flash device display the Storage Status page STEP 12 Click Unmount STEP 13 When the AUX 1 LED on the back of the chassis is off you can safely remove the unmounted USB flash device from the AUX 1 port NOTE Removing the USB flash device in a mounted state means that you risk causing file or filesystem corruption ...

Страница 141: ...lete a configuration file To delete a configuration file STEP 1 From the Manager Menu click Admin Configuration The Configuration Manager page appears STEP 2 If the configuration file is located in a location on your network install it onto a USB flash device and then insert the USB flash device into the AUX 1 port on the back of the NSS chassis STEP 3 Click Restore A list of saved configuration f...

Страница 142: ...manually refresh the page by reselecting the NTP Configuration page from the Manager Menu If the synchronization failed the following occurs An error message stating Could not synchronize with NTP server s appears in the NTP Configuration page The system alert message Could not synchronize with NTP server s appears in the System Status page If the SNMP traps are configured an SNMP trap message is ...

Страница 143: ...can be located on your network or can be public NTP servers located on the Internet Skip to step 6 STEP 4 Click Manually STEP 5 Enter the date and time in the Date and Time fields STEP 6 Select your time zone from the Time Zone drop down menu STEP 7 Click Update Configuring the Email Alerts for a Recipient You can create a list of users that will receive email alerts when changes occur to the NSS ...

Страница 144: ...efine the following fields in the Alert Recipients Types area Email Address Enter the user s email address Disk Check this option to notify the user when a change occurs to the disks installed in the NSS RAID Check this option to notify the user when a change occurs to a RAID array Quota Check this option to notify the user when a change occurs to a quota Backup Check this option to notify the use...

Страница 145: ...ecipient After you define a recipient to receive email alerts you can only edit the alert profile by first deleting the existing profile and then recreating it To edit the email alerts STEP 1 From the Manager Menu click Admin Email Alerts The Email Alerts page appears STEP 2 Click Delete for the applicable email recipient STEP 3 Recreate the email recipient STEP 4 Click Add Click Test All to send ...

Страница 146: ... To stop sending all email alerts to a user you can delete the profile at any time This is also one of the steps you must take if you want to make changes to the types of email alerts the user receives To delete the email alerts STEP 1 From the Manager Menu click Admin Email Alerts The Email Alerts page appears STEP 2 Click Delete for the applicable email recipient ...

Страница 147: ...he MIB to your management station For more information on installing and integrating the NSS MIB into your management station refer to the management station documentation STEP 4 Enter the IP address or hostname for the management station to which you want to send the alerts STEP 5 Select the checkbox for each type of trap sink for which you want to send alerts to the SNMP server You can set up an...

Страница 148: ... completes Power When there is a change in the state of the UPS Monitor When there is an event tracked through the hardware monitor i e voltages fans and temperatures that falls out of specification STEP 6 Click Add The management station appears in the Existing SNMP Trapsinks list STEP 7 Repeat steps 4 through 6 for each SNMP server address to which you want to send alerts STEP 8 To send a test a...

Страница 149: ...essing the Reset button on the NSS chassis and restoring the factory defaults The default password is admin To set up the administrator password STEP 1 From the Manager Menu click Admin Password The Admin Password Configuration page appears STEP 2 Enter the current password in the Current Password field STEP 3 Enter the new password in the New Password field STEP 4 Re enter the new password in the...

Страница 150: ...ss to a hidden share called storage This share gives access to all data on the system including user home directories As the administrator you can read write and delete all files and folders regardless of who owns them For this reason make sure you change the default administrator password From the My Computer window type the NSS hostname or IP address in the Address bar Where the hostname refers ...

Страница 151: ...IP address in the Address bar Where the hostname refers to your NSS hostname and IP address refers to your NSS IP address For example NAS0123456789ab or 192 168 1 2 Browse for the NSS from the My Network Places window Map the NSS to a network drive The Login window appears STEP 2 If your user profile is set up locally that is through the NSS configuration interface and the NSS is part of a Windows...

Страница 152: ...ess the NSS storage using FTP STEP 1 From your FTP client application connect to the NSS Enter the IP address or hostname of the NSS For more information about using your FTP client application refer to its documentation STEP 2 Enter your username and password when prompted by your FTP client When your FTP client has logged in a list of accessible shares appears as individual directories STEP 3 De...

Страница 153: ...o a domain you need to enter the following NSS hostname user name If the NSS is not joined to a domain just enter the username STEP 5 Depending on your privileges to the share you can begin using the NSS storage Mac Users Accessing Storage through FTP Mac users who have a user profile can access any shares to which they have privileges on the NSS storage using FTP Note that when using FTP to acces...

Страница 154: ...ed In order for NFS access privileges to work correctly you must have the NSS joined to an NIS domain STEP 1 Log into the client system as root STEP 2 Create a mount point directory for the mount if you do not already have one e g mkdir mnt nas_share1 STEP 3 Mount the NFS share by typing mount v t nfs o nfsvers 3 rsize 32768 wsize 32768 IP address hostname mount point path on NSS mount point path ...

Страница 155: ...he share To access the NSS storage using FTP STEP 1 Open your FTP client application STEP 2 Enter the NSS hostname IP address STEP 3 Enter any other required settings If using FTPS ensure that the client is set to use Explicit FTPS For more help using the FTP client refer to the FTP client documentation STEP 4 Enter your username and password when prompted by the FTP client STEP 5 Depending on you...

Страница 156: ... to a blinking green This condition also occurs if the upgrade of the firmware process fails although in this case the LED remains in a solid yellow condition until the user clicks OK from the System Details page following an unsuccessful upload After the user clicks OK the system reboots using the current version of the firmware Blinking Yellow The network configuration factory defaults are being...

Страница 157: ...ail A fan has stalled The system temperature is above the maximum threshold The temperature of a disk drive is above the maximum threshold A voltage rail is above or below specification The NSS is running on UPS due to a mains power failure Solid Red There is a critical system failure The system could not boot due to a corrupted firmware image In this case contact your support representative Off T...

Страница 158: ...AN link is detected Hard Disk Drive LEDs Front Panel The ACT and Error LEDs associated with each of the installed disk drives indicate disk drive activity or an error condition The various states of the ACT LED indicates the drive activity Solid Green The disk drive is configured but is currently idle Flicker Green The disk drive is configured active and not rebuilding Flickers off with activity B...

Страница 159: ...the data on a JBOD if there are volumes that do not span across the failed disk Otherwise you must rebuild the JBOD after you replace the disk If an array with no redundancy has a failed disk drive you must delete the array replace the disk drive and then recreate the array To add a disk to a degraded array STEP 1 If you are replacing a disk remove the failed drive from the NSS and install the rep...

Страница 160: ...ays table click Edit for the applicable RAID array The RAID Configuration page appears STEP 4 Click Add to add the disk drive it to the array The RAID array is rebuilt for the added or changed redundant disk drive While the rebuild continues the array can still be used After the rebuild process completes the disk becomes part of the redundant storage ...

Страница 161: ...w array STEP 2 Reboot the NSS Make sure you do a safe reboot using the Reboot function from the System Details page See Rebooting or Shutting Down the NSS section on page121 STEP 3 When the system reboots log back into the configuration interface STEP 4 From the Manager Menu click Storage RAID The RAID page appears The failed array appears with a status of Stopped STEP 5 Click Delete The disk driv...

Страница 162: ...Problems can occur with the firmware under the following conditions The firmware must be upgraded from an external source to the NSS You cannot install firmware that is saved to a disk on the NSS If a copy of the firmware is saved to a disk on the NSS copy it to another location such as onto a PC before you attempt to upgrade it The firmware must be compatible with the NSS platform The firmware mu...

Страница 163: ...rt storage from System A STEP 2 Import storage from System A to System B STEP 3 System B crashes and cannot be recovered STEP 4 System A is bound to System B and rejects any new bind requests from other systems Resolution To resolve the problem STEP 1 Unexport the bound storage system in our example System A STEP 2 Re export the storage system The storage system is now available to be used by anot...

Страница 164: ...e Unable to Create a Share or Quota for a Volume Problem Scenario You cannot create a quota or share When you attempt to create a share the volume does not appear in the Location field When you try to create a quota the quota is not successfully added for the volume Resolution The problem is likely caused by the volume being locked An encrypted volume is automatically locked whenever the NSS is re...

Страница 165: ...s page to ensure they are correctly defined STEP 3 Close the FTP Setup page STEP 4 From the Manager Menu click Shares Shares STEP 5 Click Edit for the applicable share STEP 6 Make sure the FTP protocol is selected and then click Update STEP 7 From the Manager Menu click Access Network STEP 8 Make sure there are no filters set up to drop or reject FTP access for the applicable IP or MAC addresses C...

Страница 166: ...omatically STEP 4 Set the Amount of disk space to use to 1 MB STEP 5 Click OK Handling an Unexpected Unclean Shutdown The best way to shut down the NSS is to use the Shut Down command from the System Details page on the configuration interface or by using the Power button on the front of the chassis If the power to the NSS is unexpectedly disrupted causing the NSS to do an unclean shutdown the sys...

Страница 167: ...m setting STEP 2 If you attempt either of the above unsuccessfully restore the configuration settings back to the factory defaults and then either restore the configuration settings from a USB flash device backup or manually edit the settings Boosting the Performance of NFS Transfers You can substantially improve the NFS performance by increasing the size of read and write buffers on the client Th...

Страница 168: ...ing a means of centrally organizing managing and controlling access to these resources AES Advanced Encryption Standard A block cipher adopted as an encryption standard by the U S government Aggregation The act of collecting something together In Network Storage Aggregation you can put together pieces of networked storage into one logical storage unit B Bonjour Apple s version of the Zeroconf Used...

Страница 169: ...ol Software that dynamically assigns IP addresses to devices on a TCP IP network DHCP software typically runs in servers and is also found in network devices such as ISDN routers and modem routers that allow multiple users access to the Internet Newer DHCP servers dynamically update the DNS servers after making assignments DiffServ Differentiated Services A scalable IP Layer 3 method for classifyi...

Страница 170: ... a computer connected to the Internet For example www google com The www refers to the connection to the World Wide Web the middle portion of a domain name is usually the name of the company that owns the computer in this case Google the final portion of a domain name tells you what kind of site is served by this machine in this case com means this is a commercial site Other categories include net...

Страница 171: ...ess in itself and has to be repeated regularly to keep the FAT filesystem clean To overcome the volume size limit of FAT16 while still allowing DOS real mode code to handle the format without unnecessarily reducing the available conventional memory Microsoft decided to implement a newer generation of FAT known as FAT32 with cluster counts held in a 32 bit field of which 28 bits are currently used ...

Страница 172: ...y to transfer files over the Internet The NSS supports Explicit FTPS versus Implicit FTPS Explicit FTPS is named for the command issued to indicate that TLS security should be used This is the preferred method according to the RFC defining FTP over TLS The client connects to the server port 21 and starts an unencrypted FTP session as normal but requests that TLS security be used and performs the a...

Страница 173: ... IEEE standard that provides quality of service QoS in 802 based networks at the MAC level 802 1p uses three bits defined in 802 1q to allow switches to reorder packets based on priority level traffic class expediting and dynamic multicast filtering It also defines the Generic Attributes Registration Protocol GARP and the GARP VLAN Registration Protocol GVRP GARP lets client stations request membe...

Страница 174: ...o recovers unsaved data and stores it in the location where it would have gone if the computer had not crashed This type of system is beneficial for mission critical systems A physical journal logs verbatim copies of blocks that will be written later for example ext3 as compared with a logical journal that logs metadata changes in a special more compact format Logical journals can improve performa...

Страница 175: ...od drive RAID level 1 uses mirroring MTBF Mean Time Between Failures A measurement of hardware product reliability typically indicated in thousands tens of thousands or hundreds of thousands of operational hours between failures It is most often defined as the average time between failures MTBF can be derived from extensive and time intensive testing of the working product calculated from actual p...

Страница 176: ...a and the use of advanced data structures to improve performance reliability and disk space utilization plus additional extensions such as security access control lists and filesystem journaling P Parity A way to attach additional binary digits to data blocks that lets a NAS controller monitor if data has been lost or overwritten after it has been moved from one place to another in a storage array...

Страница 177: ...ide 169 B capacity The types of RAID levels and combinations of these levels is constantly changing as new methods and technologies continue to improve Currently the NSS offers the choice of five different RAID levels including JBOD with two options for adding a hot spare to an existing RAID level ...

Страница 178: ... transfer of data to and from a hard disk Serial ATA is a serial link a single cable with a minimum of four wires creates a point to point connection between devices Transfer rates for Serial ATA begin at 150 MBps One of the main design advantages of Serial ATA is that the thinner serial cables facilitate more efficient airflow inside a form factor and also allow for smaller chassis designs The ID...

Страница 179: ... predict the future failure of hard disk drives The NSS uses the advanced diagnostics within the S M A R T system to monitor the internal operations of a drive It can then send an early warning for about 70 of all hard drive errors such as disk performance faulty sectors recalibration CRC errors drive spin up time drive heads distance between the heads and the disk platters drive temperature and c...

Страница 180: ...om a storage server device to an accessing computer SSH uses encryption and authentication codes to establish a secure communication channel It is most often used to log into a remote computer or other device to execute commands SSL Secure Sockets Layer SSL is a protocol used to transmit files over the Internet using a private key to encrypt the data SSL was originally developed by Netscape and is...

Страница 181: ...kets Layer SSL 3 0 protocol developed by Netscape TLS uses digital certificates to authenticate the user and the network The TLS client uses the public key from the server to encrypt a random number and send it back to the server The random number combined with additional random numbers previously sent to each other is used to generate a secret session key to encrypt the subsequent message exchang...

Страница 182: ...while larger systems have enough battery for several hours V Virtualization The creation of a virtual rather than actual version of something such as an operating system a server a storage device or network resources The Cisco NSS refers to virtualization as a way of aggregating storage between devices Virtualized storage occurs when storage is exported to the network as a disk drive or an array a...

Страница 183: ...ebian Linux distributions all offer XFS as a choice of filesystem FreeBSD gained read only support for XFS in December 2005 and in June 2006 experimental write support was introduced to FreeBSD 7 0 CURRENT Z Zeroconf An IETF Internet Engineering Task Force specification that lets IP network devices automatically configure themselves and be discovered without manual intervention Zeroconf can also m...

Страница 184: ...Dimensions 3 23 x 11 38 x 9 21 82 x 289 x 234 mm Unit Weight 7 28 lb 3 3 kg Power 60W 12V external AC power Certificatio n FCC Class B Operating Temp 41 to 104 F 5 to 40 C Storage Temp 4 to 158 F 20 to 70 C Operating Humidity 10 to 90 Relative non condensing Storage Humidity 10 to 95 Relative non condensing ...

Страница 185: ...s product is available on Cisco com at the following location www cisco com go smallbiz Warranty Warranty information that applies to this product is available on Cisco com at the following location www cisco com go smallbiz End User License Agreement EULA Licensing information that applies to this product is available on Cisco com at the following location www cisco com go smallbiz ...

Страница 186: ...E Cisco Small Business NSS2000 Series Administration Guide 178 Support Contacts Support contact information for this product is available on Cisco com at the following location www cisco com go smallbiz ...

Отзывы: