background image

 
7. Playback 

48 

Chauvet® ShowXpress™ V6.22 

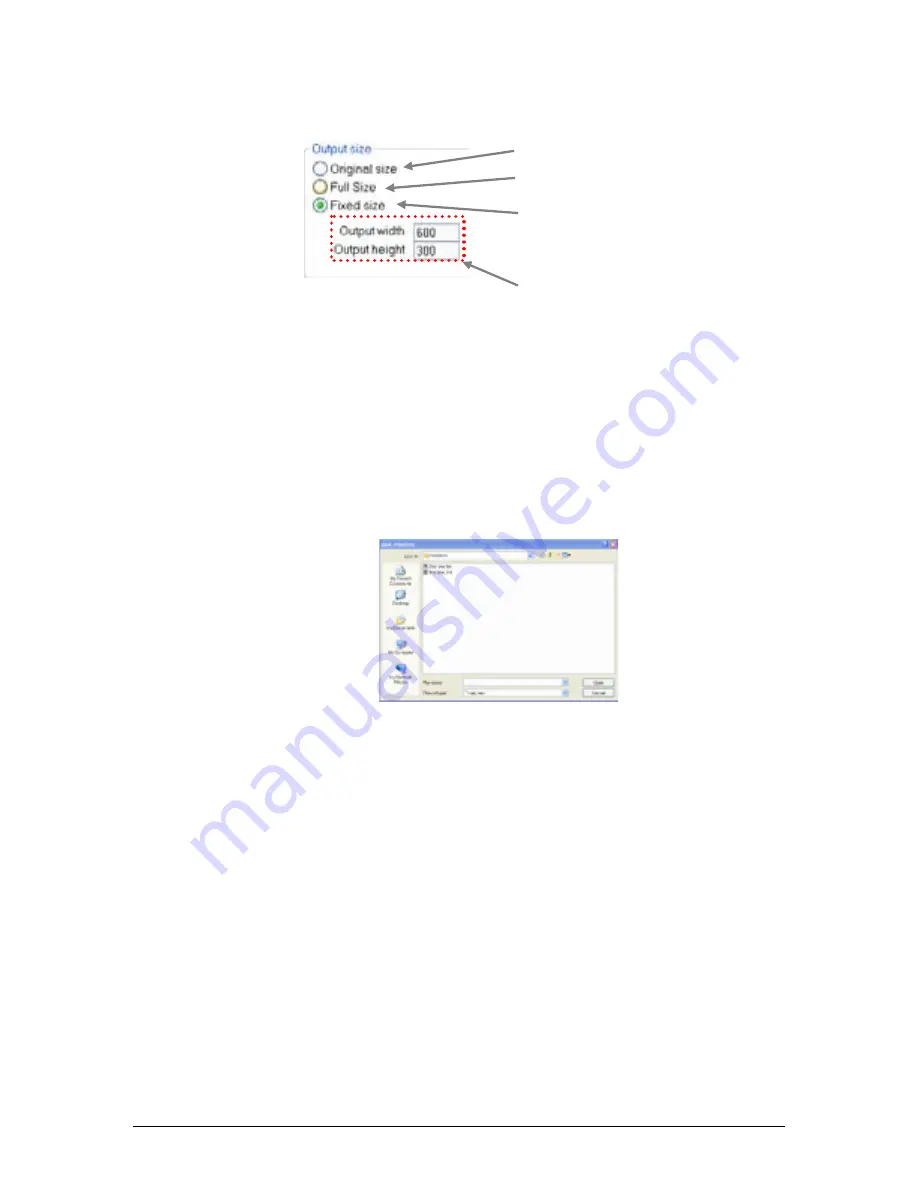
Output Size 

This section provides options on how to display the 

video window

, as well as the video 

size

.


Adding Audio Files to Live-Timeline 

Live-Timeline may be used to trigger playback of audio files. This is useful when 

synchronizing to the light show. 


The following file formats are supported for audio files: 


Wav, mp3, ogg, wma 
 
1. 

Right-click in the files area in the Live-Timeline Screen to bring up the sun-
menu. 

2. Left-click 

Add multimedia file

”. 

5. 

A sub-window will appear. Use this window to select the appropriate audio 
file. 


6. Press 

Open

” to add the file to the timeline. 


No border: 

removes the window border and title bar


Always on top: 

forces the ScreenControl window 

to remain on top of all other windows 

Force Position: 

Disables the manual window 

positioning and assigns a default X and Y position 

Screen Mode: 

Select which display to appear on 

       (this is a full screen mode) 

Содержание XPress-100

Страница 1: ...3000 N 29th Ct Hollywood FL 33020 U S A 800 762 1084 954 929 1115 FAX 954 929 5560 www chauvetlighting com Software Version 6 22 beta1 Rev 02f User Manual ...

Страница 2: ...3D VISUALIZATION 10 MINIMUM HARDWARE REQUIREMENTS WITH 3D VISUALIZATION 10 SOFTWARE INSTALLATION WINDOWS XP VISTA 7 10 HARDWARE DRIVER INSTALLATION WINDOWS VISTA 7 13 DRIVER INSTALLATION WINDOWS XP 13 DRIVER INSTALLATION MAC OSX 15 DRIVER REINSTALLATION WINDOWS VISTA 7 15 DRIVER REINSTALLATION WINDOWS XP 15 INTERFACE TROUBLESHOOTING 15 5 OVERVIEW 17 CONTROL BOARD 17 Notification Area 17 SETUP 17 P...

Страница 3: ...tton 36 No loop button 37 LIVE BUTTONS PAGE PLAYBACK MODIFICATIONS 37 Chase play 37 Random play 37 Solo play 37 LIVE BUTTON SCREEN PLAYBACK 38 Play Pause 38 Speed Button 39 Sound Triggering Auto BPM 40 Manual BPM 41 Manual Speed 41 Freeze 42 Startup Properties 42 3D VIEW 43 X and Y viewing angles 43 Position of the view 43 Size of the stage 43 Operation 43 Stage Setting Sub Screen 44 Wall Textures...

Страница 4: ...N 55 EDITOR SCREEN 55 LIVE BUTTONS 55 LIVE TIMELINE 55 2D VIEW 55 SCREENCONTROL VIDEO PLAYBACK WINDOW FROM THE LIVE SCREEN 55 11 XPRESS 512 PLUS STANDALONE TRIGGERING 56 MINI DIN TRIGGERING 56 IR WIRELESS TRIGGERING 57 Proprietary CHAUVET Remote 57 Operation 57 Generic Remote 57 12 UPDATING THE INTERFACE FIRMWARE 58 13 APPENDIX 59 DMX PRIMER 59 DATA CABLING 59 DMX Data Cable 59 Cable Connectors 60...

Страница 5: ...f information from the regular text CONVENTION MEANING 3D View A main screen accessed through the control board Menu A sub screen accessed through a main screen 1 512 A range of values 50 60 A set of values of which only one can be chosen Settings A menu option not to be modified for example showing the operating mode current status MENU Settings A sequence of menu options to be followed ON A valu...

Страница 6: ...r scenes by mouse click keyboard date and time manual BPM sound MIDI and external DMX signal triggering coming soon Playback timelines with lighting audio and video with a single click Stand alone Select individual scenes to upload to the X Factor Xpress Plus Xpress 512 or Xpress 512 Plus interfaces Stand alone scenes automatically start when computer is removed or powered OFF Simultaneous playbac...

Страница 7: ...CTION 7 Chauvet ShowXpress V6 22 Product Overview Xpress 100 Product Overview Xpress 512 PC Link LED Indicator Power Indicator DMX Out USB Connection DMX Out Protective Cover USB Connection PC Link LED Indicator ...

Страница 8: ...owXpress V6 22 Product Overview Xpress 512 Plus IR Receiver IR Data Indicator PC Link LED Indicator DMX Out External IR Receiver Power Indicator Mini DIN Scene Trigger USB Connection Security Location Power EXT USB External Power ...

Страница 9: ...t a computer with speed control and layering Unlimited shows when using a computer Internal calendar for date time trigger without a computer Power Connection Xpress 100 This interface runs on USB bus power During operation on a computer it will receive its power from the USB connection Xpress 512 This interface runs on USB bus power During operation on a computer it will receive its power from th...

Страница 10: ...oes not take into account multimedia operation on machine Software Installation Windows XP Vista 7 There are two options for obtaining the installation file The file ships on the CD that arrives in the box when purchasing an interface from Chauvet Or the file may be downloaded from the internet This is recommended to be sure that you are using the latest version of the software The computer will d...

Страница 11: ...ocation is C Program Files ShowXpress and usually does not need to be altered 6 Click NEXT to continue 7 Select a name and location for Windows to place the Start Menu folder 8 Click NEXT to continue 9 Check the box titled Create a desktop icon if you want a folder to be created on your desktop This action cannot be undone so it may be better to create the folder and delete it later if desired ...

Страница 12: ...owXpress V6 22 10 Click NEXT to continue 11 Confirm the settings and then click INSTALL to continue 12 After the installation completes click FINISH to confirm You must be logged in as Administrator to install the software ...

Страница 13: ...llation This may take a few minutes to complete 4 A message indicating that the publisher cannot be verified may appear simply click Install this driver software anyway to continue with the installation 5 A message will appear indicating that the driver installation was successful and the stand alone LED will turn off X Factor and PC Link will turn on Xpress Plus Xpress 512 Xpress 512 Plus indicat...

Страница 14: ... select the bubble that reads Install the software automatically recommended 6 When the following window appears prompting that the driver did not pass the Windows Logo testing compatibility simply click CONTINUE ANYWAY to continue the installation 7 When it s complete click FINISH and the window will disappear and a popup window will indicate that the driver installation was successful ...

Страница 15: ...scan for hardware changes also on the top menu bar to have the computer auto detect any new hard ware 5 The computer will automatically scan and install the necessary drivers for this device Driver Reinstallation Windows XP If the driver installation fails or you need to reinstall the driver for any reason the driver can be installed manually Please follow the instructions below 1 Click START CONT...

Страница 16: ...all associated drivers for the interface 4 Click scan for hardware changes also on the top menu bar to have the computer auto detect any new hardware 5 Repeat the same steps from Hardware Installation Windows XP to install the driver again 6 A popup balloon in the lower right side of the monitor will indicate that the driver installation was successful and the device is ready to use ...

Страница 17: ...D View attributes This does not affect the programming for the product connected It does affect the appearance of the fixture in the 3D View Fixture Channels The Fixture Channels displays the selected fixture s channels When a fixture is selected the channels may be modified cut copy paste insert and add Channel Levels The Channel Levels displays the selected fixture s channel levels When a fixtur...

Страница 18: ...ure s channel levels When a channel is selected the levels may be modified cut insert and add Toolbar Area New Insert Save Save as Delete Addressed Fixtures Personal Fixtures Fixture 3D View Settings Personal Fixtures Channel Values Fixture Channels Universe Area Select the universe to modify up to 6 ...

Страница 19: ...election 2D View The 2D View accesses the following functions Direct fixture selection in pictorial form Selecting a fixture here also selects it in the Fixture Fader Area Fixture Fader Area The Fixture Fader Area accesses the following functions Direct Attribute manipulation in fader form Group assignment and callback for more convenient programming Step Area Play Scene 3D On Off DMX On Off Pan T...

Страница 20: ...Trigger method modification Options Area The Options Area accesses the following controls Play Pause button Current BPM also capable of manual input Tap Sync press multiple times to modify current BPM Freeze freezes entire DMX output of the Live screen to the current step DMX On Off double as a blackout function 3D View On Off enables playback in the 3D View screen Scene Area Board Selection Bar O...

Страница 21: ...rrent pause location current progress through the show Zoom Control The Zoom Control modifies the following attribute Modify the resolution of the timeline This is useful when precision is important Timelines The Timelines displays the following attributes Layout of each individual timeline including the Video Picture Audio and 2 10 LightScene timelines Location of STOP and OFF markers Location of...

Страница 22: ...s where new DMX input assignments may be created The following attributes may be altered in this area DMX input address Priority type DMX input software HTP Output assignment s The DMX input is currently only available for the first universe DMX MIDI Selection Input Creation Area Current Inputs ...

Страница 23: ...5 Overview 23 Chauvet ShowXpress V6 22 Patch MIDI Selected Device Live Transmission DMX MIDI Selection Device Selection ...

Страница 24: ...D PAR 64 Tri This fixture has two operating modes We will be using the 3 channel operating mode The fixture has the following channels red green and blue Please see the steps below for an example in designing a fixture profile 1 Press New Fixture 2 In the screen that appears enter a name for the fixture profile LED PAR 64 Tri Press OK The name should now appear in Personal Fixtures 3 In the Channe...

Страница 25: ...ch 1 Switch the page tab in the Setup screen from fixtures setting to dmx addressing 2 Right click on the LED PAR 64 Tri to highlight it and bring up the option Add fixture to the dmx list Click on this option 3 The DMX addressing setting sub menu will appear Let s start this fixture off at DMX address 001 We will set the clone to 4 This will also be on universe 1 It is also necessary to set a nam...

Страница 26: ... be used to achieve a given address For Example if you type an address of 100 into the Setup screen for a fixture s DMX address the software will display an image showing the following DMX Addressing Setting This shows that DIP switches 3 6 and 7 must be turned to the ON position to achieve an address of 100 DIP Switch Calculator Fixture Name 3D Fixture Clone Reverse Pan Reverse Tilt DMX Address ...

Страница 27: ... name and time in the Step Area 6 Add a new step by selecting the appropriate button in the Step Area 7 Bring the red fader channel down to 000 8 Bring the green fader channel to full 255 9 Change the transition type below the green to smooth 10 Adjust the name and time in the Step Area 11 Add a new step by selecting the appropriate button in the Step Area 12 Bring the green channel down to 000 13...

Страница 28: ...ver Images size There are 3 options Select the desired option and the change is complete Modifying the Background The background of the 2D View may be modified to any custom JPG BMP or PNG image The user may wish to take a digital photo of the stage and then move the fixture images to overlay the correct location With this option available it is a very fast process Please follow the instructions b...

Страница 29: ...enerator scene has been created it may be saved for later access and editing Toolbar Area Toolbar Area Edit Area this area contains the controls for the dimming curves and fan effect attributes Fixture Attribute Area this area is where the fixture attributes are activated deactivated in the current generator scene Create New Project Open Saved Project Save Project As Save Scene Delete Current Scen...

Страница 30: ...tribute to be modified in the current scene This is done by checking the box next to the attribute name This does not need to be done in order 5 When you select an attribute the Edit Area will modify the attribute for that particular attribute aside from the other attributes in the fixture There are preset dimming curves available A user may also create custom dimming curves and save them to the c...

Страница 31: ... if desired as desired by the user it is necessary to generate the scene into the Editor Screen before being able to use it in the Live Screen for playback This is done by using the generate button located in the 12 Upon generating the scene in the above step the scene will transport into the Editor Screen showing each individual step that has been created in the generator screen Further editing i...

Страница 32: ...cal representation of the dimming curve that may be altered Use the mouse to modify the curve Working with Lines The waveform will be gradual and appear as below Working with Points The waveform will be square and appear as below Dimming Time 0 DMX value of 000 100 DMX value of 255 Start time 0 End time 100 Points ...

Страница 33: ... or more fixtures must be selected in order to enable access to the Generator Screen Fixtures may be selected in the 2D_View section of the Editor Screen It is possible to select multiple fixtures by holding down the CTRL APPLE key Groups may be used to select a fixture Selecting Fixtures by Groups When a group has been created simply press the shortcut key to highlight select it This will only wo...

Страница 34: ...oup area to bring up the menu Select Add new group 6 A sub window will appear Type a name for the group here 7 Press OK 8 Another sub window will appear Type in a single character and this is the group selection shortcut The available keyboard shortcuts are a z A Z It is possible to make 52 total groups ...

Страница 35: ... created in the Editor section on Creating a Scene 1 Open the Live screen from the Control Board 2 Right click the Board Selection Bar and select Add Light Scene See fig L a 3 Select RGB Color Fade from the file explorer window that appears and press Open 4 The Scene will now appear in the Live screen as a single button completely filling up the empty space See fig L c 5 Right click on the Scene b...

Страница 36: ...be triggered And this scene will run for as long as this key is held down The moment that this key is released the scene will stop playing This is momentary Preset button With this feature you may take a scene that has multiple steps and play only a single step back This is done by using the right click menu for step that appears after enabling this function on a scene For the following example we...

Страница 37: ... 1 Using the Editor screen create a scene for the LED PAR 64 Tri that has the following parameters a 3 second time b Smooth transition c 1 step 2 Using the Editor screen create 2 more scenes with the above parameters but use green for one and then blue for the other 3 Using the Live screen right click on the Board Selection Bar to add a new page 4 Title the new page as Colors Press Save 5 Add the ...

Страница 38: ...ction on a scene that is not currently running it will turn it on This function is a 2 step process The first step prepares the execution and the second step completes the execution Please follow the steps below for this procedure 1 Press Play Pause See fig Pp a 2 Select a scene The symbol will appear on the scene button This is the preparation See fig Pp b 3 Press Play Pause a second time This is...

Страница 39: ... in Live buttons may function on different speeds Auto BPM Manual BPM and Manual Speed To access the Speed button window follow the steps below 1 Open Live buttons from the Control Board 2 Right click on any light scene A sub menu will appear 3 Select Speed button ...

Страница 40: ...g 8 Refer to the volume controls at the bottom of the window and place a check mark next to the audio input you wish to trigger from in Live buttons 9 Press OK 10 In the Master Volume window that appears adjust the properties for the volume input Deselect the mute option adjust the balance and volume settings 11 Open Live buttons from the Control Board 12 Right click on the scene button and select...

Страница 41: ...is a MANUAL setting which will NOT synchronize with an external source BPM effects the time to switch to the next step in a scene Available BPM 10 500 Manual Speed This mode refers to the manual adjustment in the speed of a program This may be set between 25 and 400 Please see the steps below to access this setting 6 Open Live buttons from the Control Board 7 Right click on the scene button and se...

Страница 42: ...erties There are five different options available that may be set when starting up the Live Buttons screen These settings are saved even after closing the program for future use Live screen is maximized at startup The normal window resizing options are removed including the main top bar Automatically turn the DMX ON when opening the Live Screen Disable right click options within the Live Screen Pa...

Страница 43: ...the 3D View screen 3 While holding the mouse button drag the mouse in the desired direction to adjust the viewing position Size of the stage This may be adjusted within the 3D View screen This is the zoom To adjust this please see the following steps 1 Left click any open space in the 3D View screen 2 While holding SHIFT use the wheel on the mouse in the desired direction to adjust the viewing pos...

Страница 44: ...ures Wall Textures The 3D View installs with several custom textures to choose from These are accessible by using the drop down menu in the texture area After selecting a texture and turning the texture ON the 3D View screen will immediately display the texture on the applicable wall Custom textures must adhere to the following parameters in the file formatting PNG BMP and JPG Stage Settings Textu...

Страница 45: ...ngs 7 The window will open 8 Select a fixture form the Fixture Selection Area It will be highlighted in the 3D View Screen so that it is possible to see the results of any change in settings immediately 9 Select an attribute to modify from the Attribute Selection Area 10 Use the Value Setting Area to adjust the setting s This may be done by entering the value in directly with the keyboard or by us...

Страница 46: ...e right click the Board Selection Bar in the Live Screen to bring up the sub menu 2 Select Add timeline with the left mouse button 3 A sub window will appear Use this window to select the appropriate timeline 4 Select Open The right click sub menu options for Timeline buttons are limited in the Live Screen Timeline buttons in the Live Screen will appear with a unique background as displayed below ...

Страница 47: ...this window to select the appropriate video picture file 4 Press Open to add the file to the timeline Screen Control Properties Screen Control is the sub window that is used for video and photo playback Video output This section provides options on where to display the video as well as the video location You may also choose between a windowed mode or a full screen mode Output size Miscellaneous Vi...

Страница 48: ...mp3 ogg wma 1 Right click in the files area in the Live Timeline Screen to bring up the sun menu 2 Left click Add multimedia file 5 A sub window will appear Use this window to select the appropriate audio file 6 Press Open to add the file to the timeline No border removes the window border and title bar Always on top forces the ScreenControl window to remain on top of all other windows Force Posit...

Страница 49: ...ming the Rows The rows in Live Timeline may be modified to display custom titles Please see the steps below for further details The following steps assume the Live Timeline screen is already open and operating 1 Move the mouse over any of the timelines This includes Video Picture Audio and LightScene rows 2 Right click to bring up the sub menu 3 This will cause the sub window Timeline name to open...

Страница 50: ...the timeline it is possible to stop a LightScene or multimedia file on an individual row before it has completed For this step use the OFF tool 1 Right click on the row to which you want to add the OFF tool A sub menu will appear 2 Select Add OFF tool 3 After the tool has been added it may be repositioned by left clicking holding and dragging with the mouse Then remove the mouse button to release ...

Страница 51: ... for each different type of file in timeline Video Picture Timeline Audio Timeline LightScene Timeline Turn off sound playback for the file disables volume control Continuous Loop excluding STOP tool Press to close window and save setting s Option not available for Audio Timeline Continuous Loop excluding STOP tool Press to close window and save setting s Auto beats per minute unchanged Continuous...

Страница 52: ...in standalone mode when powered and not running ShowXpress software Xpress 512 Plus 1 From the Control Board left click the Upload icon 2 The Universe Selection sub screen will appear Choose the universe See fig Us a 3 The Xpress 512 Plus upload screen will appear The layout and location of features may be found in the illustration Make the desired upload options 4 Locate the desired scene for the...

Страница 53: ...SCREEN 53 Chauvet ShowXpress V6 22 Universe Selection Screen fig Us a Xpress 512 Plus Upload Screen Button Setting Area Interface Clock Update Button Delete Button Button Setting Area Upload to Interface Button ...

Страница 54: ... backup one show at a time Therefore select the show to backup in the Saved Shows Area 3 Use the Folder Location Selection Area to choose a location to save the show to 4 Press the Export A screen will appear confirming a successful backup Import The show may be restored by using the Import a Light Show Screen This screen is accessed directly from the Control Board Please see the steps below for t...

Страница 55: ...tor Screen CRTL APPLE N Create New scene CRTL APPLE I Import Saved scene CRTL APPLE S Save Current scene SPACEBAR Play Stop Live Buttons ENTER Freeze SPACE BAR Manual BPM 3 times to activate Live Timeline LEFT RIGHT Move red marker ENTER Play from red marker SPACE Play Pause PAGE UP DOWN Scroll horizontal HOME END Move to beginning end Zoom in out 2D View CRTL APPLE A Select all fixtures from same...

Страница 56: ...dalone operation These are accessed through the Mini DIN connector on the interface A Ground Fault Interrupt system is used for the triggering Please see the wiring configuration below Pin 1 Scene 1 Pin 2 Scene 2 Pin 3 Scene 3 Pin 4 Scene 4 Pin 5 Not Used Pin 6 Ground All buttons are push button type normal open This method will only trigger the first 4 scenes that are loaded into the interface Wi...

Страница 57: ...oprietary remote shown below The model number for a replacement battery is CR2025 standard or CR2032 high capacity Operation Please see the following notes on operation The Normal Speed button disables playback speed modification Playback Speed Modification affects ALL of the programs proportionally It is NOT possible to modify individual programs Generic Remote An alternative to using the CHAUVET...

Страница 58: ...install the necessary hardware drivers 4 Double click the firmware update executable file 5 Select press this button to upload firmware xxx 6 A confirmation message will appear indicating that the upload was successful When you see this message wait for a period of 5 seconds 7 After waiting for the period above disconnect the interface from the computer remove the USB cable If you disconnect the i...

Страница 59: ...fixture connects to the DATA IN of the next fixture The order in which the fixtures are connected is not important and has no effect on how a controller communicates to each fixture Use an order that provides for the easiest and most direct cabling Connect fixtures using shielded two conductor twisted pair cable with three pin XLR male to female connectors The shield connection is pin 1 while pin ...

Страница 60: ...umber of channels required by all the fixtures on a serial data link determines the number of fixtures the data link can support Fixtures on a serial data link must be daisy chained in one single line To comply with the EIA 485 standard no more than 32 fixtures should be connected on one data link Connecting more than 32 fixtures on one serial data link without the use of a DMX optically isolated ...

Страница 61: ...a Link 1 Connect the male 3 pin connector side of the DMX cable to the output female 3 pin connector of the controller 2 Connect the end of the cable coming from the controller which will have a female 3 pin connector to the input connector of the next fixture consisting of a male 3 pin connector 3 Then proceed to connect from the output as stated above to the input of the following fixture and so...

Страница 62: ...roper UPS packing or double boxing is always a safe method to use CHAUVET reserves the right to use its own discretion to repair or replace product s If you are given an RMA please include the following information on a piece of paper inside the box 1 Your name 2 Your address 3 Your phone number 4 The RMA 5 A brief description of the symptoms Claims Damage incurred in shipping is the responsibilit...

Страница 63: ...nd has a maximum of 512 channels per line or universe 8 Driver a software module that tells the operating system how to control a given piece of hardware such as a printer or external hard drive 9 File extension the portion of a filename following the final dot which indicates the kind of data stored in the file It also tells the computer which program is needed to open it correctly 10 Forum an on...

Страница 64: ...el in between 2 color which allows to see 2 colors emitted from the same lighting fixture at the same time 31 Step one static setting or look consisting of selected fixtures their constructs and timing 32 Taskbar the application bar which is used to launch and monitor applications in the Windows operating environment It is the part at the bottom of the screen that contains the Start button Quick L...

Страница 65: ...6 22 14 TECHNICAL SPECIFICATIONS MAXIMUM SCENES IN STANDALONE Xpress 100 N A Xpress 512 600 steps 1 scenes Xpress 512 Plus 600 steps per scene 18 scenes THERMAL Maximum ambient temperature 104 F 40 C WARRANTY INFORMATION Warranty 2 year limited warranty ...

Отзывы: