LSS-2404
19 |
P a g e
Software Operation
Quick Start
Make sure all the software is installed on the PC. Refer to ‘Required Components’ on page
1 for further
information. When setting up the LSS for the first time;
Step 1.
Connect LSS ethernet cable to PC
Step 2.
Set PC and camera to match LSS default IP address (in the same local network of LSS)
a.
LSS Default IP address is 192.168.0.10
b.
For example, you can set PC IP address to 192.168.0.20
Step 3.
Open LSS2404_GUI.html with compatible browser
a.
Right click
→
‘open with’ →
select Firefox or Microsoft Edge
Step 4.
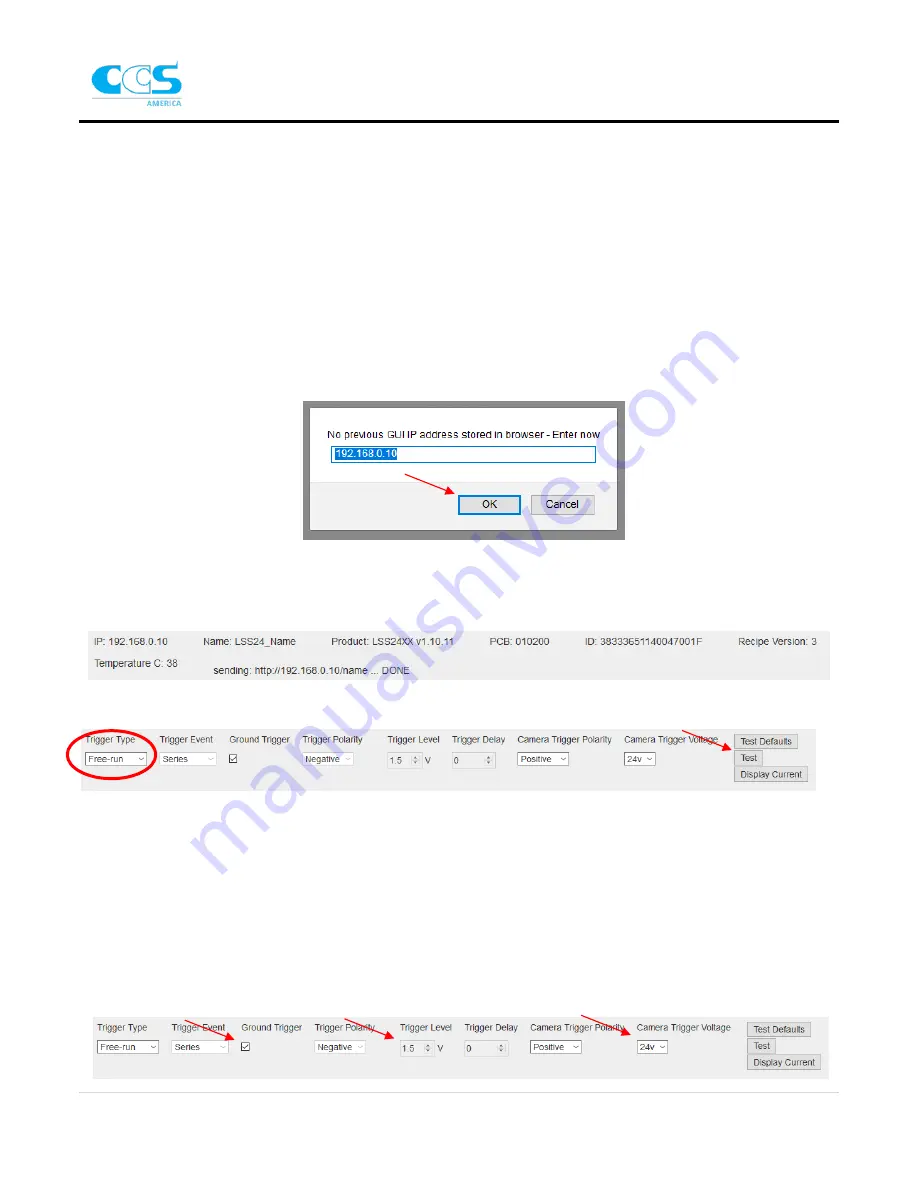
When prompted press ‘OK’ for ‘No previous GUI IP address stored in browser’ prompt
a.
A connection should automatically establish, if it does not refresh the GUI page
Step 5.
Test the network connection and light functionality
a.
Verify there is an IP, Name, Product, pcb, and id
b.
To test the connection right away change ‘Trigger Type’ to ‘Free
-
Run’ → press ‘Test’
i.
You should see each light quadrant flash in the correct sequence
ii.
Note: use system in Free-Run during this phase of testing only. Change to desired trigger
type when executing with the camera software
iii.
Turn off ‘Free
-
Run’ by changing the trigger type to ‘Continuous’ or ‘One Shot’ and press
‘Test’
Step 6.
Adjust Global Settings based on inspection/machine constraints
a.
Check ground trigger if using closed contact trigger signal
b.
If not adjust ‘Trigger Level’ voltage
i.
Increase level if getting noise or false triggers
c.
Adjust camera voltage based off camera’s settings


