Chapter 8
8-8
8.2.2 Environmental Change Corrective Control
0019-5020
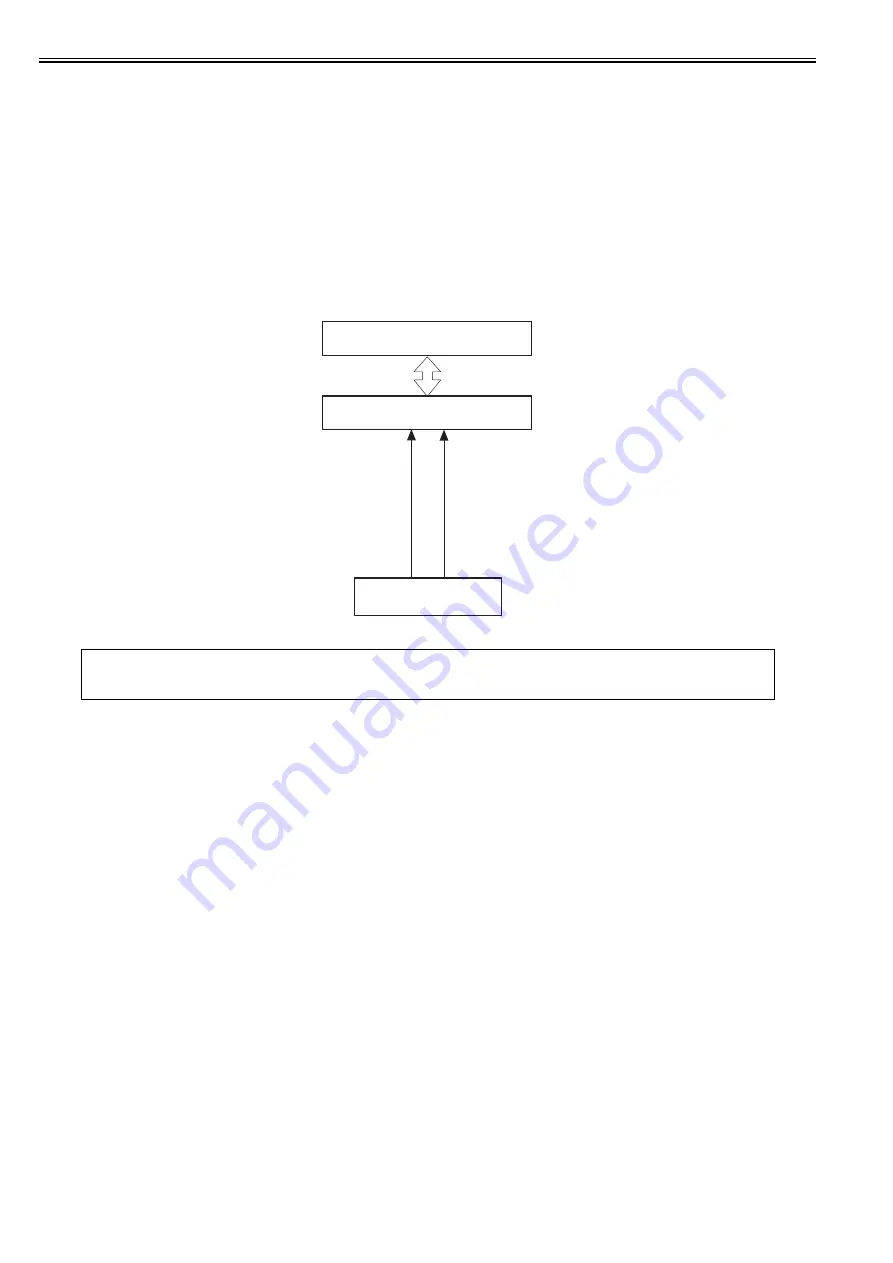
This control corrects values of primary charging biases and developing biases to obtain an optimum image under the detected environmental condition.
Explanation of operation
The environment sensor sends detected temperature and humidity to the DC controller as a temperature signal and a humidity signal.
The DC controller detects the printer's installation environment based on these two signals.
The DC controller requests the main controller to send a command to execute environment related corrective control at the following timing.
- After power-on
- When the front cover is closed after the replacement of the toner cartridge
- When a specified period of time elapses after the execution of this control
- When a specified number of prints are completed after the execution of the previous job or after the replacement of the toner cartridge
- When a specified level of environmental change (temperature/humidity) has been made after the execution of this control
- When the DC controller received the execution command from the main controller
The DC controller executes the following measures to prevent an image failure after the execution of this control.
- Change the primary charging bias value.
- Change the developing bias.
- Request the main controller to execute image gradation collective control.
F-8-13
Error Codes:
E066
Environment sensor error alert
If the temperature detected by the environment sensor is out of the specified range, the host machine is stopped and an error code will be displayed.
DC controller PCB
Main controller PCB
Temperature signal
Humidity signal
Environment sensor
Содержание iR C1020 Series
Страница 1: ...Sep 8 2008 Service Manual iR C1020 Series iR C1021i ...
Страница 2: ......
Страница 6: ......
Страница 18: ...Contents ...
Страница 19: ...Chapter 1 Introduction ...
Страница 20: ......
Страница 22: ......
Страница 57: ...Chapter 2 Installation ...
Страница 58: ......
Страница 60: ......
Страница 73: ...Chapter 3 Basic Operation ...
Страница 74: ......
Страница 76: ......
Страница 81: ...Chapter 4 Main Controller ...
Страница 82: ......
Страница 84: ......
Страница 97: ...Chapter 5 Original Exposure System ...
Страница 98: ......
Страница 100: ......
Страница 112: ......
Страница 113: ...Chapter 6 Original Feeding System ...
Страница 114: ......
Страница 116: ......
Страница 132: ......
Страница 133: ...Chapter 7 Laser Exposure ...
Страница 134: ......
Страница 136: ......
Страница 143: ...Chapter 8 Image Formation ...
Страница 144: ......
Страница 146: ......
Страница 180: ......
Страница 181: ...Chapter 9 Pickup and Feed System ...
Страница 182: ......
Страница 213: ...Chapter 9 9 29 F 9 79 1 2 3 ...
Страница 214: ......
Страница 215: ...Chapter 10 Fixing System ...
Страница 216: ......
Страница 218: ......
Страница 233: ...Chapter 11 External and Controls ...
Страница 234: ......
Страница 263: ...Chapter 12 e maintenance imageWARE Remote ...
Страница 264: ......
Страница 266: ......
Страница 275: ...Chapter 12 12 9 F 12 27 ...
Страница 280: ......
Страница 281: ...Chapter 13 Maintenance and Inspection ...
Страница 282: ......
Страница 284: ......
Страница 286: ......
Страница 287: ...Chapter 14 Measurement and Adjustments ...
Страница 288: ......
Страница 290: ......
Страница 293: ...Chapter 15 Correcting Faulty Images ...
Страница 294: ......
Страница 296: ......
Страница 304: ...Chapter 15 15 8 15 3 2 2 Fans 0019 5064 F 15 11 T 15 3 Notation Name FM1 main unit fan FM2 duplex fan FM2 FM1 ...
Страница 313: ...Chapter 15 15 17 F 15 19 21 22 28 29 30 31 24 14 15 16 23 26 25 32 27 20 19 18 17 2 13 6 10 33 1 8 4 3 12 11 5 7 9 ...
Страница 317: ...Chapter 16 Error Code ...
Страница 318: ......
Страница 320: ......
Страница 331: ...Chapter 16 16 11 ...
Страница 332: ......
Страница 333: ...Chapter 17 Special Management Mode ...
Страница 334: ......
Страница 336: ......
Страница 343: ...Chapter 17 17 7 ...
Страница 344: ......
Страница 345: ...Chapter 18 Service Mode ...
Страница 346: ......
Страница 348: ......
Страница 388: ......
Страница 389: ...Chapter 19 Upgrading ...
Страница 390: ......
Страница 392: ......
Страница 396: ...Chapter 19 19 4 3 Click Next F 19 4 4 Select a USB connected device and click Next F 19 5 ...
Страница 397: ...Chapter 19 19 5 5 Click Start F 19 6 6 Click Yes F 19 7 Download will be started F 19 8 ...
Страница 399: ...Chapter 19 19 7 ...
Страница 400: ......
Страница 401: ...Chapter 20 Service Tools ...
Страница 402: ......
Страница 404: ......
Страница 407: ...Sep 8 2008 ...
Страница 408: ......


