Basic Sending Methods
2-8
Se
ndin
g
Docume
nt
s
2
1
Press
(SEND)
➞
place your originals.
NOTE
•
For instructions on how to place your originals, see Chapter 2, “Basic Operations,” in
the
Reference Guide
.
•
If <Enter your User Name and password and specify the login destination.> appears,
follow the instructions in “Logging in to Authorized Send,” on p. 2-36.
•
If any of the messages below appears, follow the instructions in Chapter 2, “Basic
Operations,” in the
Reference Guide
:
- <Enter the Department ID and Password using the numeric keys.>
- <You must insert a control card.>
- <Enter the User ID and Password.>
NOTE
For instructions on how to enter characters, see Chapter 2, “Basic Operations,” in the
Reference Guide
.
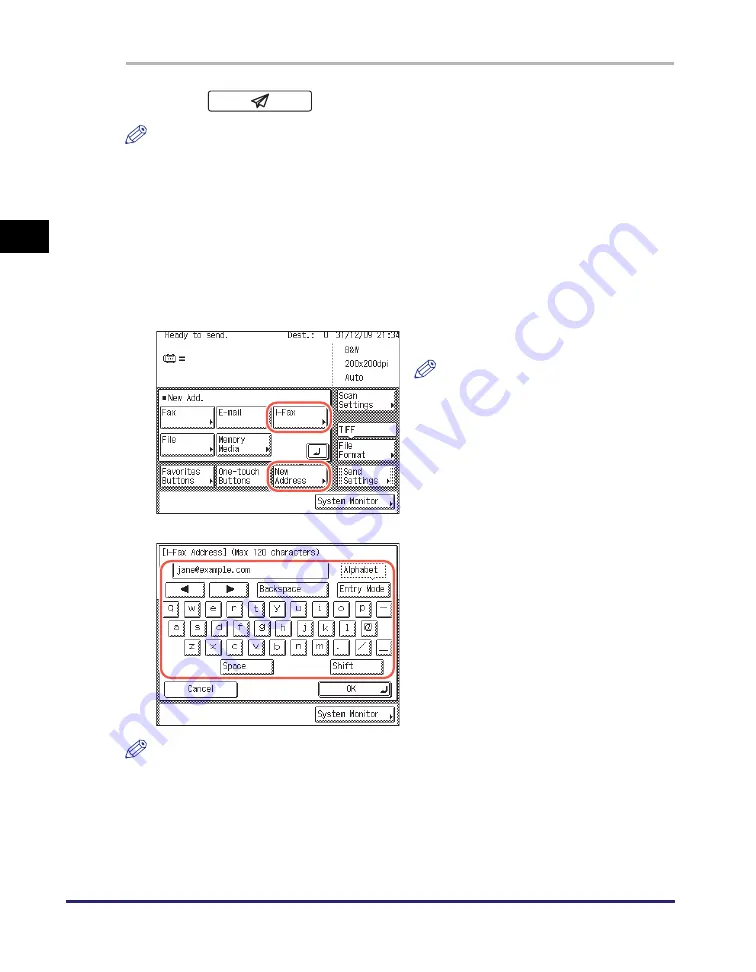
2
Press [New Address]
➞
[I-Fax].
NOTE
If E-mail Send is set to ‘Do not allow’
or ‘Only allow sending to own
address’, [I-Fax] is not displayed. (See
Chapter 4, “Customizing Settings,” in
the
Remote UI Guide
.)
3
Enter the I-fax address (up to 120
characters) using the on-screen
keyboard.
Содержание imageRUNNER 1750i
Страница 2: ...imageRUNNER 1750i 1740i 1730i Sending and Facsimile Guide ...
Страница 27: ...Before Using Send and Fax Functions 1 14 Introduction to Send and Fax Functions 1 ...
Страница 85: ...Canceling Sending Documents 2 58 Sending Documents 2 ...
Страница 105: ...Specifying the File Format 3 20 Specifying the Scan Settings 3 ...
Страница 135: ...Address Book 4 30 Specifying Destinations Easily and Quickly 4 4 Press Reset to return to the top screen ...
Страница 173: ...LDAP Server 4 68 Specifying Destinations Easily and Quickly 4 ...
Страница 183: ...Canceling Receiving Fax Documents 5 10 Receiving Documents 5 ...
Страница 251: ...Reception Related Items 7 40 Customizing the Machine s Settings 7 ...


