2. Installation Manual
- 8 -
4.2 System
Installation
Procedures
No.
Step
Conditions and Checkpoints
Reference Section
1
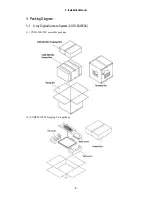
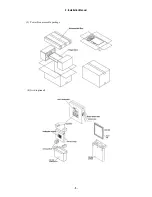
Unpacking and checking the
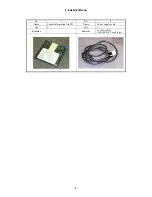
product’s constituent parts
-There must be no missing parts, damage,
dents, etc.
-There must no color changes in the shock
sensor.
2
Connect the Imaging Unit
and the Power Box
-Handle the instrument carefully, as it may
be damaged if something is hit against it,
dropped or receives the strong jolt.
-The cable must be routed in such a way that
no unreasonable loads are brought to bear
upon them.
3
Connect the Power Box and
the Control PC
-The cable must be routed in such a way that
no unreasonable loads are brought to bear
upon them.
4
Connect the Power Box and
the X-ray generators
-The manufacturer of the X-ray generators
must be asked to handle the connections
with the generators.
5
Check date and time
- Date and time must be changed according
to the area where the instrument is installed.
“(1) Checking and
Setting the Date and
Time” in section 5.6.
6
Check the software
program’s version
-The compatibility of the sensor unit and the
Control PC must be checked on the
compatibility list, and the software program
must be installed or upgrade as required.
“(2) Checking the
Firmware Version” in
section 5.6.
7
Identifying the Imaging Unit
(input the sensor serial
numbers)
“(6) Identifying the
Sensor Units” in section
5.6.
8
Enter control PC serial
number.
“(7) Entering Control
PC Serial Number” in
section 5.6.
(9)
Adjusting the timing with X-
ray generator
-No required usually.
10
Calibration
-No error must be displayed.
Operation Manual
11
Setting the Fixed ROI Areas
If necessary, set the ROI area.
12
Set exposure parameter table -Set it in consultation with the technician.
“(8) Table Setup
Setting” in section 5.6.
13
Set annotation
-Set it in consultation with the technician.
“(9) Performing the
Annotation Setting” in
section 5.6.
14
Connect the network and set
the output destination
“(10) Network
Connections” in section
5.6.
15 Startup
settings
“(5) Set Up Startup
Menu” in section 5.6.
16
Exposure testing
-The data must be sent to the printer and
storage and the image quality must be
checked.
Section 5.7 Image
Quality.
17
Check the linearity of the
transferred image density.
“(11) Linearity Check
Image Density” in
section 5.6.
18
Operation unit Gamma
correction
“(12) Operation Unit
Gamma Correction” in
section 5.6.
19
Body parts settings
-The engineer in charge must be consulted
prior to perform these settings.
Operation Manual
20
Check and set the system
settings.
-The engineer in charge must be consulted
prior to perform these settings.
Each section in section
5.6 Settings.
21
Total adjustments and delete
the unnecessary data.
-Conform according to the check sheet.
-Delete the unnecessary data.
Section 5.8 Post-
installation check.
22 Cleaning
Содержание CXDI-50C
Страница 15: ......
Страница 23: ...2 Installation Manual 6 3 Power Box assemble package 4 Grid optional ...
Страница 35: ...2 Installation Manual 18 When normal imaging When timeout due to RX_REQ not negating ...
Страница 63: ...2 Installation Manual 46 Fig 3 Input parameters ...
Страница 115: ...2 Installation Manual 98 2 Power Box Unit mm Mass 4 2Kg ...
Страница 116: ...2 Installation Manual 99 3 Remote Switch Unit mm Mass 0 5Kg 4 Grid Optional 508 27 452 Unit mm Mass 0 9Kg Frame ...
Страница 118: ......
Страница 138: ...4 Repair Guide 3 Do not touch the tabs when replacing the sensor cable Tabs in Enlarged View Sensor Cable ...
Страница 163: ......
Страница 167: ...CXDI SYSTEM 1 2 Rev 04 Key No 5 Key No 6 Key No 7 Key No 8 Key No 9 Canon Inc ...
Страница 186: ......
Страница 188: ......
Страница 189: ...Content 1 Gathering Information about Problems 1 2 How to back up and recover the system 3 ...


