57
17.2. CHIMNEY MAINTENANCE
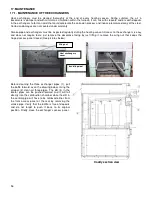
The most efficient way to sweep a chimney is to run a hard chimney sweeping brush. Brush from the top down so
sooth and creosote deposits will detach from the chimney liner and fall down to the bottom of the chimney where it can
be easily removed.
The chimney must be inspected regularly and any creosote build-up must be removed without delay. Monthly cleaning
should be sufficient during cold winter months while more frequent cleaning could be required during milder periods.
17.3. SMOKE PIPE INSPECTION
•
The smoke pipe must be inspected regularly during the heating season.
•
The pipe must be examined carefully to detect any defect or damage.
•
The pipe can be reassembled if no defect is detected and defective pipe must be replaced immediately.
•
Burn wood only in this furnace.
•
As a combustible, well seasoned hardwood in 18" logs works best.
.
17.4. BLOWER MOTOR MAINTENANCE
Periodic cleaning of the fan housing as well as fan and fan blades using a vacuum cleaner is necessary in order not to
affect performance and cause overheating of the latter.
DO NOT OVERLUBRICATE
17.5. FILTERS
Never use the furnace without air filters. To function as expected, controlled combustion wood burning appliance must
be maintained on a regular basis. This means that the chimney, the gaskets and the pipes must be kept in good
working order and the air filter cleaned or replaced regularly. Use the same size and type of filter as the original.
17.5.1. AIR FILTER DIMENSIONS
25 X 14 Filter (Caddy) #21367
17.6. DOOR GASKET MAINTENANCE
It is important to maintain the door gasket in good condition. After a while, the gasket might sag; a door adjustment
may then be required. If the door adjustment is not sufficient, replace the door gasket with a genuine one.
17.6.1. DOOR ADJUSTMENT PROCEDURE
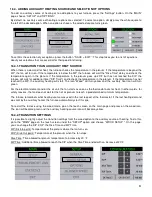
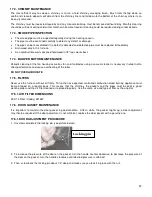
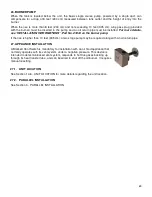
1. Unscrew completely the locking pin (see picture below).
2. To increase the pressure of the door on the gasket, turn the handle counter clockwise; to decrease the pressure of
the door on the gasket, turn the handle clockwise until desired pressure is attained.
3. Then, screw back the locking pin about 1/4" deep and make sure you lock it in place with the nut.
Locking pin
Содержание PF01015
Страница 10: ...10 ADD ON WOOD ONLY WOOD ELECTRIC WOOD OIL ...
Страница 13: ...13 INSTALLATION AND OPERATION INSTRUCTIONS CADDY ADD ON SERIAL INSTALLATION PF01015 ...
Страница 16: ...16 Option 3 Option 4 ...
Страница 17: ...17 EXAMPLE 1 EXAMPLE 2 ...
Страница 23: ...23 REQUIRES 2 RELAY SPNO SPNC WHITE ROGERS P N 90 380 NOT INCLUDED AND 24V AVAILABLE ON EXISTING FURNACE ...
Страница 24: ...24 13 ELECTRICAL DIAGRAM FOR SERIAL FURNACE VIA MOTOR REQUIRES 1 RELAY 51035 WITH 1 JUNCTION BOX NOT INCLUDED ...
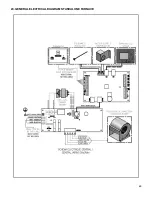
Страница 63: ...63 20 GENERAL ELECTRICAL DIAGRAM STANDALONE FURNACE ...
Страница 64: ...64 21 ELECTRICAL DIAGRAM FOR PARALLEL FURNACE ...
Страница 65: ...65 22 ELECTRICAL DIAGRAM FOR ELECTRIC UNIT ...
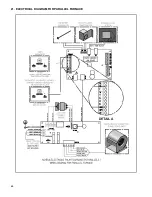
Страница 78: ...78 31 ELECTRICAL DIAGRAM BECKETT OIL UNIT ...
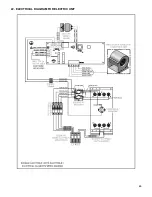
Страница 79: ...79 32 ELECTRICAL DIAGRAM RIELLO OIL UNIT ...
Страница 81: ...81 33 4 AIR CONDITIONNING DAMPER 33 5 HUMIDIFIER 33 6 HEAT PUMP ...
Страница 82: ...82 34 EXPLODED VIEW AND PART LIST ...
Страница 83: ...83 ...
Страница 84: ...84 ...
Страница 85: ...85 ...
Страница 86: ...86 ...
Страница 87: ...87 ...
Страница 88: ...88 ...
Страница 89: ...89 ...

