


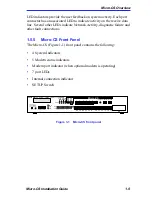
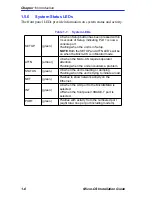
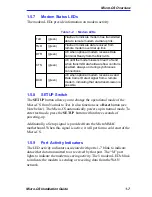
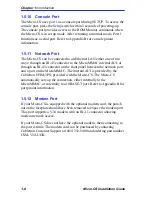


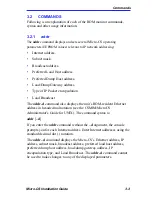


Power-up and Test
Micro-CS Installation Guide
2-5
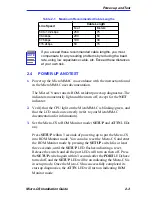
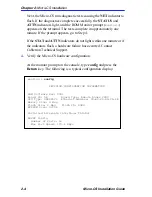
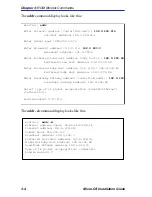
5.
Record the Ethernet address of the Micro-CS for future reference.
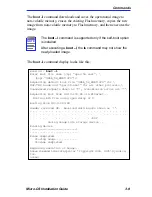
At the monitor prompt, type addr -d and press the Return key. The
display looks like this:
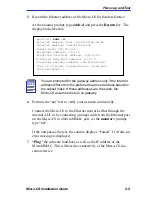
6.
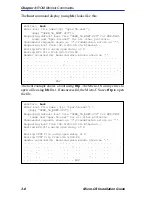
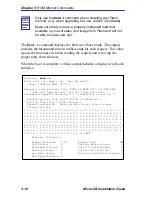
Perform the “net” test to verify your network connectivity.
Connect the Micro-CS to the Ethernet network either through the
internal AUI, or by connecting a jumper cable from the Ethernet port
on the Micro-CS to a MicroMMAC port. At the monitor:: prompt,
type “net”.
If the unit passes the test, the console displays “Passed”. If it fails, an
error message is displayed.
7.
“Ping” the software load host, as well as the IP address of the
MicroMMAC. This will test the connectivity of the Micro-CS to a
remote device.
NOTE
You are prompted for the gateway address only if the internet
address differs from the preferred load host address based on
the subnet mask. If these addresses are the same, the
Micro-CS assumes there is no gateway.
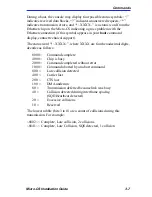
monitor:: addr -d
Ethernet address (hex): 00-80-2D-00-18-B6
Internet address: <uninitialized>
Subnet mask: 255.255.0.0
Broadcast address: 0.0.0.0
Preferred Load Host address: <any host>
Preferred Dump Host address: 0.0.0.0
Load/Dump Gateway address: <uninitialized>
Type of IP packet encapsulation: <ethernet>
Load Broadcast: Y
Содержание MICRO-CS
Страница 2: ......
Страница 8: ...vi Micro CS Installation Guide...
Страница 12: ...Contents iv Micro CS Installation Guide...
Страница 22: ...Chapter 1 Introduction 1 10 Micro CS Installation Guide...
Страница 32: ...Chapter 2 Micro CS Installation 2 10 Micro CS Installation Guide...
Страница 72: ...Chapter 4 Troubleshooting Procedures 4 14 Micro CS Installation Guide...
Страница 82: ...Appendix C Flash Upgrade Instructions C 4 Micro CS Installation Guide...
Страница 92: ...Index 4 Micro CS Installation Guide...