Power-up and Test
Micro-CS Installation Guide
2-3
2.4
POWER-UP AND TEST
1.
Power up the MicroMMAC in accordance with the instruction found
in the MicroMMAC user documentation.
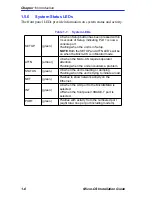
The Micro-CS now runs its ROM-resident power-up diagnostics. The
indicators momentarily light and then turn off, except for the NET
indicator.
2.
Verify that the CPU light on the MicroMMAC is blinking/green, and
that the LCD reads out correctly (refer to your MicroMMAC
documentation for information).
3.
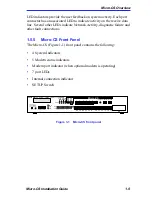
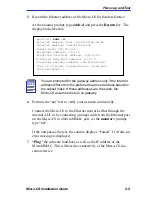
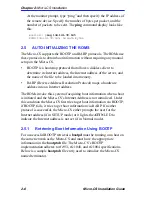
Set the Micro-CS to ROM Monitor mode (SETUP and ATTN LEDs
on).
Press SETUP within 3 seconds of powering up to put the Micro-CS
into ROM Monitor mode. You can also reset the Micro-CS and enter
the ROM Monitor mode by pressing the SETUP switch for at least
three seconds, until the SETUP LED flashes indicating a reset.
Release the switch and all the port LEDs will turn on then off. Press
the SETUP switch again within 3 seconds after the PORT LEDs have
turned off, and the SETUP LED will be on indicating the Micro-CS is
in setup mode. Once the Micro-CS has successfully completed its
start-up diagnostics, the ATTN LED will turn on indicating ROM
Monitor mode.
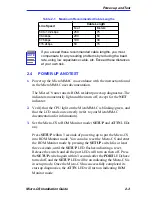
Table 2-1
Maximum Recommended Cable Lengths
Line Speed
Cable Length
Feet
Meters
50 to 19.2kbps
250
75
38.4kbps
200
60
57.6kbps
100
30
115.2kbps
50
15
NOTE
If you exceed these recommended cable lengths, you must
compensate for any resulting problems by reducing the baud
rate, using low capacitance cable, etc. Exceed these distances
at your own risk.
Содержание MICRO-CS
Страница 2: ......
Страница 8: ...vi Micro CS Installation Guide...
Страница 12: ...Contents iv Micro CS Installation Guide...
Страница 22: ...Chapter 1 Introduction 1 10 Micro CS Installation Guide...
Страница 32: ...Chapter 2 Micro CS Installation 2 10 Micro CS Installation Guide...
Страница 72: ...Chapter 4 Troubleshooting Procedures 4 14 Micro CS Installation Guide...
Страница 82: ...Appendix C Flash Upgrade Instructions C 4 Micro CS Installation Guide...
Страница 92: ...Index 4 Micro CS Installation Guide...


