64
Email Notification
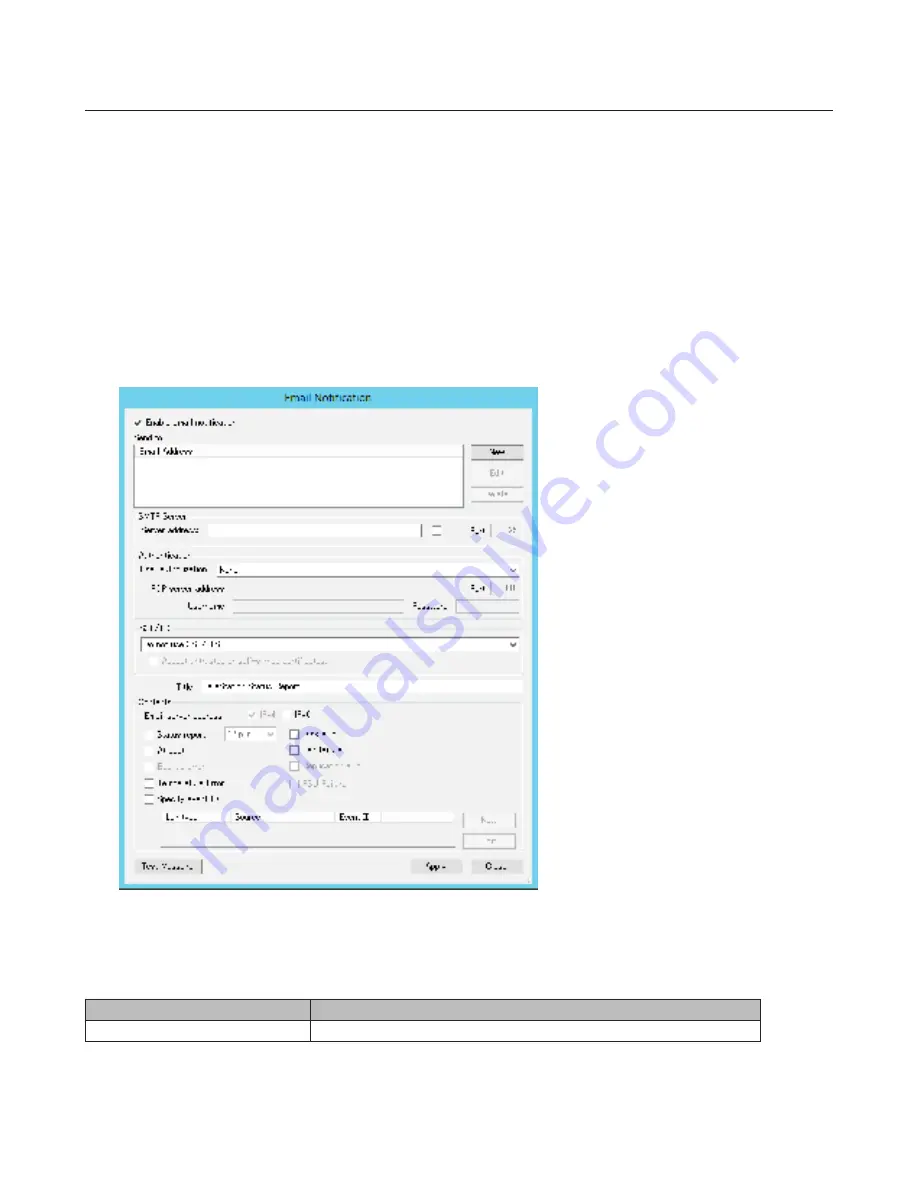
Your TeraStation can send you email reports daily, or when settings are changed or an error occurs. Notification emails
may triggerd by any of the following events:
• Hard drive statu at scheduled time
• Hard drive read error
• TeraStation booted
• Fan error
• Temperature exceeded
• Specified event ID logged
1
In Windows Storage Server, click
Email Notification
.
2
Check “Enable email notification”.
3
Click
New
and enter an email address. You may enter up to five email addresses to receive notifications.
4
Enter your mail server settings and choose what events will trigger notification. Click
Apply
to finish the email
notification settings. You can send a test email when clicking
Test Message
.
Items
Descriptions
Enable email notification
Enables or disables the email notification.
Содержание TeraStation WSS 5000R2
Страница 1: ...TeraStation WSS 5000R2 User Manual www buffalotech com 35020333 01 2014 01...
Страница 5: ...5 Chapter 1 Installation Diagrams WS5600DR2 WS5400DR2 WS5200DR2...
Страница 17: ...17...
Страница 25: ...25 4 Click Next 5 Enter the volume size that you want to create and click Next...
Страница 30: ...30 8 Push the unlock button of the failed hard drive and swing the lock mechanism out...
Страница 31: ...31 9 Pull out the hard drive cartridge and remove it from the TeraStation...
Страница 33: ...33 11Swing the lock back down until it clicks into place...
Страница 40: ...40 4 Click Next 5 Select Custom and click Next...
Страница 41: ...41 6 Click Add Items 7 Select the backup source folders or drives and click OK...
Страница 42: ...42 8 Click Next 9 Specify the schedule to run the backup and click Next...
Страница 45: ...45 5 Select the date when backing up the data and click OK 6 Select the recovery targets and click Next...
Страница 49: ...49 4 Enter the computer name choose domain or workgroup and click OK...
Страница 51: ...51 4 Click Proceed 5 Enter a new password twice...
Страница 54: ...54 4 Enter the desired settings then click Add...
Страница 55: ...55 5 Click Advanced 6 Click Find Now 7 Select the users to be registered to the group then click OK...
Страница 56: ...56 8 Click OK 9 Click Close...
Страница 58: ...58 4 Click Next 5 Enter the path of an existing folder or a new folder then click Next...
Страница 60: ...60 7 Check Customize permissions then click Custom 8 Choose Everyone and check Allow for Change...
Страница 61: ...61 9 In the Security tab click Edit Add...


