8
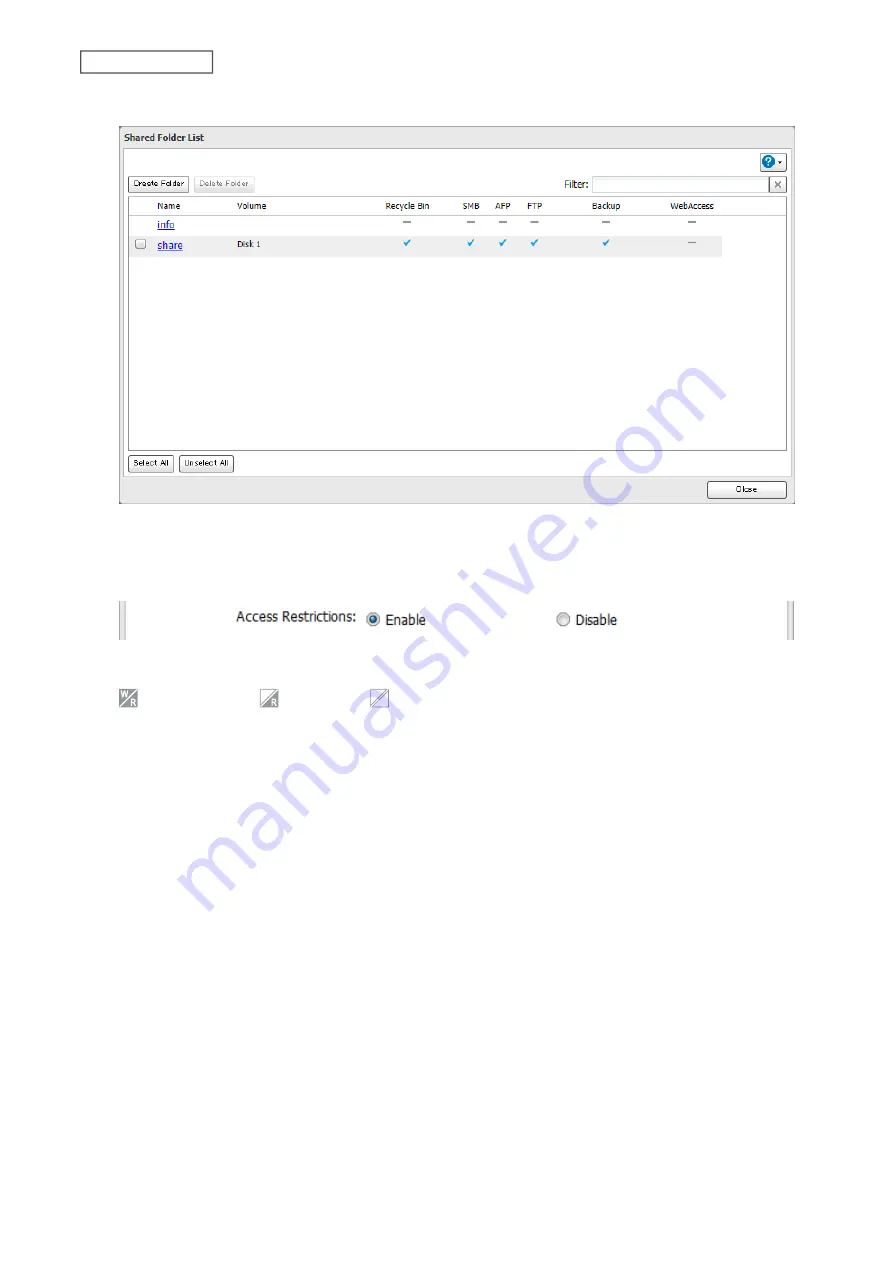
Click the shared folder that you want to set access restrictions for.
9
Click
Edit
.
10
Enable “Access Restrictions”.
11
Select the level of access for the user or group.
: Read and write
: Read-only
: No access
12
Click
OK
.
Notes:
• If you change the LinkStation’s name, you will no longer be able to use domain users and groups or access
restrictions. To repair this, rejoin the domain.
• To have the LinkStation join an Active Directory domain, configure it to use a DNS server that can resolve names
for the Active Directory domain.
• After building an Active Directory domain, the administrator password for joining the domain must be changed
at least once, or joining the Active Directory domain will fail.
• The DNS name and NetBIOS name of Active Directory domains should be identical.
• The most restrictive access settings will always apply. For example, if both read-only and read and write
permissions are given to a user, the user will have read-only access.
• If there is a difference of more than five minutes between the LinkStation’s clock and the domain controller’s
clock, joining the domain or authenticating domain users and groups may fail. For best results, use an NTP server
to set the time for all network devices.
• To use the LinkStation as a member server in an Active Directory domain, the LinkStation should be logged in to
the domain and accessed from a computer that is not a member of the domain with a valid domain account.
• If the LinkStation is a member server of an Active Directory domain, you cannot connect as a guest user via AFP.
• If your LinkStation is a member server in an Active Directory domain and you change the authentication method
to “Workgroup”, the account on the domain controller will not be deleted automatically.
45
Chapter 2 File Sharing
Содержание LinkStation 200 Series
Страница 27: ...4 Configure the desired settings then click OK 26 Chapter 2 File Sharing...
Страница 28: ...Using a Mobile Device 1 From Settings tap Folder Setup 27 Chapter 2 File Sharing...
Страница 29: ...2 Tap Create Folder 28 Chapter 2 File Sharing...
Страница 33: ...4 Enter the desired settings then click OK 32 Chapter 2 File Sharing...
Страница 34: ...Using a Mobile Device 1 From Settings tap Users 33 Chapter 2 File Sharing...
Страница 35: ...2 Tap Create User 34 Chapter 2 File Sharing...
Страница 38: ...3 Click Add Group 37 Chapter 2 File Sharing...
Страница 42: ...Using a Mobile Device 1 From Settings tap Folder Setup 41 Chapter 2 File Sharing...
Страница 43: ...2 Tap the shared folder that you want to set access restrictions for 42 Chapter 2 File Sharing...
Страница 67: ...10Click at the top right of Settings and choose Restart 66 Chapter 3 RAID Modes and Drive Management...
Страница 74: ...73 Chapter 4 Remote Access...
Страница 90: ...6 Click Time Machine 89 Chapter 5 Backup...
Страница 91: ...7 Click Select Backup Disk 8 Select the shared folder then click Use Disk 90 Chapter 5 Backup...
Страница 130: ...6 Replace the four screws 7 Insert the new drive back into the empty slot 129 Chapter 8 Drive Replacement...


