


3. ASSEMBLY
RH-981A
47
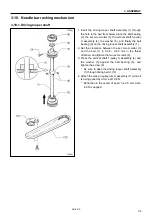
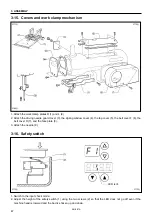
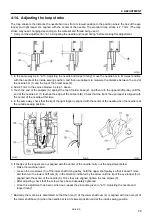
3-15. Covers and work clamp mechanism
1. Attach the work clamp plates R (1) and L (2).
2. Attach the driving needle guard cover (3), the zigzag window cover (4), the top cover (5), the belt cover F (6), the
belt cover R (7), and the face plate (8).
3. Attach the needle (9).
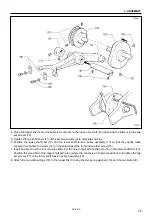
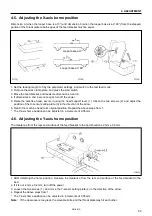
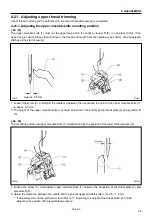
3-16. Safety switch
1. Switch to the input check mode.
2. Adjust the height of the safety switch (1) using the two screws (2) so that the LED does not go off even if the
machine head is lowered and the bed is shaken up and down.
3771Q
3770Q
3769Q
3772Q
3773Q
LED is lit.
Содержание RH-981A
Страница 8: ...RH 981A ...
Страница 23: ...2 DISASSEMBLY RH 981A 15 2 7 Needle bar thread take up and zigzag mechanisms 3710Q 3711Q 3709Q 3708Q ...
Страница 92: ...5 POWER SUPPLY EQUIPMENT RH 981A 84 Control circuit board Power supply circuit board 3530Q 3531Q ...
Страница 119: ...6 AIR PRESSURE MECHANISM RH 981A 111 5 Cloth opener cylinder 6 Lower thread trimming cylinder 3554Q 3555Q ...
Страница 136: ...7 SOFTWARE RH 981A 128 7 6 Control circuit block diagram 1 3842Q ...
Страница 137: ...7 SOFTWARE RH 981A 129 7 7 Control circuit block diagram 2 3843Q ...
Страница 138: ...SERVICE MANUAL Printed in Japan RH 981A I3080846H 2003 10 H 1 http www brother com ...


