


3. ASSEMBLY
RH-981A
23
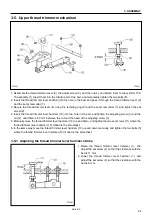
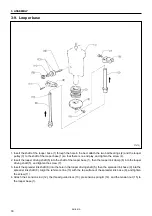
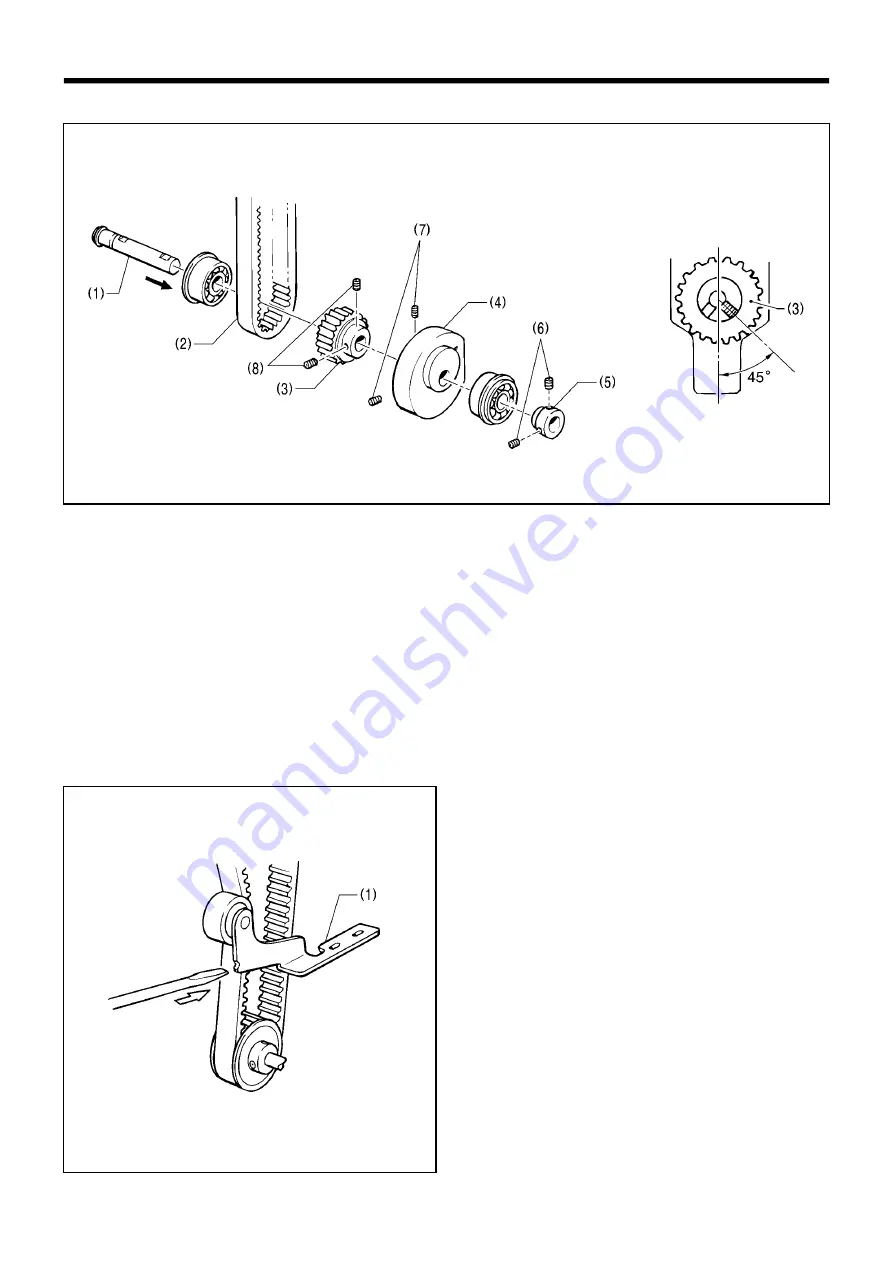
3-4. Lower shaft mechanism
1. Fit the two ball bearings into the holes in the bed, insert the lower shaft (1) from the left.
2. Put the timing belt (2), the lower shaft tension pulley assembly (3), the lower shaft cam (4), and the set collar (5),
in this order, on the lower shaft (1), and tighten the two set screws (6) of the set collar (5) so that there is no play
between the parts on the lower shaft (1).
3. Lightly press the lower shaft tension pulley assembly (3) and the lower shaft cam (4) against the left ball bearing,
and tighten the two set screws (7) of the lower shaft cam (4).
* The screw flat should align with the set screw which comes first when the lower shaft is rotated in the rotation
direction.
4. When the screw flat of the upper shaft is at the top, and the two set screws (8) of the lower shaft tension pulley
assembly (3) are as shown in figure 1, loop the timing belt over the lower shaft tension pulley assembly (3).
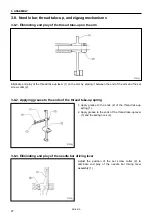
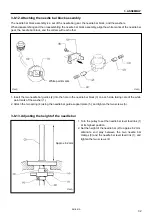
3-4-1. Adjusting the timing belt
Use a screwdriver or similar tool to press the notch of
the tension pulley arm assembly (1) with a force of 39.2
N, and attach the tension pulley assembly.
3722Q
<Figure 1>
3723Q
3721Q
Содержание RH-981A
Страница 8: ...RH 981A ...
Страница 23: ...2 DISASSEMBLY RH 981A 15 2 7 Needle bar thread take up and zigzag mechanisms 3710Q 3711Q 3709Q 3708Q ...
Страница 92: ...5 POWER SUPPLY EQUIPMENT RH 981A 84 Control circuit board Power supply circuit board 3530Q 3531Q ...
Страница 119: ...6 AIR PRESSURE MECHANISM RH 981A 111 5 Cloth opener cylinder 6 Lower thread trimming cylinder 3554Q 3555Q ...
Страница 136: ...7 SOFTWARE RH 981A 128 7 6 Control circuit block diagram 1 3842Q ...
Страница 137: ...7 SOFTWARE RH 981A 129 7 7 Control circuit block diagram 2 3843Q ...
Страница 138: ...SERVICE MANUAL Printed in Japan RH 981A I3080846H 2003 10 H 1 http www brother com ...


