BASIC EMBROIDERY
73
2
d
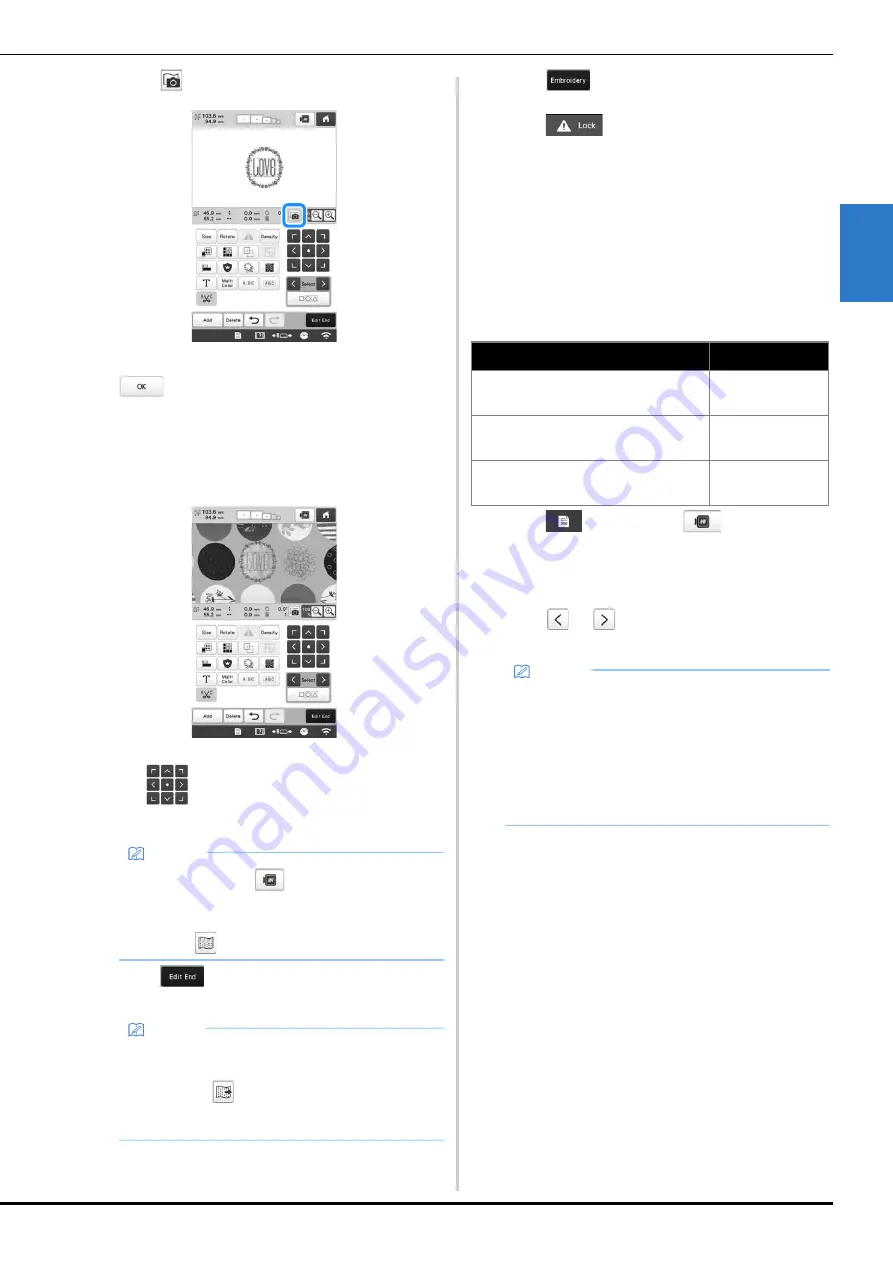
Touch
in the pattern editing screen.
e
When the message to start scanning appears, touch
.
The embroidery frame moves so the fabric can be
scanned.
f
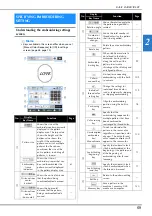
When the fabric appears as a background for the
pattern, the pattern can be edited if it is necessary.
g
Use
to align the pattern with the desired
embroidery position.
h
Touch
to display the embroidering settings
screen.
i
Touch .
j
Touch
, and then press the “Start/Stop”
button to start embroidering.
When embroidery is finished, the fabric displayed in
the background disappears.
■
Improving scanned images and camera images
The machine software adjusts images according to the
table installation setting.
The table installation setting must be selected before
scanning the fabric to display it as a background image for
a pattern or before using the built-in camera to display a
camera image of the fabric.
a
Touch
, and then touch
.
The embroidery settings screen appears.
b
Locate [Attached Table].
c
Touch
or
to select the table installation
setting.
Memo
• If necessary, touch
to display a preview in
order to check the pattern position.
• The background can be displayed or hidden by
touching
in the embroidering settings screen.
Memo
• The pattern can also be aligned from the
embroidering settings screen.
• By touching
in the embroidery settings screen,
the background image can be saved to USB
media.
Table installation
Setting
When no table is attached to the
machine
[No Table]
When the included wide table is
attached to the machine
[Wide Table]
When the optional tubular frame table
is attached to the machine
[Tubular Frame
Table]
Memo
• Better camera image and scanning results can be
achieved with the appropriate settings.
• When scanning in My Design Center with a
scanning frame, no setting needs to be selected for
[Attached Table].
• Be sure to install the wide table when using the
optional magnetic sash frame, border frame, quilt
frame, flat frame or jumbo frame.


