6-20
Precautions to keep good printing quality/use printer over the long term
6-1-9. Replacing the carriage foam
When a warning message appears in the warning message window, replace the specified carriage foam with a new
one.
<TIPS>
Once you have selected [Maintenance Part Clean/Replace], you do not need to select it repeatedly in the case of replacing the
wiper, flushing foam, and carriage foam in sequence.
(1)
Prepare the gloves and carriage foam, which come standard with the printer.
(2)
From the menu, select [Maintenance] > [Maintenance Part Clean/Replace] > [Maintenance Unit Part Replace], and
press
.
(3)
Select [Replace carriage foam] and press
.
<IMPORTANT>
If any other error or message is displayed on the operation panel or warning message window, follow the message to solve
the problem, then replace the carriage foam.
Please complete the task within 15 minutes, in order to prevent the print heads from drying up.
There is a risk of damaging the nozzle surface of the head. Be careful not to damage the nozzle surface of the head.
(4)
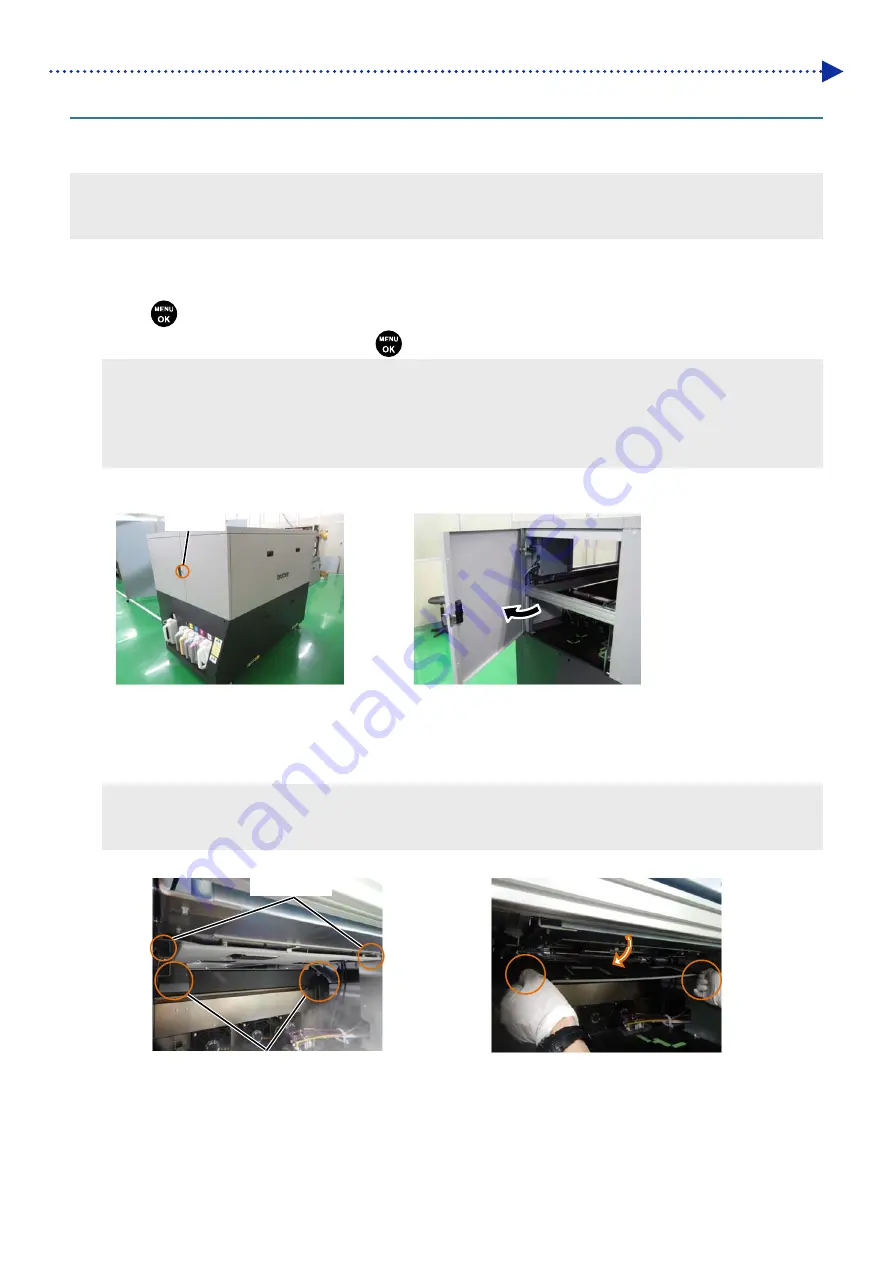
Unlock and open the right-hand-side cover.
(5)
Hold the end of the carriage foam and rotate the carriage foam downward to remove the carriage foam from the
carriage magnet. Rotate the carriage foam until the carriage foam comes in contact with the sliding surface of the
foam guide.
<IMPORTANT>
Be careful not to let the carriage foam come into contact with the nozzle surface of the head.
Be careful when removing the carriage foam, which may come off suddenly.
Keyhole
Sliding surface of
foam guide
Foam end
Содержание GTX600NB
Страница 76: ...3 38 Installation and preparation 6 Select the elapsed time to finish humidification and click Next ...
Страница 154: ...5 21 Basic printing procedures When Color Ink Only is selected Details ...
Страница 315: ...10 22 Specifications l libjpeg this software is based in part on the work of the Independent JPEG Group ...


