38
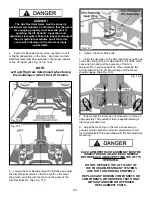
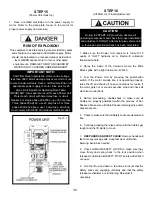
6. Push the
RAISE
button or rotate the control switch on
the power unit.
Important Note:
Allow (2) seconds between motor starts.
Failure to comply may cause motor burnout.
7. Stop before making contact with vehicle. Check arm
restraint pins for engagement. If required, slightly move
arm to allow restraint gear and pawl to mesh.
Do Not
hammer arm restraint pin down as this will damage the
restraint gear teeth.
8. Raise vehicle until tires clear the floor.
9. Stop and check adapters for secure contact at vehicle
manufacturer’s recommended lift points.
10. Continue to raise to desired height only if vehicle is
secure on lift.
11.
Do Not
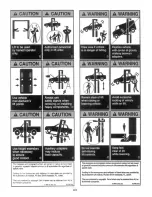
go near or under a raised vehicle if all four
adapters are not in secure contact with vehicle at vehicle
manufacturer’s recommended lift points.
12. Repeat entire loading and raising procedures if
required.
13. Lower lift onto safety locks.
•
Do Not
enter work area or go under vehicle if safety
locks are not engaged.
•
CLEAR AREA
if vehicle is in danger of falling.
•
Do Not
position yourself between a wall and the lift.
If the vehicle falls in that direction, you may be severely
injured.
• Before attempting to lift pickup trucks or other truck
frame vehicles, be sure that:
t
Vehicle frame is strong enough to support its
weight and has not been weakened by
modification or corrosion.
t
Vehicle individual axle weight does not exceed
one-half lift capacity.
t
Adapters are in secure contact with frame at
vehicle manufacturers recommended lift points.
t
Vehicle is stable on lift and neither front nor “tail”
heavy.
t
The overhead switch bar will contact the highest
point on the vehicle.
WHILE uSING LIFt
• Avoid excessive rocking of vehicle while on lift.
• Always use safety stands as needed or when
removing or installing heavy components.
to LoWER tHE LIFt
1. Remove all tools or other objects from the lift area.
2. Raise lift off safety locks. Make sure you raise the lift
by at least two inches to allow adequate clearance for the
locks to clear.
3. Push safety lock release handle fully and hold.
4. Push LOWERING valve handle to lower. Note: Both
SAFETY LOCK release and LOWERING valve handles
must be held down simultaneously to lower lift. Do not
override self-closing lift controls.
5. Remain clear of lift when lowering vehicle. Observe
pinch point warning decals.
6. Remove adapters from under vehicle and swing arms
to full drive-thru position before moving vehicle.
7. If lift is not operating properly, Do Not use until
adjustment or repairs are made by qualified lift service
personnel.
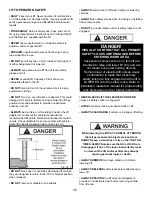
DANGER!
VISuALLy CoNFIRM tHAt ALL PRIMARy
SAFEty LoCKS ARE ENGAGED BEFoRE
ENtERING WoRK AREA.
Suspension components us on this lift are
intended to raise and lower lift only and are
not meant to be load holding devices.
Remain clear of elevated lift unless visual
confirmation is made that all primary
safety locks are fully engaged and the lift is
LOWERED onto the safety locks, Refer to
installation /operation manual for proper safety
lock procedures and /or further instruction.
WARNING!
When lowering the lift PAy CAREFuL AttENtIoN
that all personnel and objects are kept clear.
ALWAyS keep a visual line of site on the lift At ALL
tIMES. ALWAyS make sure that ALL LoCKS are
disengaged. If one of the locks inadvertently locks
on descent the lift and/or vehicle may disrupt
causing personal injury or death.
Содержание XpR-10AC-168
Страница 25: ...25 25 ...
Страница 28: ...28 ...
Страница 32: ...32 32 OPTIONAL EQUIPMENT INSTALLATION ...
Страница 42: ...42 42 ...
Страница 43: ...43 43 ...
Страница 52: ...52 52 ...
Страница 74: ...74 ...
Страница 75: ...75 ...

