BankSA EftpoS 1i terminal User Guide
4
BankSA EftpoS 1i terminal User Guide
5
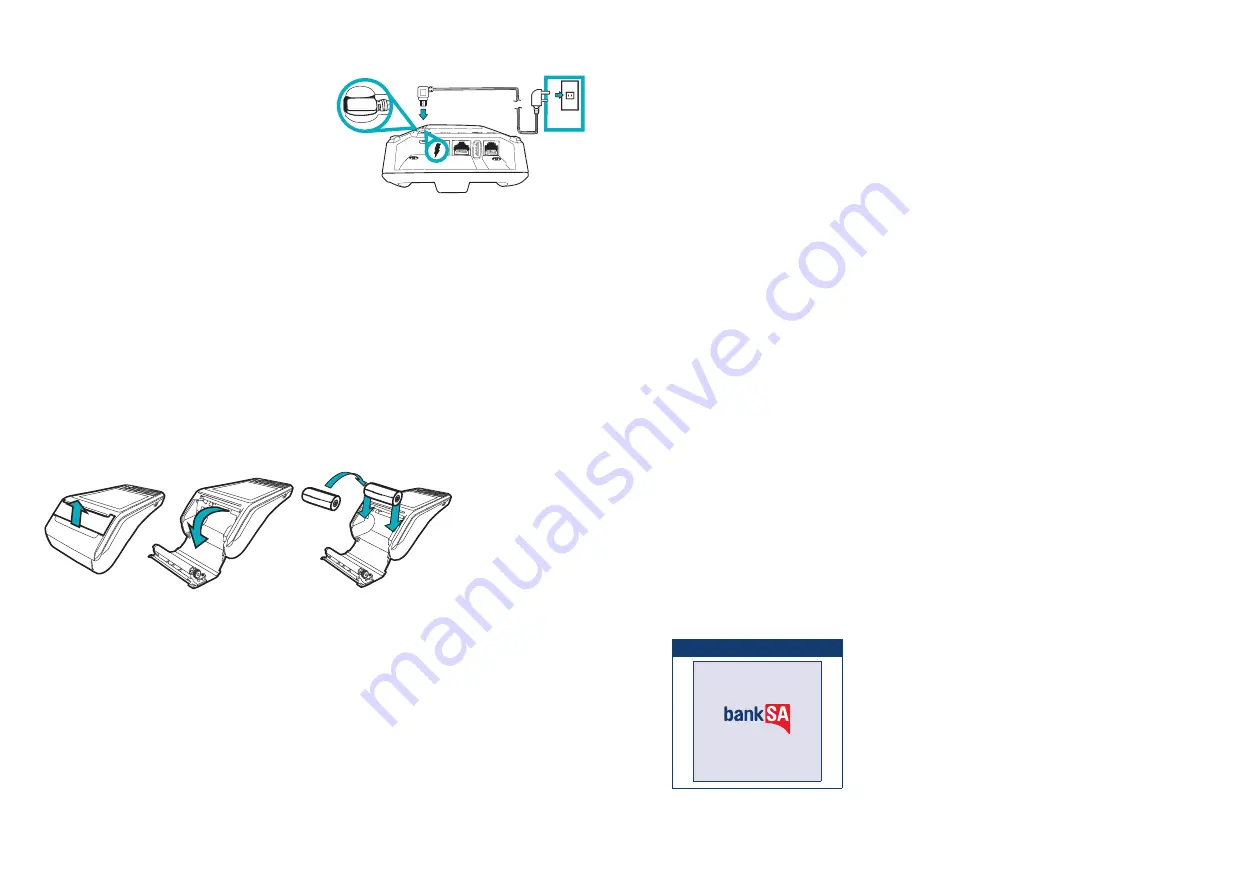
2.3 Powering up
Connecting base station to power
1. Insert the power cable into the power port on the
terminal base.
2. Plug the AC power cord into a wall outlet or a
power surge.
3. Place terminal on charger to begin charging the
terminal.
Manual Start-up
Hold the green (Enter) key down for about 10 seconds until terminal displays the
start-up screen.
Manual Shutdown
Hold the red (Cancel) key down for about 10 seconds until the terminal displays the shutdown
verification screen. Keep holding the red key until the terminal shuts down.
(Must be unplugged from power supply before attempting manual shut down)
2.4 Loading paper
1. On top of your terminal, lift and open the black paper compartment latch.
2. Position the paper roll with the end of the roll protruding from underneath the roll towards the
terminal screen.
3. Pull paper out slightly and close the cover.
2.5 Getting started
Your EFTPOS 1i terminal arrives as a complete unit. Included in your delivery is:
• quick reference guide
• terminal
• terminal base
• paper rolls
• power supply
• cables (RS232 serial, USB and dial cables).
For any PC-EFTPOS software queries, please contact the PC-EFTPOS Help Desk on 02 9998 9800.
Communication type
The terminal supports PC-EFTPOS IP Gateway via the POS.
In the event that your main communication method is down, the terminal will automatically failover to
3G/GPRS backup communications.
2.6 Terminal setup and configuration
To begin setting up your new EFTPOS 1i terminal:
1. Ensure the terminal base is connected to power.
2. Ensure the terminal base is connected to your Point of Sale (POS) via a supported communications
method.
3. Ensure the terminal is fully charged, or is sitting on the terminal base for power.
4. Ensure that your POS software is running on your Point of Sale. Please contact your Point of Sale
provider or refer to your POS Guide if further information is required.
5. Hold down the green “Enter” key found at bottom right corner of the terminal keypad, until an
audible beep is heard and/or the terminal screen powers on.
6. Follow the instructions for Bluetooth pairing below.
Your terminal should display “Ready” on-screen, at which point you can begin transacting via your POS
software.
2.7 Terminal pairing with base (Bluetooth)
Your terminal uses Bluetooth communications between the Keypad and the Base, with security
measures in place for all communications.
If the base does not display a solid blue light (indicating that it is currently paired with the terminal),
follow these instructions to pair the terminal with the base:
• Press the button on the front of the base and wait for the blue light to begin blinking.
• On the Keypad, select the correct base by identifying the 9-digit serial number printed on the
underside of the base.
• Wait for the pairing to complete, which will be indicated by a solid blue light displayed on the base.
The terminal will display the following message if Bluetooth pairing has not occurred or is
unsuccessful:
TERMINAL SCREEN
READY
NOT PAIRED
Common issues in the initial pairing process include power and communications issues which are
often resolved by checking the connections between device and power outlets. Please contact the
Merchant Helpdesk for further assistance.


