www.balluff.com
No. 822964 EN · L17; Subject to modification. Replaces edition 0205.
Installation (continued)
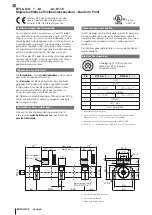
– For distance B between the magnet and the BTL and
for the center offset C (see Dimensions and Function)
the following values must be maintained:
Magnet type
Distance B
2)
Offset C
BTL6-A-3800-2
4...8 mm
3)
± 5 mm
BTL6-A-3801-2
4...8 mm
3)
± 5 mm
2) The selected distance must remain constant over the entire stroke
length.
3) For optimal measuring results a distance B of 6…8 mm is recommen-
ded.
The BTL is installed on a flat surface of the machine using
mounting clamps or cuffs (available accessories). Any
orientation is permitted. Note the recommended spacing
for the location of clamps or cuffs (see Dimensions and
Function).
1.
Slide BTL into the mounting clamps or cuffs.
2.
Align BTL slot in the direction of the magnet(s)!
3.
Attach the BTL to the base (tighten screws in clamps
or cuffs to max. 4 Nm tightening torque).
4.
Installing magnet (accessory).
Startup
DANGER
Uncontrolled system movement
When starting up, if the position measuring system is
part of a closed loop system whose parameters have
not yet been set, the system may perform uncontrolled
movements. This could result in personal injury and
equipment damage.
►
Persons must keep away from the system’s
hazardous zones.
►
Startup must be performed only by trained technical
personnel.
►
Observe the safety instructions of the equipment or
system manufacturer.
1.
Check connections for tightness and correct polarity.
Replace damaged connections.
2.
Turn on the system.
3.
Check measured values (especially after replacing the
BTL).
Operating notes
– Regularly check function of the BTL and all associated
components.
– Take the BTL out of operation whenever there is a
malfunction.
– Secure the system against unauthorized use.
Shielding and cable routing
Defined ground!
The BTL and the control cabinet must be at the
same ground potential.
Shielding
To ensure electromagnetic compatibility (EMC), observe
the following:
– Connect BTL and controller using a shielded cable.
Shielding: Braided copper shield with minimum 85%
coverage.
– Shield is internally connected to connector housing.
Magnetic fields
The position measuring system is a magnetostrictive
system. Be sure to provide sufficient distance of the BTL
from strong external magnetic fields.
Cable routing
Do not route the cable between the BTL, controller, and
power supply near high voltage cables (inductive stray
noise is possible). The cable must be routed tension-free.
Cable length
BTL6-A/G…
Max. 20 m 1)
1) Longer cables may be used if their construction, shielding and routing
prevent noise interference.
Installation
NOTICE!
Improper installation
Improper installation can compromise the function of the
transducer and result in damage.
►
Ensure that no strong electrical or magnetic fields
are present in the direct vicinity of the BTL.
►
Be sure to maintain the specified distances and
separations.
Note when installing the magnet:
– To ensure the accuracy of the magnetostrictive linear
position sensor, fasten the magnet to the moving
member of the machine only using non-magnetizable
screws (stainless steel, brass, aluminum).
– The moving member must guide the magnet on a
parallel line to the BTL.
– When using multiple magnets a minimum separation of
65 mm must be maintained between them.
– Distance A between the magnet and parts made of
magnetizable material must be kept to at least 10 mm
(see Dimensions and Function).
BTL6-A/G _ 1 _ -M _ _ _ _ -A1-S115
Magnetostrictive Linear Position Sensor – Profile Style
english
2

