Pro-Stitcher Lite for the Baby Lock Gallant/Villa Frame
Installation Instructions | 21
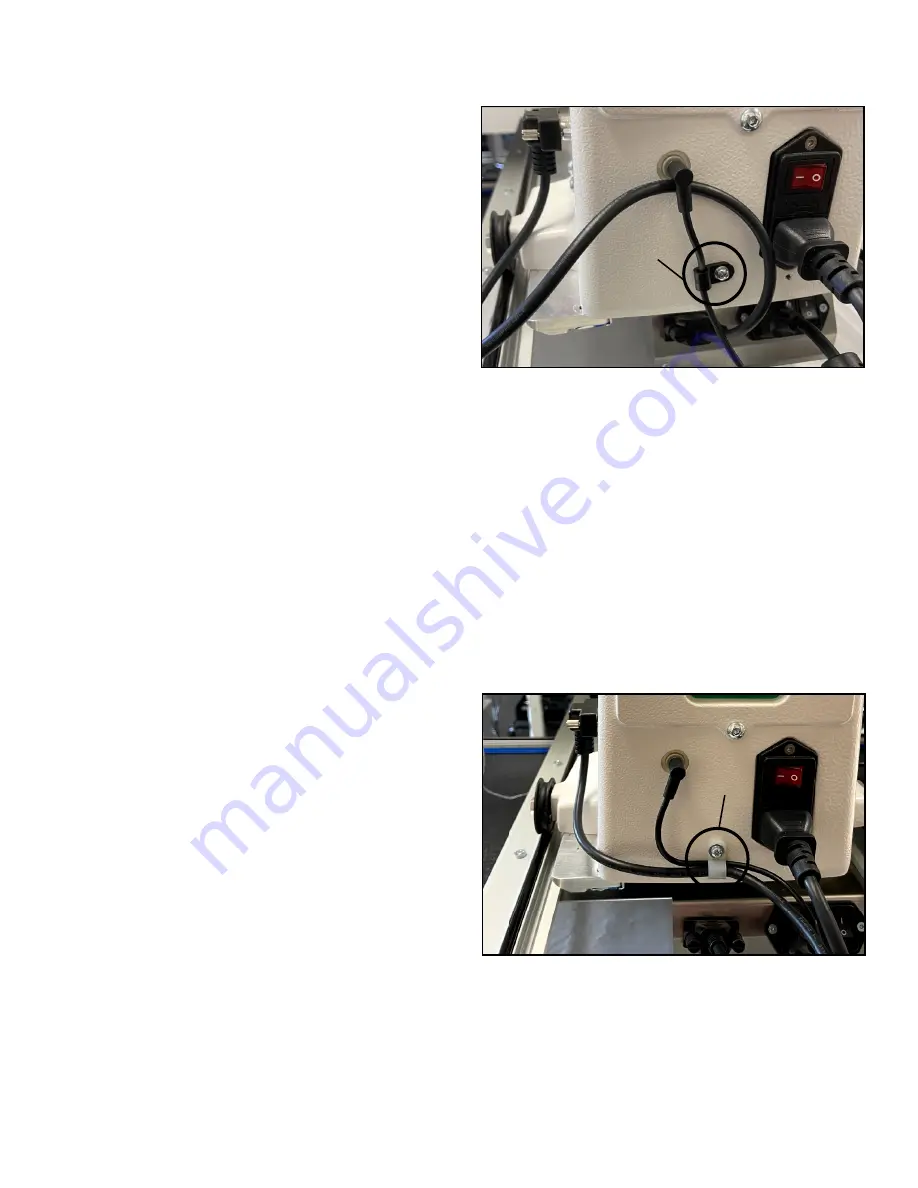
Add or Replace the P-Clip
If you’ve previously set up your Gallant, you may
have already installed a black P-clip to hold the
encoder cable in place on the back of the machine.
This clip needs to be replaced with the
white P-clip
(see
Parts List
,
item P
) so that it can hold both the
encoder cable and the communication cable in
place. This prevents the cables from rubbing along
the carriage when you move the machine.
If this black P-clip is already installed, follow all the
steps below.
If no black P-clip is installed, skip to step 3.
1. Using a Phillips screwdriver, remove the screw
and washer from the black P-clip.
(This screw
and washer may be reused, but there are spare
parts in the bag with item P, if needed.)
2. Once you remove the screw, open the prongs of
the P-clip until the opening is large enough for
you to remove the cable.
3. Take the white P-clip and open the two prongs
wide enough to slip both the encoder and
communication cable in the opening.
4. Put the P-clip against the screw insert on the
back of the Gallant. Make sure neither the
encoder cable nor the communication cable
are touching the tracks of the Pro-Stitcher Lite
carriage.
5. Line up the screw insert with the P-clip. Put the
washer on top of the P-clip and insert the screw.
Tighten the screw using a Phillips screwdriver.
6. With the power cable plugged into the machine
and the motors in the engaged position, ensure
that the quilting machine can move in both the
X (left/right) and the Y (front/back) directions
and that the corresponding gears are rotating as
well.
black
P-clip
white
P-clip
NOTE
: Make sure there is no strain on the
cables when putting the P-clip in place.
NOTE
: If needed, push the machine to the
front of the frame so the machine stays put
while you tighten the screw.


