10
Use custom setup
Custom Setup
allows you to configure the
FastStream VT to best suit the needs,
performance and level of reliability for your
application. If you want to create more than one
VTL, use custom setup. You may create up to two
VTLs.
1
f you are not already in the ExpressNAV
interface, type the IP address of your appliance,
as found in
Use the ExpressNAV interface
on
page 27, in a standard browser, click
Enter
Here
and type in your user name and
password.
2
On the
Initial Setup
page, choose the
Custom
Setup
button.
3
Click on
Next
.
4
Type a name for your Virtual Tape Library in the
box provided on the page under the
Step 1
heading.
• In
Step 2
, select a RAID level. Refer to
Designing RAID groups
on page v in the
Appendix for more information. Click on the Hot
Spares radio button if you want a Hot Spare.
Refer to
Use Hot Spares
on page 11.
5
In
Step 3
, click on the
System Scan
button to
discover the drives available for VTL
configuration.
6
When the scanned drives box is populated,
select the drives to be used for the underlying
RAID group associated with the VTL. The
Minimum Number Additional Drives
Required
heading lists the number of drives
you must add to fulfill the RAID level and Hot
Spare requirements you have already selected.
7
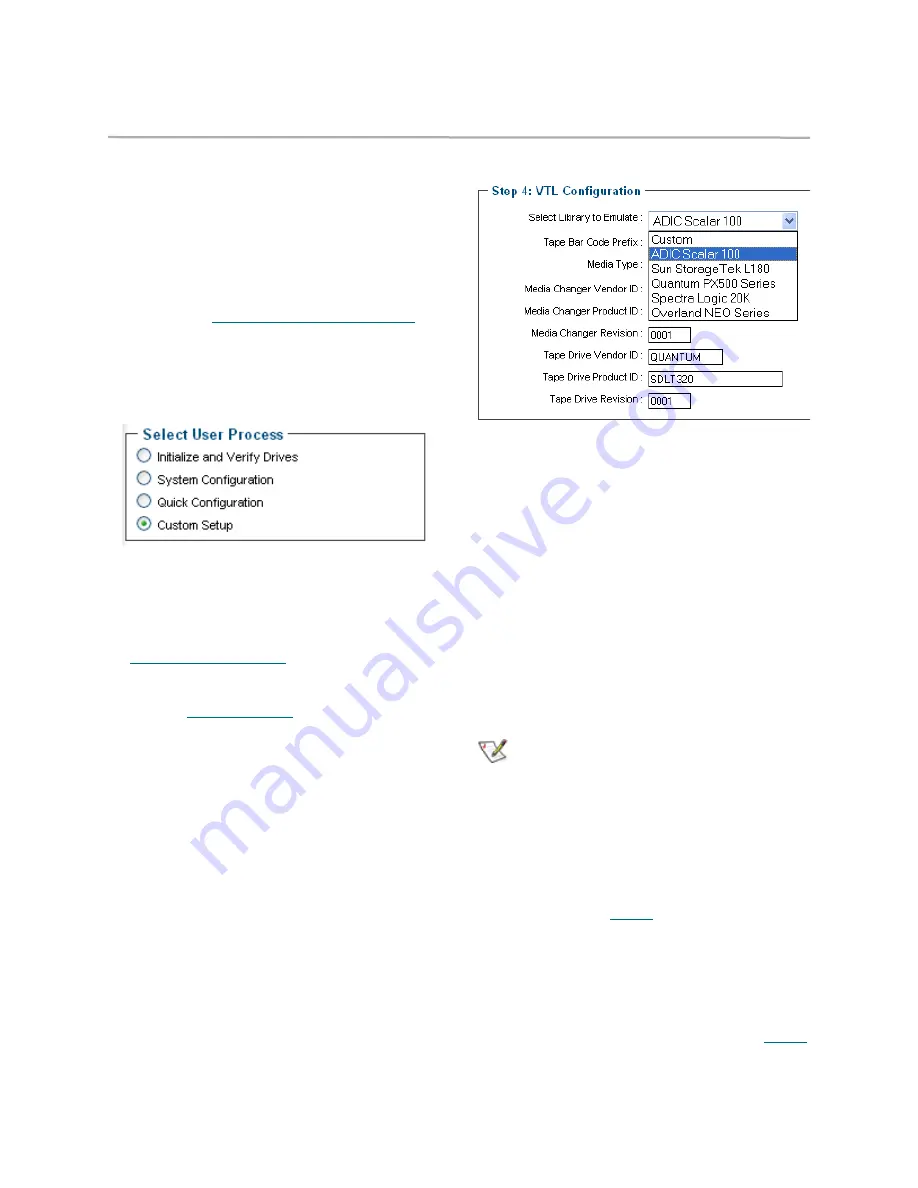
Answer the questions in
Step 4
to define your
virtual storage as if it were a physical tape
storage array based on the needs of your ISV.
• You may select a library to emulate or select
Custom
to define your own setup.
• If you select a library, default values for
that library are entered into the fields in
the rest of
Step 4
and in
Step 5
.
• If you select
Custom
, you must
complete the fields in
Step 4
and
Step 5
on the screen. However, some fields
may be populated automatically for you
depending on your system.
8
When you have completed your choices, click
Next
.
9
The
Virtual Tape Library Setup
page appears.
If the new configuration is the way you want it,
click on
Commit.
10 In the warning box, verify that you want to add
the VTL by clicking on
Yes
.
Note
Clicking on
No
returns you to the
Virtual
Tape Library Setup
page and you can
choose to begin this procedure again
Click on the
Cancel
button.
Click on the
Manage
menu item on the left.
Select the
Virtual Tape Libraries
arrow.
Click on the
Create Virtual Tape Library
button.
Continue with
Step 3
in this process, typing in
a name for your VTL.
11 The
Virtual Tape Library Setup
page appears.
• Click
on
Done
if you do not want to create
another VTL.
• Click
on
Configure Another
to create
another VTL. Begin the process from
Step 4
in this process.


