


6
2
Locate the FastStream with the serial number
recorded earlier.
3
Highlight the serial number.
4
Click
Next
.
If a DHCP server is available on your network,
an address is assigned automatically by the
server. Note the assigned address:
_____________________________________
If you do not have a DHCP server, get an
IPaddress and subnet mask from your network
administrator, type it into the area provided, and
select
Next
.
5
Click on
Launch Browser
Your browser points to the FastStream VT
splash screen. If you use Internet Explorer as a
browser, continue on to
Internet Explorer setup
below. If not, continue on to
Begin initial
configuration
.
Internet Explorer setup
1
Open your browser
2
Select
Internet Options
.
3
In the
Internet Options
screen, select the
Security
tab.
4
Click on the
Trusted Sites
icon.
5
Click on the
Sites
button.
6
In the text box
Add this Web site to the zone
,
add the IP address of the appliance. You may
use wild cards.
7
Click on
Add
8
Uncheck the
Require server verification
check box.
9
Click
OK.
10 At the bottom of the
Internet Options
box, click
on
OK
and close the box.
Begin initial configuration
1
The ExpressNAV interface welcome screen
appears. Click on
Enter Here
2
Type in the user name and password.
Note
The default user name is
root;
it is case
insensitive. The default password is
Password
; it is case sensitive. It is best
practice to change the passwords. Refer to
Optional system modifications
on page 13.
3
The
Initial Setup
page appears.
Before creating a Virtual Tape Library, you may
wish to initialize and verify your drives to ensure
drive integrity. Refer to
Initialize and verify
drives
on page 7.
CAUTION
CAUTION
Selecting Drive Initialization causes all
previous storage data on the drive to be
erased. Make sure all of your information is
backed up before initializing drives.
4
Go on to
Configure Virtual Tape
on page 7.
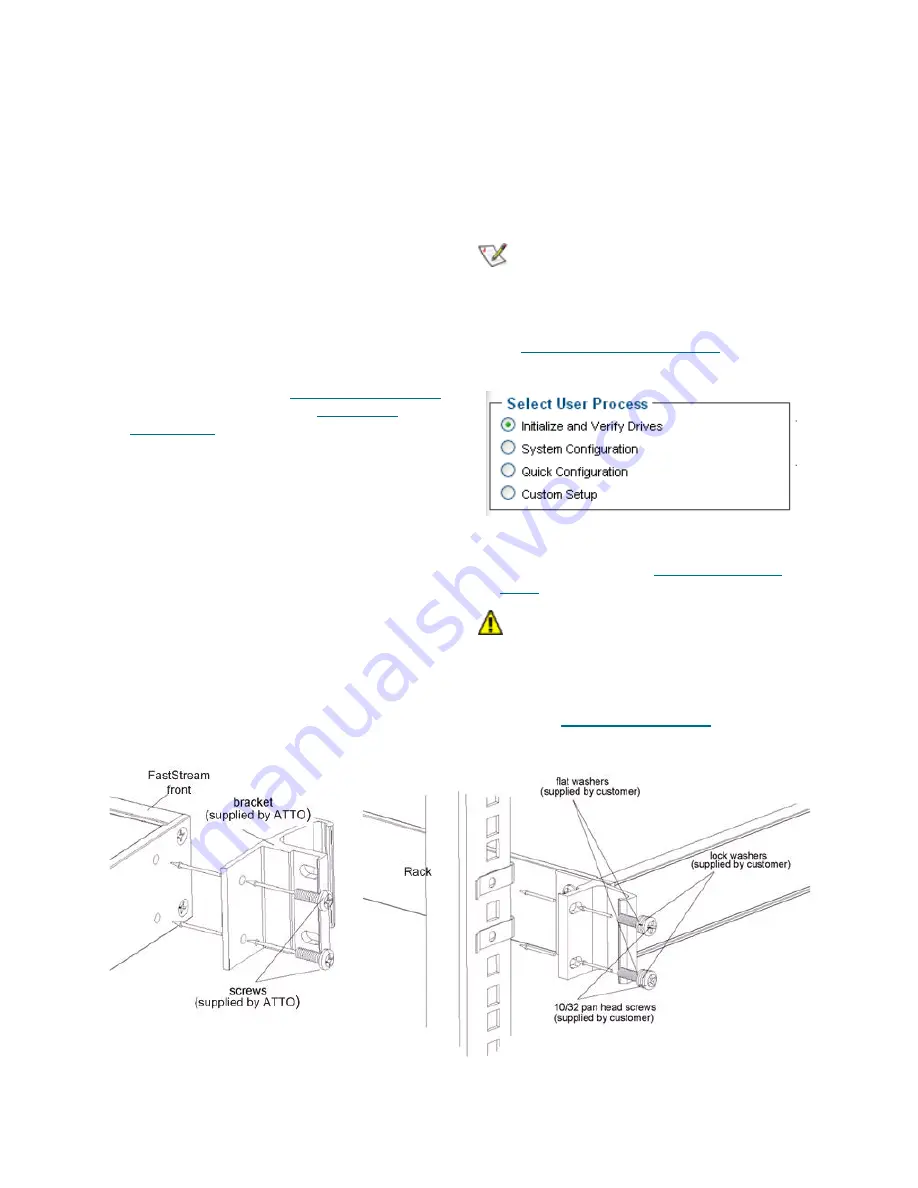
Exhibit 2.0-1 General bracket assembly


