


133
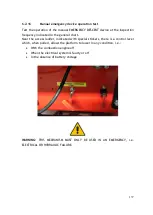
6.2.12
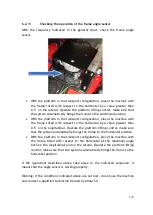
Checking the operation of the scissor angle sensor
With the frequency indicated in the general chart, check the scissor angle
sensor.
•
Lift the platform to a height greater than the transport height, check that
the manual levelling functions are not allowed.
•
Check the operation of the anti-shearing device; this test is performed by
lifting the platform to a height that involves an angle of the scissor
frames greater than 12° with respect to the horizontal and make sure
that the descent movement stops automatically at a scissor angle
between 7° and 9° (the vertical distance between the ends of the scissors
must be greater than 50mm). Further movements downwards are possible
only after a 3s delay at reduced speed.
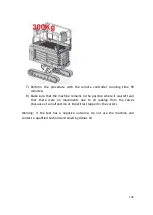
•
Check the operation of the travel function with the platform lifted; this
test is performed by lifting the platform to a height that involves an angle
of the scissor frames of 23° with respect to the horizontal (maximum
height of transit area 4.5mt) and make sure that it is possible to travel
with the machine only at reduced speed (light indicator 2 flashing ). Also
make sure that at greater heights the light indicator (2) turns off and that
it is not allowed to move.
If the operations described above take place in the indicated sequence, it
means that the angle sensor is working properly.
Warning: if the conditions indicated above are not met, do not use the machine
and contact a qualified technician trained by Almac Srl
Содержание 1090 EVO
Страница 7: ...7...
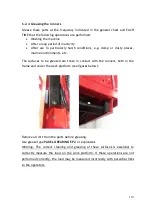
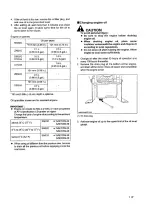
Страница 10: ...10 Maximum transport height allowed manual levelling and the adjustment of the travel speed is allowed...
Страница 22: ...22...
Страница 23: ...23...
Страница 49: ...49 37 Combustion engine 38 Fuel tank 39 Bi levelling chassis 37 38...
Страница 78: ...78...
Страница 80: ...80...
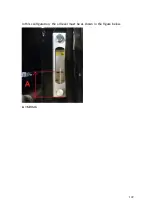
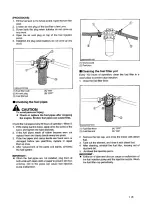
Страница 122: ...122 In this configuration the oil level must be as shown in the figure below A 60mm...
Страница 144: ...144...
Страница 145: ...145...
Страница 146: ...146...
Страница 147: ...147...
Страница 148: ...148...
Страница 149: ...149...
Страница 150: ...150...
Страница 151: ...151...
Страница 152: ...152...
Страница 156: ...156 6 Using the nut supplied point A 7 Move the front wheel back by pressing on the track with your foot...
Страница 161: ...161 8 ATTACHMENTS 8 1 Declaration of conformity...
Страница 163: ...163 MANDATORY ROUTINE INSPECTIONS Date Observations Seal Signature...
Страница 177: ...177 8 4 Hydraulic diagram See attachment 8 5 Wiring diagram See attachment...