


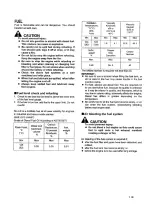

130
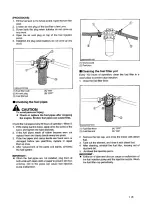
To replace the discharge filters located inside the hydraulic tank, proceed as
follows:
1)
Arrange the machine with the extending structure lifted and block it with
the special mechanical locks for maintenance.
Now turn it off and
deactivate the electric panel
2)
Empty the hydraulic oil reservoir
3)
Unscrew the blocking screws (3) on the hydraulic tank lid and remove it
from its housing
4)
Remove the cartridge of the filters (1)
5)
Remove the filter (1) and fit a new one in its place.
6)
Work through the instructions above in reverse order to restore the
machine to its normal operating conditions
7)
Seal the lid with sealing paste
8)
Fill the hydraulic oil reservoir with oil and check the level.
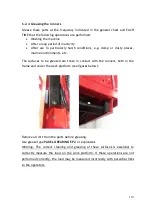
6.2.10.2
Replacement of return filter
To replace the discharge filter (2) located above the hydraulic tank, proceed as
follows:
1)
Arrange the machine with the extending structure lifted and block it with
the special mechanical locks for maintenance.
Now turn it off and
deactivate the electric panel
2)
Unscrew the blocking screws (
4
) on the filter and remove it from its
housing
3)
Unscrew the filter cartridge (
5
). Take care of the seals and/or O-rings.
4)
Remove the cartridge (
6
) and fit a new one in its place.
5)
Work through the instructions above in reverse order to restore the
machine to its normal operating conditions.
Содержание 1090 EVO
Страница 7: ...7...
Страница 10: ...10 Maximum transport height allowed manual levelling and the adjustment of the travel speed is allowed...
Страница 22: ...22...
Страница 23: ...23...
Страница 49: ...49 37 Combustion engine 38 Fuel tank 39 Bi levelling chassis 37 38...
Страница 78: ...78...
Страница 80: ...80...
Страница 122: ...122 In this configuration the oil level must be as shown in the figure below A 60mm...
Страница 144: ...144...
Страница 145: ...145...
Страница 146: ...146...
Страница 147: ...147...
Страница 148: ...148...
Страница 149: ...149...
Страница 150: ...150...
Страница 151: ...151...
Страница 152: ...152...
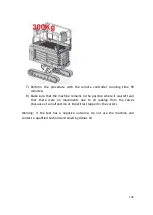
Страница 156: ...156 6 Using the nut supplied point A 7 Move the front wheel back by pressing on the track with your foot...
Страница 161: ...161 8 ATTACHMENTS 8 1 Declaration of conformity...
Страница 163: ...163 MANDATORY ROUTINE INSPECTIONS Date Observations Seal Signature...
Страница 177: ...177 8 4 Hydraulic diagram See attachment 8 5 Wiring diagram See attachment...