


1
6
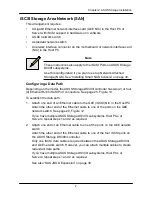
Chapter 2: ASUS Storage Installation
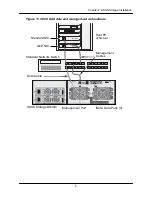
Figure 5. ASUS Storage drive slot numbering
Install all of the drive carriers into the ASUS Storage enclosure to ensure proper
airflow, even if you do not populate all the carriers with disk drives.
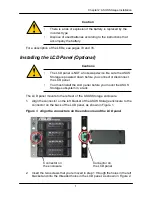
Installing Your Disk Drives
Installing Your Disk Drives
To install your disk drives:
1. Remove a disk drive carrier.
2. Carefully lay the disk drive into the drive carrier at the front, so that the screw
holes on the sides line up.
See page 17, Figure 6.
3. Insert the screws through the holes in the drive carrier and into the sides of
the disk drive.
•
Install only the counter-sink screws supplied with the ASUS Storage.
•
Install four screws per drive.
•
Snug each screw. Be careful not to over-tighten.
4. Reinstall the drive carrier into the ASUS Storage enclosure.
Repeat steps 1 through 3 until all of your disk drives are installed.
Содержание DS300f
Страница 1: ...ASUS Storage DS300f DS300i User Manual Version 1 0 ...
Страница 10: ...x Language 178 Closing Smart NAS Console 178 ...
Страница 27: ...8 Chapter 1 Introduction to ASUS Storage ...
Страница 57: ...3 8 Chapter 2 ASUS Storage Installation ...
Страница 73: ...54 Chapter 3 ASUS Storage Setup ...
Страница 164: ...14 5 Chapter 4 Management with ASUS Storage Management ...
Страница 221: ...202 Chapter 5 SmartNAVI ...
Страница 235: ...216 Chapter 6 Management with the CLU Figure 4 Controller Status LED Controller Status ...
Страница 337: ...318 Chapter 8 Maintenance ...
Страница 425: ...406 Chapter 11 Support ...
Страница 433: ...414 Appendix A Setting up NAS Network Drives ...
Страница 449: ...430 Index ...


