


28
Basic Camera Operation
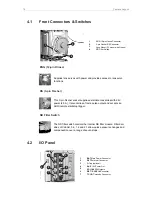
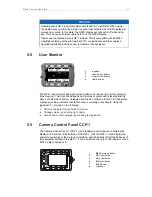
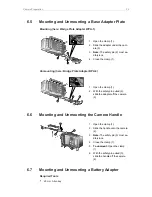
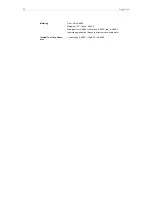
Connecting the CCP-1
1
MVF-1 Connector
2
CAM Connector
Connect the CCP-1 CAM connector with the HDMI connector on camera top side,
located underneath the camera handle.
When it is used alone with the camera, the CCP-1 always shows an image.
When a MVF-1 is daisy-chained to the CCP-1, the MVF-1 will show an image in the
EVF, but only one of the two monitors, either of the MVF-1 or the CCP-1 is active.
If the monitor of the MVF-1 is closed, the CCP-1 is activated.
If the monitor of the MVF-1 is opened, the monitor will be activated.
Activate the MVF-1 by pressing a screen button on the MVF-1.
Activate the CCP-1 by pressing any button except the
REC
button on the CCP-1.
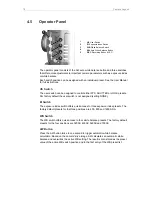
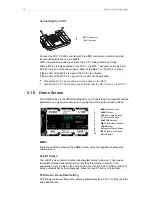
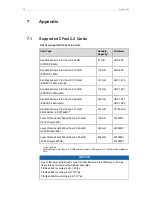
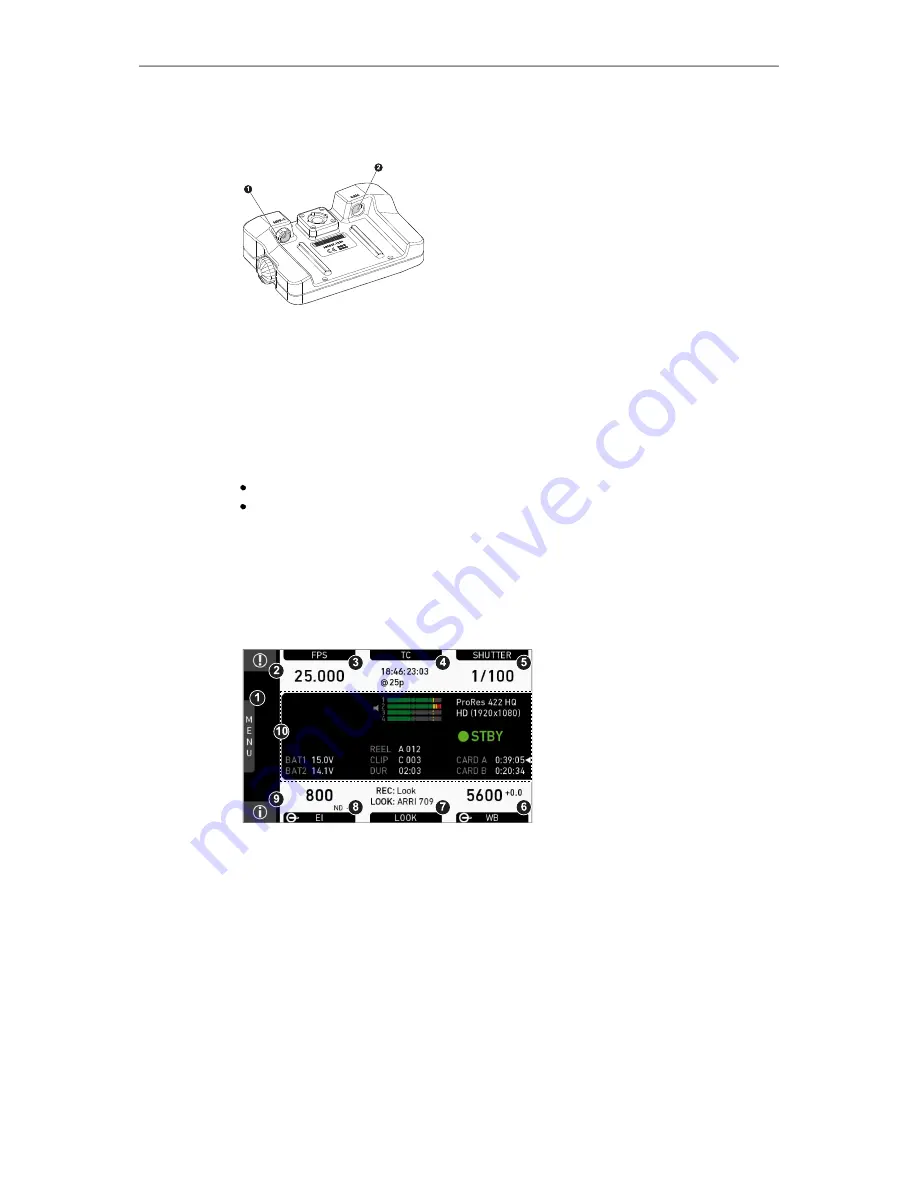
5.10 Home Screen
The HOME screen is the AMIRA's default screen. It shows the most important camera
parameters and gives quick access to changing them through the screen buttons:
1
MENU
Button/Access
2
ALERT
Screen
3
FPS
Frame Rate Settings
4
TC
Timecode Settings
5
SHUTTER
Settings
6
WB
White Balance Settings
7
LOOK
Settings
8
EI
Exposure Index Settings
9
INFO
Camera Info Screens
10
Status Section
MENU
While the monitor is showing the HOME screen, press the jogwheel to access the
camera menu.
ALERT Screen
The ALERT screen communicates critical system states to the user. They require
immediate attention and remain active until the state returns to normal. A red
exclamation mark, visible on the home screen, the monitor, EVF and SDI overlays (if
active) indicates active alert messages, press the round '!' button to read them.
FPS Sensor Frame Rate Setting
FPS shows the sensor frame rate, allowing adjustments from 0.75 to 100 fps (200 fps
with valid license).


