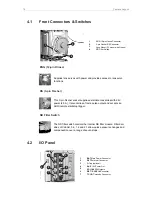

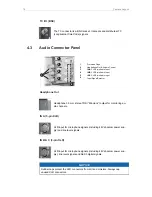


26
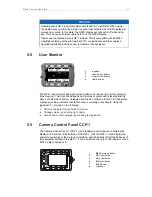
Basic Camera Operation
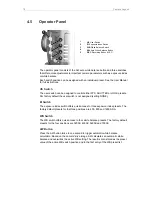
VF-1 and VF-2 User Buttons
The MVF-1 has two user buttons, VF1 and VF2 (4, 5). You can assign frequently used
functions to each button.
For more information on how to assign user buttons please refer to the user manual.
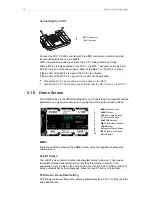
REC Button
The recording button starts and stops recording to the CFast 2.0 card. With no CFast
2.0 card inserted, the button is inactive.
M (Monitor Button)
Press the M (Monitor) button (7) to change the monitor mode between live view and
user interface.
Proximity Sensor
This infrared sensor automatically deactivates the MVF-1's internal OLED panel when
you withdraw your eye. The sensor is placed either on the bottom left-hand side of the
viewfinder (generation 1), or it is integrated into the eye cup (generation 2).
Diopter Adjustment
With the camera switched on and looking into the viewfinder, twist the ring (9) left or
right to adapt the viewfinder image to your visual acuity. The diopter adjustment can
compensate from -5 to +5 diopters.
Screen Buttons
The functionality of the screen buttons (10) depends on the monitor mode. With the
monitor in live view mode, press the lower screen buttons to toggle the status bar
content. When the monitor is set to show the user interface, the screen buttons give
quick access to main camera settings and allow for various other adjustments in the
camera menu.
Jogwheel
Using the jogwheel (11), you can scroll or navigate through lists and menus to change
and confirm settings.
PLAY Button
The PLAY button is located on the bottom side of the MVF-1. Press and hold the PLAY
button for two seconds to start in-camera playback from the CFast 2.0 card.
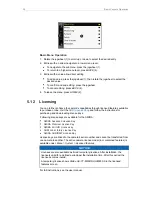
NOTICE
Constantly covering the proximity sensor of the MVF-1 can cause an irreversible
burn-in on the viewfinder OLED display. If you need to cover the viewfinder, please
disable the EVF OLED first using the EVF power setting:
MENU > Monitoring > EVF/MONITOR > Settings > EVF Power
.