C.19 Option 34: NTP/PTP Server
193
•
Clock Jitter – is defined as the root-mean-square (RMS) average of the most recent offset
differences, and it represents the nominal error in estimating the offset (of the clock).
•
Clock wander – is the RMS of exponentially weighted frequency differences. This is not used
directly, but can, along with the jitter, be a highly useful monitoring and debugging tool.
•
Stratum – the level of each server in the hierarchy is defined by a stratum number. Primary
servers are assigned stratum one.
NTP Configure
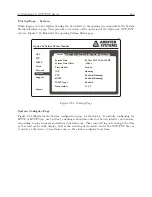
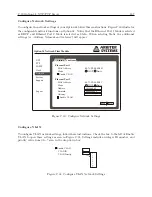
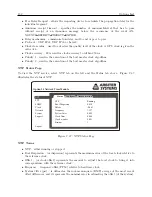
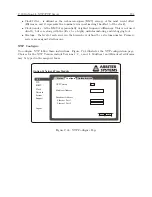
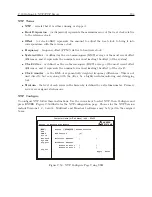
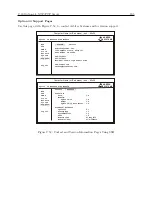
To configure NTP follow these instructions. Figure C.38 illustrates the NTP configuration page.
Choices for the NTP Version include Versions 1, 2, 3 and 4. Multicast and Broadcast addresses
may be typed in the assigned boxes.
Option 34 Network Time Module
Status
Configure
NTP
PTP
SNMP
Clock
Network
System
Support
Logout
Authentication
NTP Version
Multicast Address
Broadcast Address
Ethernet Port 1
Ethernet Port 2
4
Apply
Reset
Figure C.38: NTP Configure Page
Содержание 1084A
Страница 4: ...iv ...
Страница 6: ...vi ...
Страница 18: ...xviii LIST OF FIGURES ...
Страница 23: ...1 4 Attaching Rack Mount Ears to 1084A B C Series Clocks 3 Figure 1 2 Attaching Rack Mount Ears ...
Страница 24: ...4 Unpacking the Clock ...
Страница 36: ...16 Connecting Inlet Power Input and Output Signals ...
Страница 39: ...4 1 GPS Antenna Installation 19 Figure 4 2 Antenna Mounting Bracket Figure 4 3 Antenna Mounting with AS0044600 ...
Страница 44: ...24 GPS Antenna and Cable Information ...
Страница 114: ...94 Startup and Basic Operation ...
Страница 123: ...B 4 Physical Dimensions 103 Figure B 1 Suggested Mounting of the AS0094500 Surge Arrester ...
Страница 124: ...104 Using Surge Arresters ...
Страница 134: ...114 Options List C 6 2 Option 06 Firmware Setup Figure C 3 Option 06 Firmware Setup ...
Страница 142: ...122 Options List Figure C 5 Option 06 Output Jumper Settings ...
Страница 143: ...C 6 Option 06 Parallel BCD Output 1 millisecond Resolution 123 Figure C 6 Option 06 Board Layout and Jumper Locations ...
Страница 157: ...C 10 Option 17 Parallel BCD Output and Second RS 232C Port 137 Figure C 12 Option 17 Output Jumper Settings ...
Страница 158: ...138 Options List Figure C 13 Option 17 Board Layout and Jumper Locations ...
Страница 163: ...C 13 Option 20A Four Fiber Optic Outputs 143 Figure C 14 Option 20A Jumper Locations ...
Страница 170: ...150 Options List Figure C 16 Option 23 Internal Jumper Setup ...
Страница 172: ...152 Options List Figure C 17 Option 27 Jumper Locations ...
Страница 190: ...170 Options List Figure C 20 Option 29 Connector Signal Locations ...
Страница 246: ...226 Options List ...

