172
Options List
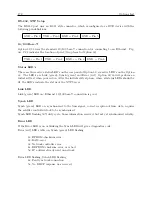
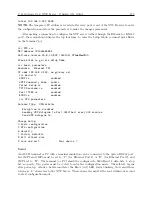
RS-232, NTP Setup
The RS-232 port uses an RJ-11 style connector, which is configured as a DTE device with the
following pin definitions:
GND = Pin 2
TXD = Pin 3
RXD = Pin 4
GND = Pin 5
10/100 Base-T
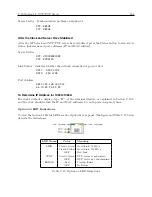
Option 32/33 uses the standard 10/100 base-T connection for connecting to an Ethernet. Fig-
ure C.21 indicates the location of pin 1 (two places for Option 33).
TXD+ = Pin 1
TXD– = Pin 2
RXD+ = Pin 3
RXD– = Pin 6
Status LED’s
There are three active status LED’s on the rear panel of Option 32; six active LED’s on the Option
33. The LED’s are Link (green), Synch (green) and Error (red). Option 32/33 will perform an
initial self test when powered on. After the initial self-test phase, where all status LEDs should be
lit, the LED’s indicate the status of the NTP Server.
Link LED
Link (green) LED on: Ethernet 10/100 base-T connection is good.
Synch LED
Synch (green) LED on: synchronized to the time signal, correct reception of time data, requires
the satellite controlled clock to be synchronized.
Synch LED flashing 50% duty cycle: Some information received, but not yet synchronized reliably.
Error LED
If the Error LED is on or blinking the Synch LED will give a diagnostics code.
Error (red) LED stable on, Synch (green) LED flashing
1x: EPROM-checksum error
2x: RAM-error
3x: Network controller error
4x: EEPROM checksum error, or is bad
5x: IP address already used on network
Error LED flashing, Synch LED flashing
4x: Faulty network connection
5x: No DHCP response was received
Содержание 1084A
Страница 4: ...iv ...
Страница 6: ...vi ...
Страница 18: ...xviii LIST OF FIGURES ...
Страница 23: ...1 4 Attaching Rack Mount Ears to 1084A B C Series Clocks 3 Figure 1 2 Attaching Rack Mount Ears ...
Страница 24: ...4 Unpacking the Clock ...
Страница 36: ...16 Connecting Inlet Power Input and Output Signals ...
Страница 39: ...4 1 GPS Antenna Installation 19 Figure 4 2 Antenna Mounting Bracket Figure 4 3 Antenna Mounting with AS0044600 ...
Страница 44: ...24 GPS Antenna and Cable Information ...
Страница 114: ...94 Startup and Basic Operation ...
Страница 123: ...B 4 Physical Dimensions 103 Figure B 1 Suggested Mounting of the AS0094500 Surge Arrester ...
Страница 124: ...104 Using Surge Arresters ...
Страница 134: ...114 Options List C 6 2 Option 06 Firmware Setup Figure C 3 Option 06 Firmware Setup ...
Страница 142: ...122 Options List Figure C 5 Option 06 Output Jumper Settings ...
Страница 143: ...C 6 Option 06 Parallel BCD Output 1 millisecond Resolution 123 Figure C 6 Option 06 Board Layout and Jumper Locations ...
Страница 157: ...C 10 Option 17 Parallel BCD Output and Second RS 232C Port 137 Figure C 12 Option 17 Output Jumper Settings ...
Страница 158: ...138 Options List Figure C 13 Option 17 Board Layout and Jumper Locations ...
Страница 163: ...C 13 Option 20A Four Fiber Optic Outputs 143 Figure C 14 Option 20A Jumper Locations ...
Страница 170: ...150 Options List Figure C 16 Option 23 Internal Jumper Setup ...
Страница 172: ...152 Options List Figure C 17 Option 27 Jumper Locations ...
Страница 190: ...170 Options List Figure C 20 Option 29 Connector Signal Locations ...
Страница 246: ...226 Options List ...


