background image

Finishing the Project

143

VisualArchitect v1.1

CONFIDENTIAL AND PROPRIETARY. COPYRIGHT, AMX LLC, 2006

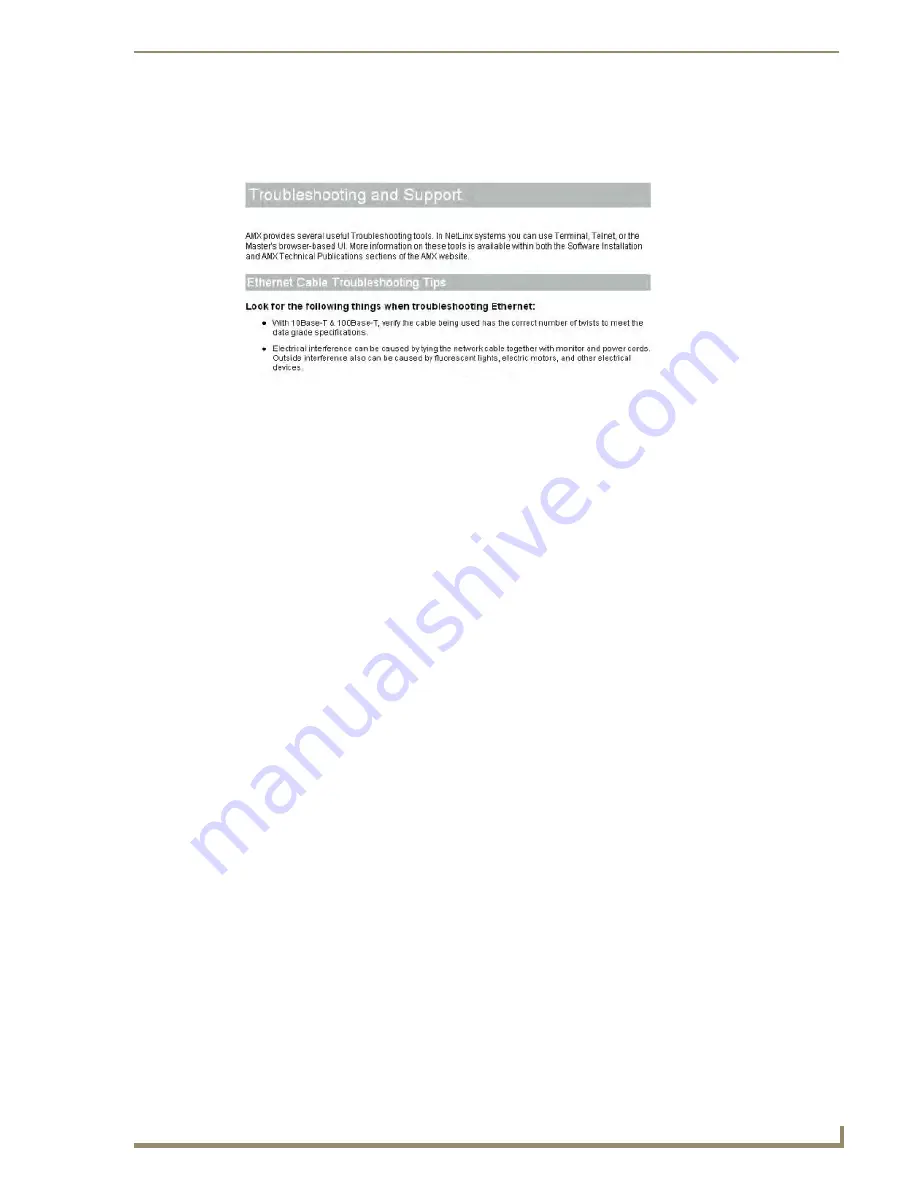
Troubleshooting and Support

This section contains troubleshooting information relating to many different aspects of the control 
system (FIG. 123). 

Contact Information

This section provides contact information for AMX technical support. 

FIG. 123  

Troubleshooting and Support

Содержание VISUALARCHITECT 1.1

Страница 1: ...Operation Reference Guide System Design Software VisualArchitect v1 1 Document ID 033 004 2972 Last Revised 8 30 2006 CONFIDENTIAL AND PROPRIETARY COPYRIGHT AMX LLC 2006 ...

Страница 2: ...the AMX SOFTWARE including without limitation any if any service packs or hot fixes provided to Licensee after the expiration of the ninety 90 day Limited Warranty period are not covered by any warranty or condition express implied or statutory LICENSEE REMEDIES AMX s entire liability and Licensee s exclusive remedy shall be repair or replacement of the AMX Software that does not meet AMX s Limite...

Страница 3: ...e context menu 4 Properties Window 5 Diagram Area 5 System Tab System Diagram 6 Devices 6 Device Connections 7 UI Tabs 7 Touch Panel UI Diagram 7 Keypad UI Diagram 8 Remote UI Diagram 8 Toolbox 9 Toolbox System Devices 9 Toolbox Touch Panel Navigation 10 Toolbox Devices tab 11 Status Bar 11 Related Software Applications 12 CAFE DUET 12 ContentDatabaseEditor 12 KeypadBuilder 12 FileTransfer 2 12 G4...

Страница 4: ...Manually Adding IR Devices To The Device Database 27 Adding IRN Files To The Database 28 Creating the IR Metadata XMD File 28 Capturing IR Codes 29 IR Capture And Management Dialog 29 Setting Up an IRIS IR Capture Unit 31 IR Capture Entering Device Information 32 IR Capture Selecting Functions To Capture 32 IR Capture Setting IR Properties 33 IR Capture Capturing IR Codes From The Hand Controller ...

Страница 5: ...ame Number 51 Selecting AMX User Interface Devices 52 Removing Devices 52 Replacing The Central Controller 53 Replacing System Devices 54 Replacing Controlled Devices 55 Dynamic Device Discovery Protocol DDDP 56 Dynamic Device Discovery Concepts 56 Working With DDDP Devices 57 To Enable Internet Access On The Master 57 Enable Auto Bind 58 Enable Module Search on Internet 58 Troubleshooting DDDP De...

Страница 6: ...s 76 Device Properties Keypads 77 Device Properties Remotes 77 Device Properties Third party Devices 78 Device Properties Media 79 Device Number Ranges By Device Type 80 Communication Parameters 80 Communication Parameters Ethernet Connections 81 Communication Parameters IR Connections 81 Communication Parameters Modem Connections 81 Communication Parameters Serial RS 232 422 485 Connections 82 Co...

Страница 7: ...iew Menu 98 Defining Device Macros Via Codebuilder 98 Defining the Navigation for UI Devices 101 Overview 101 Defining Touch Panel Navigation 101 Touch Panel UI Diagram 102 Adding UI Elements To The UI Diagram 102 Removing UI Elements 103 Replacing UI Elements 103 Touch Panel Templates 104 Installing Touch Panel Templates 105 Selecting A Touch Panel Template Via The Basic System Assistant Dialog 1...

Страница 8: ...ing User Interface Elements From The Touch Panel Page 120 Editing Button Text 120 Customize UI Pages Dialog 121 Generating The TPDesign4 Project TP4 File 122 Defining Keypad UI Navigation 122 Keypad UI Tabs 124 Keypad UI Diagram 124 Keypad Buttons 125 Keypad Button Properties 125 Combining And Uncombining Buttons 126 Uncombining Buttons 127 Exporting The Keypad Button Engraving Template As A DXF F...

Страница 9: ...ment List 141 Installation Checklist 141 Wiring Connections 142 Installation Instructions 142 Troubleshooting and Support 143 Contact Information 143 Using AMX Power Calculator 144 Appendix A Troubleshooting and Support 147 Overview 147 Troubleshooting DDDP Devices 147 Ethernet Cable Troubleshooting Tips 148 If VA Freezes During File Transfers 148 Troubleshooting IR Capture 149 RS 232 Control Trou...

Страница 10: ... Channel Layout Receiver 177 IR Template Channel Layout Set Top Box 181 IR Template Channel Layout Slide Projector 183 IR Template Channel Layout TV 187 IR Template Channel Layout VCR 190 IR Template Channel Layout Video Projector 192 Appendix C Using an IRIS IR Capture Unit 195 Overview 195 IRIS Product Specifications 195 IRIS Capturing RC Functions 196 Capturing RC Functions In Default Mode 196 ...

Страница 11: ...es by Device Type 205 Supported AMX Accessories Netlinx Controllers 205 Supported AMX Accessories Expansion Devices 209 Supported AMX Accessories Remote Controllers 210 Supported AMX Accessories Keypads 210 Supported AMX Accessories MVP Wireless Touch Panels 213 Supported AMX Accessories Modero Touch Panels 214 Appendix F The InConcert Resource Center 225 InConcert Resource Center Partner List 225...

Страница 12: ...x VisualArchitect v1 1 CONFIDENTIAL AND PROPRIETARY COPYRIGHT AMX LLC 2006 Table of Contents ...

Страница 13: ...rize yourself with the elements of the VA Workspace and the elements of the help file When you re ready to begin select an option under Start a New Project on the Welcome To Visual Architect window Basic System Assistant System Design Library New Empty System Refer to the Getting Started topic for details Supported Windows Platforms and PC Requirements Supported Operating Systems Windows XP Profes...

Страница 14: ...ckly specify a Central Controller Touch Panel and up to two Keypads This option is the same as selecting File New Basic System Assistant System Design Library System Design Library files SDLs represent pre configured VA Project Systems designed to accommodate various installation types SDLs are available for Dealers to download from www amx com in the Markets section Select a SDL that most closely...

Страница 15: ...log where you can specify the location of the device database that you want to use for your VA project s The Device Database is essentially a collection of Cafe Duet module files JAR Each JAR file represents a controlled device that can be added to the project as a third party device via the Devices tab of the Toolbox By default the Device Database is installed to the same directory as VA but you ...

Страница 16: ...Tree context menu The System Tree context menu provides shortcuts to many device oriented functions of VA Right click on any device in the Device Tree to access this menu FIG 3 Un check the checkbox next to any device to remove its element from the Touch Panel UI diagram Connection Manager Opens the Connection Manager dialog where you can view edit connection settings for the selected device CodeB...

Страница 17: ...UI devices Note that the example above indicates several tabs across the top of the Diagram Area window System Tab The System tab displays the System Diagram which gives a visual representation of the devices in the system and their connections to each other and to the Central Controller When you start a new system the program automatically adds a NI 3000 NetLinx Central Controller At this point o...

Страница 18: ... System Diagram The System diagram is the graphic representation of the various devices in the control system and their connection to the NetLinx Central Controller The System diagram is displayed in the System tab FIG 6 Devices Each device is represented in the System diagram by a Device Element To add devices to the system simply select each device in the Toolbox and drag and drop into the Syste...

Страница 19: ...ery Keypad in the System diagram there is a separate Keypad UI tab with a Keypad diagram for that keypad The UI tabs provide a graphical representation of how the user will navigate the UI to access devices in the system Touch Panel UI Diagram For every Touch Panel added to the system a separate Touch Panel UI tab is added to the Diagram Area Each Touch Panel UI tab consists of a Touch Panel UI Di...

Страница 20: ...These include the Mio Modero Elite SL Elite DL and Attache Click on any button on the Keypad diagram to select it for editing You can add edit and view button layout menu actions button label text and assign channel codes on each button The selected button s properties are displayed in the Properties window Refer to the Defining Keypad UI Navigation section on page 122 for details Remote UI Diagra...

Страница 21: ... System Devices If you are in the System tab of the Diagram Area the Toolbox provides thumbnail images of the devices that you can add to your system FIG 10 In this scenario use the Toolbox to select AMX hardware and third party devices to add to the system The Toolbox provides thumbnail images of the devices that you can add to your system for easy identification Click on the tabs to view the dif...

Страница 22: ...available within the Template selected for this touch panel In this scenario use the Toolbox to select template elements to incorporate in your panel navigation layout FIG 11 You must select a template for the panel via the Template option in the Device Properties window to populate the tabs in the Toolbox with template elements You must install at least one template via the Touch Panel Template M...

Страница 23: ...ext to any Device Type folder to display a listing of supported Manufacturers for that device type Click the plus sign next to any Manufacturer folder to further expand the view to show the supported Devices for the selected Manufacturer and device type Once you have located the desired device you can click and drag it onto the System tab of the Diagram Area Status Bar The Status Bar displays appl...

Страница 24: ...r version 2 1 or higher is required to edit keypad projects generated by VisualArchitect Using KeypadBuilder you can Assign button arrangements bridge buttons and assign blanks Define button functionality assign button descriptions and channel codes Design button engraving assign text or icons to the buttons Program the Fixed Menu System created menus for navigation on LCD equipped units Define LC...

Страница 25: ...required to open APW NetLinx Studio workspace files generated by VisualArchitect NetLinx Studio is a full featured Integrated Development Environment IDE for NetLinx and Axcess Control Systems NetLinx Studio is available for free download from www amx com Refer to the NetLinx Studio online help and Instruction Manual for instructions TPDesign4 TPDesign4 version 2 6 or higher is required to create ...

Страница 26: ...VisualArchitect v1 1 Overview 14 VisualArchitect v1 1 CONFIDENTIAL AND PROPRIETARY COPYRIGHT AMX LLC 2006 ...

Страница 27: ... the Navigation for UI Devices 7 Saving the Project 8 Generating and Transferring System Files The VA Device Database VA uses a Device Database to populate the list of supported third party devices displayed in the Devices tab of the Toolbox The Device Database is installed as part of the VA installation This provides support for several popular devices However at some point you will probably want...

Страница 28: ... select a Touch Panel the Resolution and Template fields are enabled Resolution This option is only enabled if a Touch Panel has been selected and the Resolution choices available depend on the type of Touch Panel picked Most panels only support one resolution setting which is automatically set when the Touch Panel is selected Click the down arrow to select a resolution setting from the drop down ...

Страница 29: ...t one SDL in the System Design Library directory you can select it via the System Design Library dialog 1 Select System Design Library from the File New sub menu or on the Welcome Screen to open the dialog 2 Fill in the Project Information System name Dealer Designer and Comments The only required input here is the System name 3 Click on the down arrow to select from a drop down list of all SDLs c...

Страница 30: ...ualArchitect v1 1 CONFIDENTIAL AND PROPRIETARY COPYRIGHT AMX LLC 2006 Opening VA Project Files Select File Open or click the toolbar button to open an existing VA Project file VAP via the Open VisualArchitect Project dialog ...

Страница 31: ...that will be included in this system Use the options in the AMX Equipment section of this dialog to select a NetLinx Master one AMX Touch Panel and up to two AMX Mio Modero Keypads a By default the NetLinx Controller selection is set to NI 3000 To select a different master controller click on the down arrow and select from the list of supported NetLinx Central Controllers b By default the Touch Pa...

Страница 32: ...ding Devices To The System The first step in developing a new VA project is to define the devices in the system This includes selecting the devices that you want in the system and adding them to the System diagram establishing device connections and configuring device properties 1 In the Toolbox click on a device tab to display the supported devices of that type available to choose from 2 Select t...

Страница 33: ...n When a device of a particular connection type is added to the System Diagram you can change the device properties and communication parameters for the selected connection type only You cannot change the connection type To change connection types you can remove the device connection type and drag a different connection type for that device into the System User Interface Devices There are three ty...

Страница 34: ...ly but if the Keypad s UI tab is opened the Properties window indicates button level properties in addition to device level properties Custom AXI The Custom AXI include file is used for making any custom coding changes for the system It resides in the Project s Include sub folder If a Custom AXI file is not already present in the Include folder VA creates a blank Custom AXI However if there is a C...

Страница 35: ...RT THE EVENTS GO BELOW DEFINE_EVENT PROGRAM MAINLINE DEFINE_PROGRAM END OF PROGRAM DO NOT PUT ANY CODE BELOW THIS COMMENT Saving The Project Select File Save or click the toolbar button to save the project under its current name The first time you save the project the Save VisualArchitect Project dialog prompts you to define a File Name and specify a target directory for the Project VAP file Selec...

Страница 36: ...Creating a New VA Project 24 VisualArchitect v1 1 CONFIDENTIAL AND PROPRIETARY COPYRIGHT AMX LLC 2006 ...

Страница 37: ...nce the Refresh Rebuild or Update operation has been started it cannot be cancelled Do not exit forcibly exit the program while a device database operation is in progress Modules and IRLs IRN files stored on media such as CDs cannot be added to the device database Adding Devices To The Device Database VA uses a Device Database to populate the list of supported devices displayed in the Devices tab ...

Страница 38: ...ith an IR Library IRL and an IR Metadata XMD file Both files must be present in the Device Database in order for the device to be listed in the Devices tab of the Toolbox There are two ways to approach adding an IR controlled device to the Device Database Manually adding the device by capturing the IR Functions from device s remote controller using an AMX IRIS IR Capture Unit Downloading the devic...

Страница 39: ... the Browse For Folder dialog Select the directory that the new IRL file was saved to and click OK d Click Update to update the Device Database to include the new file as well as any other device files saved in the same directory e Once the database update is complete click the Close button to exit the Device Database Manager dialog At this point the device associated with the new IRL file should ...

Страница 40: ...n IR Metadata XMD file Both files must be present in the Device Database in order for the device to be listed in the Devices tab of the Toolbox If you captured your own IR functions via the IR Capture and Management dialog VA automatically generates the associated XMD file If you are adding an existing IR device you must first open and save the IRL file in the IR Capture and Management dialog to g...

Страница 41: ... codes from the device s hand controller 5 Save the IRL file File Save to a local directory 6 Update the Device Database to include the new IRL and XMD files IR Capture And Management Dialog Select IR Capture and Management from either the File Menu or the System Tree context menu to access the IR Capture and Management dialog where you can capture IR control codes from IR controlled devices that ...

Страница 42: ...the IR Template selection is made automatically based on the Device Type selection In other cases there are multiple template options to choose from for a given Device Type For example if you select CD Player Changer as the Device Type the IR Template options include CD Changer CD Recorder and Disc Player Choose the IR Template that best fits the device you are working with IR Capture window The I...

Страница 43: ...ontrollers associated with the IR controlled devices in your system 1 Connect the RS 232 port on the rear panel of the IRIS to a COM DB 9 port on the PC that is running VA By default VA looks for the IRIS on COM1 2 Plug in the included power supply to a 12V wall outlet and apply power to the IRIS by plugging the two pin power connector into the power connector on the rear panel of the IRIS 3 Selec...

Страница 44: ... an IR Template is selected the Function tab is populated with the functions supported by the selected IR Template The next step is to select the functions that you want to capture from the list of all supported function for this template type in the Functions window IR Capture Selecting Functions To Capture Once you have entered the device information for the device hand controller that you want ...

Страница 45: ...t are represented on the controller but not included in the Main Functions directory 2 Click the Commit button to save your changes The next step is to specify IR Properties for this device IR Capture Setting IR Properties Once you have selected a Device Type you should review the IR Properties for this device type IR Properties are viewed and edited in the Properties tab of the Properties window ...

Страница 46: ... may indicate changing some of the default IR properties Although the IR properties vary for each device type there are some that are common to all devices Module The Device Class is a read only field that indicates the Duet SDK class that this device type implements IR Settings These basic IR properties are common to all IR devices IR Mode Click the drop down menu to select either SET MODE IR the...

Страница 47: ...ties for this device you are ready to start capturing the selected functions using an AMX IRIS IR Capture Unit 1 Select IR Capture Selected from the menu bar or click the toolbar button The dialog steps you through the process The dialog displays the first function that will be captured and indicates how many functions remain after the current one Locate the button on the remote control that match...

Страница 48: ... PC e Press the SEND button to send the captured function to the PC so it can be added to the IRL file for this device The display on the IRIS reads So indicating that the function is being sent to the PC The IR Code Capture and Management dialog should now indicate that it is waiting for you to capture the next selected function and that one less function remains to be captured Repeat steps a f f...

Страница 49: ... the IRIS By default the IRIS uses the following COM Port settings Bits Per Second 9600 Data Bits 8 Parity None Stop Bits 1 Flow Control None Verify that the batteries in the remote control are fresh If the remote has inadequate power it may appear to capture some functions but could result in various anomalies or the inability to capture some functions Try to minimize direct exposure of the IR wi...

Страница 50: ...any new devices to be represented in the Devices tab of the Toolbox so that they can be added to your System the Device Database must be updated to include the new file s via the Device Database Manager dialog Manually Adding Non IR Controlled Devices To The Device Database To manually add a Serial controlled device to the Device Database so that it appears in the Device tab of the Toolbox you wil...

Страница 51: ... the Value column for any item to select from a drop down menu of values supported for each property FIG 24 4 The Functions window FIG 25 is pre populated with list of functions supported for the selected device type Double click on any function in this list to add it to the Control String Assignments window FIG 26 FIG 23 New Control Strings Definition dialog Properties window FIG 24 Click Inside ...

Страница 52: ...inition for each Function 5 Type the custom control string that you want to assign to each function in the Control Strings Assignments window in the Value fields 6 Click OK to save your changes The program will alert you if there is any required information missing In order to save a CSD file the following information must be defined Every Control String Assignment must have a Control String defin...

Страница 53: ...e button to exit the Device Database Manager dialog At this point the device associated with the new CSD should be represented in the Devices tab of the Toolbox in the appropriate device type folder The new CSD file is added to the Device Type folder that matches the Device Type selection made in the New Control Strings Definition dialog Within the appropriate Device Type folder the new file is ad...

Страница 54: ...re several search options available Partner List Click to display a list of manufacturers that participate in the InConcert program Search Devices Click to display the Search Devices options This is the default view for the InConcert Resource Center Search Remote Controls Click to show the Search Remote Controls options Search New Releases Click to access the Search New Releases page where you can...

Страница 55: ...by VA to support this device In order for devices to be represented in the Devices tab of the Toolbox for inclusion in your VA projects the Module JAR file associated with the device must be present in the Device Database AXI file Include files can be loaded and edited in NetLinx Studio like normal AXS program files Like AXS program files the name of the include file is stored on the first line of...

Страница 56: ... to search the InConcert database Since VA only supports Duet modules look for the devices that are tagged as Duet Module devices with a D icon 5 Use the For drop down menu to search for either Remote Controls default setting or IR Files 6 Click Search to perform a search for all remote controls that meet the search criteria The results of the search are listed on this page sorted alphabetically b...

Страница 57: ...ged files To refresh the device database 1 Select Managers Device Database Manager to access the Device Database Manager dialog 2 Click on the Refresh button 3 The progress bar indicates the status of the refresh operation When the operation is complete the status bar closes Rebuilding The Device Database When you Rebuild the device database VA clears the current device database and re populates f...

Страница 58: ...t is open Because of the large amount of data contained in the device database Refresh Rebuild and Update operations typically take several minutes to complete On slower machines these operations could take 20 30 minutes or more to complete Once the Refresh Rebuild or Update operation has been started it cannot be cancelled Do not exit forcibly exit the program while a device database operation is...

Страница 59: ...a Notepad or a similar text editor MSRP csv is simply a comma delimited text file follow the formatting that is apparent in the file when adding new devices MSRP values 2 Scroll down to the last entry and press Enter to add a carriage return You can start adding new devices to the bottom of the list after all of the AMX devices 3 Enter the new devices one at a time following the required formattin...

Страница 60: ...ND PROPRIETARY COPYRIGHT AMX LLC 2006 5 Restart VA to see the MSRP and Dealer Part Number if one was included in the Properties window for that device Note that you must select the device in the System Diagram in order to view its properties FIG 31 FIG 31 Properties window ...

Страница 61: ...following some port type descriptions for example ICSNet 0 2 indicate the number of ports and number of those ports already used Click the plus sign to expand the port view so that you can manage the ports individually In most cases you don t need to view every port since VA will automatically connect devices to the next available port of the appropriate type FIG 32 4 Review the device properties ...

Страница 62: ...ick on the System tab in the Diagram Area to design and view the System diagram a layout of the entire system including the NetLinx Central Controller AMX devices and third party controlled devices as well as all device connections Each device in the system including the Central Controller is represented by a Device Element Drag and drop devices from the Toolbox into the System diagram to add them...

Страница 63: ...can change the Central Controller type later via the Edit Replace option Select File New New Empty System to create a new system without any devices except the default NI 3000 NetLinx Central Controller At this point you can define the rest of the system as desired You can also start a new system design with a Central Controller selection With no project open right click on the Central Controller ...

Страница 64: ...l onto the System diagram 2 To add a Keypad open the Keypads tab of the Toolbox and click and drag and drop the desired keypad onto the System diagram 3 To add a Remote open the Remotes tab of the Toolbox and click and drag and drop the desired remote controller onto the System diagram Removing Devices There are several ways to remove devices via the System diagram Right click on device in the Sys...

Страница 65: ...er is positioned correctly to replace the existing one the Replace icon is displayed on the cursor When the Replace Icon appears release the Controller that you are dragging and it will replace the existing Central Controller FIG 34 It is important to note that depending on the differences between the original Central Controller and the one that is selected to replace it some device connections ma...

Страница 66: ...entered will carry over after replacing the Controller Replacing System Devices VA supports replacing a device in the System Diagram with another device of the same type To replace a device with another similar device from the Toolbox Devices tab 1 Click and drag a device from the Devices tab of the Toolbox into the System Diagram 2 Position the selected device directly on top of the device that y...

Страница 67: ...ntrolled device with another similar device from the Toolbox Devices tab 1 Click and drag a device from the Devices tab of the Toolbox into the System Diagram 2 Position the selected device directly on top of the device that you want to replace 3 Assuming the devices are of the same device type when the replacement device is positioned correctly to replace the existing one the Replace icon is disp...

Страница 68: ...ysical device with no changes needed to the higher level glue code Dynamic Device Discovery Concepts Feature Description Application Device A Duet Device 41000 42000 that is used as a control interface to a physical device This is also referred to as the Duet virtual device All control requests are made to the application device rather than to the physical device Binding In concrete programming th...

Страница 69: ...select an Ethernet connection as the Connection Type field in the Device Properties window there are two Ethernet communication parameters required If you select RS 232 as the Connection Type there are several Serial communications parameters required To Enable Internet Access On The Master 1 In your web browser i e Internet Explorer or compatible enter the following URL http masters ip example ht...

Страница 70: ...omplished manually via the Web control interface Manage Other Devices Enable Module Search on Internet Clicking this button toggles the capability of searching the Internet either AMX s site or a device specified site for a device s compatible Duet modules This capability is automatically disabled if the Master does not have Internet connectivity Upon enabling Internet connectivity the AMX License...

Страница 71: ...File To Upload See FIG 38 4 Locate and select the file devicesdkrt jar By default VA copies these files to the following directory Program Files Common Files AMXShare Duet Bundle 5 Select Upload File 6 Select the Browse button next to Select File To Upload 7 Locate and select the file snapirouter jar 8 Select Upload File Working With Accessories Many AMX devices support various optional accessorie...

Страница 72: ...alog indicates the following information for accessory in the list Model This is the model number of the accessory e g PSN2 8 Description This is a brief description of the accessory e g 2 8 amp Power Supply w Phoenix connector FG Number This is the Finished Goods number for this accessory e g FG423 17 The Finished Goods FG number is used to identify the device for ordering purposes MSRP This is t...

Страница 73: ...een the panel and the Controller When adding video touch panels including any of the wired Modero panels VA v1 1 or higher automatically adds the appropriate NXA AVB Breakout box to the System diagram at the time that the panel is added Also note that included accessories cannot be removed from the system Many connection nodes have a plus sign icon to indicate that there are multiple ports of that...

Страница 74: ...re colorized to represent the different connection types Control green Power red Audio white Video blue Audio Video cyan Using The Connect Feature Use the Connect feature to establish a connection between a device in the System Diagram and an available port on the Central Controller or intermediate device required for the device to connect to the Controller such as a Networking or Expansion device...

Страница 75: ...Controller such as a Networking or Expansion device By default this option is enabled Removing Device Connections To remove a device connection 1 Select a device in the system diagram and right click to open the System Diagram context menu 2 Select Remove Device Connections Connecting Devices by Device Type Connecting Devices Central Controllers NetLinx Central Controllers have a single Output con...

Страница 76: ...lers FIG 43 Connecting Devices Networking Devices If your system includes touch panels and or networked control equipment you will need to include one more Networking device to your system Networking devices include Ethernet switches and Wireless Access points FIG 44 MVP wireless panels require a Wireless Access Point between the panel and the Controller Ethernet 10 100T panels require a Network S...

Страница 77: ...n IR Receiver e g AXD IR AXR IRSM MIO IRRX AXD IR AXD IRSM MIO R2 remotes support IR and RF 418 433 MHz These remotes can connect to the Controller either via an IR Receiver an RF Receiver e g AXR RF or both Connecting Devices Keypads Mio Modero Keypads are Axcess devices except for the Attache so they don t require a Network Switch Mio Modero Attache Keypads are IR devices and connect to the Cent...

Страница 78: ...ough an appropriate expansion device Adding DDDP devices These devices use Dynamic Device Discovery Protocol DDDP to connect and communicate with the Central Controller via Ethernet via a Network Switch FIG 48 Note that there is an entry for DDDP Device under each of the device categories in the Devices tab of the Toolbox in addition to the specific manufacturers and models represented for each de...

Страница 79: ...e types is an assortment of storage capacities and functionality Every MAX Server utilizes two separate Ethernet 10 100T connections indicated in their Device Elements as Control and VLAN The Control Ethernet port is used to connect the MAX Server to the Internet The VLAN port is used to distribute digital A V content Note that the VLAN port is labelled A V OUT on the servers and in all MAX produc...

Страница 80: ... use the USB port s to distribute audio to an MAX AOM Audio Only USB Module MAX Servers that also feature audio outputs can distribute audio via USB to a single MAX AOM as well as via the L R analog stereo and Digital audio outputs MAX Modules AOM and AVM There are two types of MAX Modules the MAX AOM Audio Only USB Module and the MAX AVM Audio Video Module The MAX AOM connects to the MAX Server v...

Страница 81: ...the NetLinx Central Controller and each device in the System Diagram VA allows you to specify how to connect each individual physical connector on a controlled device via the Connection Manager dialog The detailed connection information that you can define with the Connection Manager is included in the System Report and is intended to assist in the installation process However this information is ...

Страница 82: ... in the Connection Manager dialog FIG 57 Once each connector has been added in the Connection Manager dialog the DVD Player s Device Element in the System diagram will indicate these connectors as shown below FIG 58 Once these connections are available in the Device Element they can be connected to other devices in the diagram just like any other drag and drop to draw a connection line between eac...

Страница 83: ...s device When a new connection is added by default the type is A C Power as indicated in the Properties table 4 Click on the Type row in the Properties table select a different connector type from the drop down menu of connectors supported by this device FIG 61 5 Type a name for this connector as you want it to appear in the System diagram and resulting System Report in the Name row if desired By ...

Страница 84: ...am will specifically indicate these connectors as shown in the DVD Player example below FIG 62 Once these connections are available in the Device Element they can be connected to other devices in the diagram just like any other drag and drop to draw a connection line between each input output node to a compatible node on the Central Controller or another device in the system FIG 62 DVD Player Exam...

Страница 85: ...gram context menu to access the Quick Input sub menu The Quick Input setting allows you to enter a particular device or touch panel template element property without having to select the property in the Properties Window Use the Edit Quick Input submenu to specify which device property to assign Quick Input to The options are Name default setting With this option selected you can select a device a...

Страница 86: ...ntroller read only Card Frame Number This is the device number of the Card Frame default 25 This property is only displayed for NXF Card Frames which have 12 Control Card Slots and NI 4000 4100 Controllers which feature 4 Control Card slots Click the browse button to open the Card Frame Number dialog to change this assignment See Setting the Card Frame Number for details Connection Type Click insi...

Страница 87: ...cters Comments Click inside this row to add any developer s comments regarding this device Category This is the category of devices that the selected device belongs to read only Model Number This is the manufacturer s model name number for the device read only Device Number This is the current Device Number setting for the device click to edit NXS NMS AXR RF AXD IR SM only Sub Model This field ind...

Страница 88: ...haracters Comments Click inside this row to add any developer s comments regarding this device Category This is the category of devices that the selected device belongs to read only Model Number This is the manufacturer s model name number for the device read only FG Number This the AMX Finished Goods number associated with this device read only This field is only displayed for AMX devices MSRP Th...

Страница 89: ...uggested retail price for this device read only This field is only displayed for AMX devices Device Properties Remotes The following parameters are required for AMX Remotes and are set via fields in the Device Properties window Name This is the default system name for the selected device Click inside this row to edit the element name note that the device Name cannot contain any Unicode characters ...

Страница 90: ...selected button text up or down in 10 increments default 1 0 or 100 Device Properties Third party Devices Third party devices are non AMX controlled devices selected via the Devices tab of the Toolbox There are two types of Third Party devices Module Supported Devices Devices that are listed by name in the Devices tab are module supported These devices are supported by Duet Modules that are packag...

Страница 91: ...he Media Library represents a listing of all media including CDs and DVDs identified in the ContentDatabaseEditor program accessible via the File menu This field is only displayed for devices that can playback audio video media Device Properties Media The following parameters are required for MAX by AMX devices and are set via fields in the Device Properties window Name This is the default system ...

Страница 92: ...ice Number Ranges By Device Type Device Type Allowed Device Number Range AXLink General 1 255 AXLink UI 128 255 NetLinx Card Frames 301 3060 start at frame number 25 First Slot frame 12 1 ICSNet NetLinx devices NXI NXM COM2 NXM IRS4 etc 5001 5999 ICSNet Landmark devices PLH VS8 PLH AS16 PLB AS16 6001 6999 P3 Devices 7001 7999 PCLink Devices 8001 8999 ICSNet Panels DMS IMS future panels 10001 31999...

Страница 93: ... supports more than one remote control you can select from the drop down menu of supported models IR File This field displays the name of the IR File associated with the selected remote control Communication Parameters Modem Connections The following parameters are required for Modem connections and are set via fields in the Device Properties window click inside any of these fields to access a dro...

Страница 94: ... the Device Properties window click inside any of these fields to access a drop down menu of supported options COM Port Select an available COM communications port to use for communication with this device The COM ports available to choose from will depend on the number of COM ports present on the selected device default COM1 Baud Rate Select a baud rate for communications with this device For mos...

Страница 95: ...hen you add a DDDP device to the System diagram the Connection Type is always set to Ethernet 10 100T There are several types of Ethernet 10 100T connections supported by VA as indicated in the drop down menu that is accessible by clicking on the Connection Type Ethernet 10 100T field in the Device Properties Ethernet 10 100T This is the default Ethernet connection type used by DDDP devices This c...

Страница 96: ...ries of constants variables separated by colons or a DEV structure For example STRUCTURE DEV INTEGER Number Device number INTEGER Port Port on device INTEGER System System the device belongs to The D P S notation is used to explicitly represent a device number port and system For example 128 1 0 represents the first port on device 128 on this system If the system and Port specifications are omitte...

Страница 97: ... control None default is Hardware Click OK to complete the communication parameters and open a new Terminal window Type echo on to view the characters while entering commands If that does not work press ENTER key on your keyboard Getting and Setting the IP Address Within the Terminal session type get ip and press ENTER to view the current IP communication parameters Here is a listing of some sampl...

Страница 98: ... repeat the process Is this correct Type Y or N and Enter y Settings written Device must be rebooted to enable new settings 5 Incorporate the new settings by cycling power to the unit To Assign a Static IP Address 1 Enter IP type Type D for DHCP or S for Static IP and then Enter Static If you type in S or Static and press ENTER you are then prompted to enter the pre reserved IP Address Gateway and...

Страница 99: ...on from within the Online Tree to open the Device menu buttons within the right frame 3 Click the Network Settings button to open the Network Settings dialog This dialog allows a user to setup the network settings for the specified device The fields are populated with the current settings when initially loaded 4 Enter a new or updated name within the Host Name field This entry can be 1 50 alphanum...

Страница 100: ... The following message Device number changed to XXX Device must be rebooted for the change to take effect reminds the user that the Master must first be rebooted before the new settings take effect Step 4 Reboot the Master via the System Menu 1 Click the Manage System link from within the System Settings section of the Navigation frame 2 Click on the purple System icon within the Online Tree to op...

Страница 101: ...2 Locate the 8 position Device DIP switch on the rear panel 3 Set the DIP switch according to the switch values shown below The device number is set by the total value of DIP switch positions that are ON If you later change the device number remove and reconnect the AXlink power connector to enter the new device number into memory Switch 1 2 3 4 5 6 7 8 Value 1 2 4 8 16 32 64 128 ...

Страница 102: ...Setting Device Properties 90 VisualArchitect v1 1 CONFIDENTIAL AND PROPRIETARY COPYRIGHT AMX LLC 2006 ...

Страница 103: ...on IR controlled Device 1 Select File Control Strings Definition New Definition to open the New Control Strings Definition dialog Use this dialog to define a new control string for one or more a specific functions for a selected device type The drop down menu in this dialog allows you to select the device type that you want to define a new control string for 2 Select a device type and click OK to ...

Страница 104: ...ave been created for this CSD file in a two column table FIG 68 The Function column indicates the name of each Function Some Functions support variable parameters as indicated by a editable field within the Function column In some cases this field accepts an ASCII text string type directly into the text field see FIG 69 in other cases the field provides a drop down menu of supported parameters to ...

Страница 105: ...ng information must be defined Every Control String Assignment must have a Control String defined in the Value column of the Control String Assignments window Every CSD file must have a manufacturer defined in the Manufacturer field of the Properties window Every CSD file must have a device model defined in the Model field of the Properties window 7 Assuming all required information is present the...

Страница 106: ...Defining Control Strings 94 VisualArchitect v1 1 CONFIDENTIAL AND PROPRIETARY COPYRIGHT AMX LLC 2006 ...

Страница 107: ...Hold button event is 5 seconds Hold Duration 50 Codebuilder Dialog Select CodeBuilder from either the Device Menu or the System Diagram context menu to access the CodeBuilder dialog where you can design macros for controlled devices and keypads in your system This dialog contains its own Menu Bar and Toolbar This dialog is divided in to three main sections left to right User Interface Buttons Wind...

Страница 108: ...nal tabs for Release Event and Hold Event If more than one handler has been specified for the selected button there is a tab for each handler type FIG 73 General Functions Status Window Click the General tab to view and select from the macros available for example If Else EndIf Delay and DoPush Event Click the Function tab to view and select from a list of functions available for each third party ...

Страница 109: ...he device list in the Functions tab to show only the currently selected device not all devices in the system which is the default view Filter Status This filters the device list in the Status tab to show only the currently selected device not all devices in the system which is the default view Show friendly names of Functions This option toggles the display of functions in the Functions tab When t...

Страница 110: ... functions in the Functions tab When this option is disabled which is the default setting the Functions tab displays all functions for the selected device individually with a descriptive name for each one For functions that support multiple parameters each parameter is listed separately in the Functions tab This allows you to select a specific function parameter directly into the Event window Defi...

Страница 111: ...ding If Else EndIf Delay and DoPush Event Click the Function tab FIG 76 to view and select from a list of functions available for each third party device in the system click any device name to expand its functions list Click the Status tab FIG 77 to view and select from a list of status related functions available for each third party device in the system click any device name to expand its status...

Страница 112: ...r the Functions and Status tabs to show only the currently selected device Many Functions have selectable parameters You can specify parameters either via the drop down menu on the macro step in the Event window or by toggling the Show Friendly Names of Functions option and selecting the specific Function Parameter directly in the Functions tab 7 Click OK to save your changes and close the CodeBui...

Страница 113: ...r DVD Player Display and Sound System When the user presses the CD Player button the device page for the CD Player is invoked allowing the user to control the CDP via the control buttons on that page Similarly the DVD Player button would open the DVD Player s device page with transport controls for that device Likewise the Display and Sound System buttons would take the user to the Display device ...

Страница 114: ...ouch Panel UI diagram is shown below FIG 81 Adding UI Elements To The UI Diagram The first step in defining the UI for a touch panel is to add UI Elements to the Touch Panel UI Diagram This includes selecting the elements pages and popup pages that you want in the UI adding them to the UI diagram connecting elements to establish the flow from one page to the next and configuring UI element propert...

Страница 115: ...avigation Features Placeholders 4 Review the UI Element properties for this element and edit if necessary Removing UI Elements There are several ways to remove UI elements via the Touch Panel UI Diagram Right click on an element in the UI diagram and select Delete from the System Diagram context menu Select an element in the UI diagram and select Delete from the Edit menu Select an element in the ...

Страница 116: ...ment has at least as many pages as the original no connections will be lost Note that any Comments entered will carry over after replacing the UI element Touch Panel Templates VA utilizes Touch Panel Template VAT files to greatly simplify the process of designing user interfaces for the touch panel s in your system A Touch Panel Template is a pre fabricated collection of integrated touch panel pag...

Страница 117: ...og is invoked b Use the Path field at the top of the dialog to navigate and select a file directory that contains at least one VAT file c Select a template from the preview window and click Install This action installs the selected VAT and closes the dialog returning you to the Touch Panel Template Manager dialog d The selected template is now represented in the preview area and is available for s...

Страница 118: ...red template Once a template has been selected two additional fields are enabled in the Device Properties window Color Scheme and Unicode Font 5 Click on Color Scheme then click the down arrow to expand a list of all Color Schemes supported by the selected template FIG 85 Click Browse to open the Color Schemes dialog where you can browse and select from the available color themes 6 Click on Unicod...

Страница 119: ...wse to open the Select Touch Panel Template dialog where you can browse thumbnails of the installed templates c Click the down arrow to expand a list of all installed templates that support the selected panel s resolution setting If the selected panel supports multiple resolutions you may select a desired resolution to see which templates support each resolution d Select the desired template 3 Onc...

Страница 120: ...humbnail image of the color scheme that you want to apply to the selected panel 7 Click OK to close the dialog and apply the selected Color Scheme The new Color Scheme is indicated in the Device Properties Window for this panel Previewing Touch Panel UI Elements Use the Preview UI option to preview a selected UI element in a Touch Panel UI Diagram FIG 87 Note that each UI element in the Touch Pane...

Страница 121: ... allows the device to connect to the Central Controller The cursor will change to indicate which nodes are not permitted for the type of connection you are attempting FIG 88 3 Release the mouse button to complete the connection Assuming the nodes make a valid connection VA draws a connecting line between the devices and the name of the of the connecting element is automatically added to the target...

Страница 122: ... the third party devices that have been added to the system and the Start Device The Start Device represents the touch panel that you are designing the UI for in this UI tab and is the starting point for the UI the panel s Home Page Start Device UI elements have one Enter connection node on the left and one Exit connection node on the right FIG 91 Use the Enter connection node on the Start Device ...

Страница 123: ... functionality for example one Mode could provide access to all A V equipment while a different mode could be used for non A V equipment To separate zones in a system that includes equipment that is installed in four separate areas you could assign each zone to its own Mode To customize panel layout modes can be used to provide a separate UI for different individuals For example Dad has his own mo...

Страница 124: ...provide the end user the ability to select a third party device to control Navigation elements are panel pages containing a buttons that represent each controlled device in the system The actual control functions for the devices are on the individual Device elements accessed via the buttons on the Navigation elements FIG 96 If your panel is designed for a single mode system does not utilize Mode e...

Страница 125: ... for a third party controlled device Connecting UI Elements Placeholders Placeholder elements in the Touch Panel UI diagram provide empty pages to which functionality can be added in TPDesign4 after the panel project is generated FIG 100 Placeholders can be thought of as specialized device interfaces that have no function As such you can include one or more of these in their project as if it were ...

Страница 126: ...u to access the Quick Input sub menu The Quick Input setting allows you to enter a particular device or touch panel template element property without having to select the property in the Properties Window Use the Edit Quick Input submenu to specify which device property to assign Quick Input to The options are Name default setting With this option selected you can select a device and type to chang...

Страница 127: ...to access the drop down menu and select a color theme to apply to the selected template Unicode Font This field is also enabled only after a Template has been selected Click to access the drop down menu and select a font to use with the selected template UI Element Properties Mode Selection When a Template element is selected in a Touch Panel UI diagram the Properties window is populated with Temp...

Страница 128: ... diagram Typically the View Name is used to enter Unicode text for display on the panel or to leave the system name of a device to as the default Manufacturer Model Number e g Marantz DV9500 while displaying a different name on the panel e g DVD Comments Click inside this row to add any developer s comments regarding this Template element Category This field displays the category type of the selec...

Страница 129: ...nt The View Name is displayed on the panel page that this element represents Click inside this row to enter a View Name which may contain Unicode characters When you add a View Name to an element the View Name is indicated in parenthesis beneath the Name on this element in the Touch Panel UI diagram Typically the View Name is used to enter Unicode text for display on the panel or to leave the syst...

Страница 130: ...ement it only appears on the UI diagram it is not displayed on the generated Touch Panel page Click inside this row to edit the element name note that the element Name cannot contain any Unicode characters View Name This field allows you to specify a View Name for this element The View Name is displayed on the panel page that this element represents Click inside this row to enter a View Name which...

Страница 131: ...s if necessary To add UI elements to the touch panel page 1 With a device element selected in a Touch Panel UI Diagram select Touch Panel Customize UI Pages to access the Customize UI pages dialog The touch panel page associated with the selected device is displayed in the Design View window in its default configuration The User Interface Elements window on the right side of the dialog displays a ...

Страница 132: ...Elements window indicates which element the selected button represents 2 Select the button that you want to remove and press Delete Alternatively you can right click on any button and select Delete Element from the context menu or click on the Delete Element toolbar button You can also select the desired element in the User Interface Elements window and press Delete or right click and select Delet...

Страница 133: ...ements in the Design View window Right click on any element in the Design View window to access the context menu This context menu provides quick access to all of the options in the dialog s toolbar except undo redo Design View Window The Design View window provides a visual of the selected Device s UI page Use this view to edit the UI page To remove an element select an element in the Design View...

Страница 134: ... has been created this project file can be opened and edited in the TPDesign4 application available for free download from www amx com Select the Open Project In TPDesign4 option to automatically open the resulting file once it is generated Refer to the TPDesign4 on line help for details Defining Keypad UI Navigation Once you have added a keypad to the system diagram a Keypad UI tab is created for...

Страница 135: ...name is for use within VA only and is intended to assist in developing unique descriptive names This is not the text that will be engraved on the button see Engraving Text below 3 Enter the text that you want to have engraved on the selected button in the Engraving Text field To enter text click inside the text field and type directly into the field Alternatively click on the browse button to acce...

Страница 136: ...u actions button label text and assign channel codes on each button For Keypads that do feature an LCD display the UI also includes items displayed on the LCD display These include the Mio Modero Elite SL Elite DL and Attache Keypad UI Diagram For every Keypad added to the system a separate Keypad UI tab is added to the Diagram Area Each Keypad tab consists of a Keypad UI diagram the graphic repre...

Страница 137: ...ow Menu Actions Show Button Name Keypad Button Properties When you select a button in a Keypad UI diagram the following additional Keypad Button Properties fields appear in the Properties window Button Name The button name is for use within VA only and is intended to assist in developing unique descriptive names This is not the text that will be engraved on the button see Engraving Text below Menu...

Страница 138: ...guages You must have the language loaded on you OS and then use Arial Unicode MS to render the text on the button Supported System Languages English US French Spanish German Russian Engraving Scale Select a scale factor to apply to the engraved text on the selected keypad button default 1 0 or 100 0 5 50 0 6 60 0 7 70 0 8 80 0 9 90 1 0 100 default 1 1 110 1 2 120 1 3 130 1 4 140 1 5 150 Click insi...

Страница 139: ... 1 Select a Keypad UI tab for a keypad that has button engraved text indicated 2 Select Keypad Engraving Export DXF File or click the toolbar button to open the Export DXF File dialog 3 Specify the filename and target directory for the exported DXF file 4 Click Export The system prompts you when the process is complete Working With Keypad LCD Display Menus Several Keypads including the Mio Modero ...

Страница 140: ...Add Menu Item in the Main Menu window of the Keypad Fixed Menu Editor dialog 1 Click Add to open the Add Main Menu Item dialog 2 Select the Separator radio button note that a horizontal line is indicated in the Item Caption field 3 Click OK Once you have added the devices that you want to provide control for to the Main Menu you need to create a device specific sub menu for each device The device ...

Страница 141: ...lder on line help for details Defining Remote Control Button Properties Once you have added a Remote to the system diagram a Remote UI tab is created for that keypad Note that when you select a Remote UI tab the Remote Toolbar is displayed The Remote UI tab displays an image that indicates the button layout for the six customizable buttons available on the remotes Note that the button layout is id...

Страница 142: ...ected button text up or down in 10 increments default 1 0 or 100 Remote UI Tabs For every Remote added to the system a separate Remote UI tab is added to the Diagram Area For Remote Controllers the UI consists of the text that will be presented on each button Click on a Remote UI Tab to view the Remote UI diagram where you can add edit and view button label text for each button Remote UI Diagram A...

Страница 143: ...click on the browse button to access the Enter Text dialog enter the button text and click OK to save Engraving Font Select AMX Icon 2 for symbols or Arial Arial Narrow or Arial Unicode MS for text from the drop down menu AMX Icons2 provides various control oriented icons that can be engraved on the buttons Click here for a character map for AMX Icon 2 The VA Engraving module supports the fonts in...

Страница 144: ...rted DXF file 4 Click Export The system prompts you when the process is complete Generating The KeypadBuilder Project KPB File For Remotes 1 With a Remote UI tab selected select Remote Generate KeypadBuilder Project or click the toolbar button This selection opens the Generate KeypadBuilder Project dialog where you can edit the name and target directory for the resulting KPB project file By defaul...

Страница 145: ...d your project via the Basic System Assistant dialog some of the fields in this dialog are pre populated with the project data you entered there If you started your project via the New Empty System option all fields are empty The fields in this dialog include System Name Enter the name that you want to associate with this system This name will be reflected in the resulting project VAP file and any...

Страница 146: ...sert the project name Use D to insert the diagram name The file extension bmp png or jpg is added automatically 5 Make additional export options as desired Scale To scale the exported image s down enter a percentage of the original size default 100 original size File Select a file type for exported files BMP PNG or JPG default JPG Compression Specify the level of compression for exported images JP...

Страница 147: ...Check to print the diagram s in grayscale Generating And Transferring System Files Once your VA project is complete you are ready to generate and transfer the system files required by the Central Controller to make the system work 1 Select System Generate and Transfer System Files or click the toolbar button to access the Generate Transfer System Files dialog 2 Select an Action option Generate and...

Страница 148: ...ms or issues with the system files during the process Notes You can also generate the KeypadBuilder project KPB file via the Generate KeypadBuilder Project option in the Keypad menu You can also generate the TPDesign4 project TP4 file via the Generate TPDesign4 Project option in the Touch Panel menu You can also generate the System Report HTML file via the System Report option in the System menu P...

Страница 149: ...system Module folder contains all Duet module JAR files required by the devices in the system Other folder this directory contains any system files other than the VA generated files Source folder contains the Master Source Code file AXS required by the Central Controller User Interface folder contains all touch panel TP4 and keypad KPB user interface files There is one UI file generated for each U...

Страница 150: ... the root of the project subfolder in the Output Folder specified in the Generate Options of the Generate Transfer System Files dialog 4 In Studio s workspace view right click the Include folder and select Add Existing Include File from the context menu This opens the Add Existing Include File dialog In this dialog a Browse to C Program Files Common Files AMXShare AXIs b Select the SNAPI axi G4API...

Страница 151: ...XW file you just created for this project and click Open a When you open a AXW file NetLinx Studio will prompt you to specify a target directory to extract the files contained in the AXW file to in the Import From AXW File dialog FIG 116 b Click on Extract NetLinx Studio may prompt you to verify new directories if any were indicated in the Extract To field in the Import From AXW File dialog c Clic...

Страница 152: ...ach generating the system report 1 Select System System Report This selection opens the System Report dialog where you can specify the target Output folder for the System Report file In this case the System Report file alone is generated and copied to the Output folder 2 Select System Generate Transfer System Files This selection opens the Generate Transfer System Files dialog Verify that the Gene...

Страница 153: ...stem diagram for this project FIG 118 Equipment List This is a listing of every device in the system FIG 119 Installation Checklist Use the Installation Checklist as a guide to the installation process Each item in the checklist should be completed before you continue FIG 120 FIG 118 System Diagram FIG 119 Equipment List FIG 120 Installation Checklist ...

Страница 154: ...epend on the devices in the system and the types connections that exist between system devices FIG 121 Installation Instructions This section of the report provides a summary of the Device Addressing plus several subsections that describe various aspects of configuring device addressing on the NetLinx Master and AMX devices including Master Addressing via Terminal Telnet NetLinx Device Addressing ...

Страница 155: ...GHT AMX LLC 2006 Troubleshooting and Support This section contains troubleshooting information relating to many different aspects of the control system FIG 123 Contact Information This section provides contact information for AMX technical support FIG 123 Troubleshooting and Support ...

Страница 156: ...ot and Meter measurements You can also get the total current draw for this group of devices Calculates the voltage drop of a length of cable for a device or devices based on current draw Red means it exceeds the allowable voltage drop 1 Select the tab along the bottom of the screen that contains the type of device s you are working with 2 Under QTY in column A enter a quantity for each device list...

Страница 157: ...uipment Total Current Draw Column A Row 6 This cell shows the total current draw for all devices entered The System tab shows the total for all pages Voltage Drop Columns G H I Rows 4 10 This group of cells shows the voltage drop for a selected cable length and device set Enter the estimated cable length in the yellow box and read the voltage drop for the wire gauge at the right Use a cable gauge ...

Страница 158: ...Finishing the Project 146 VisualArchitect v1 1 CONFIDENTIAL AND PROPRIETARY COPYRIGHT AMX LLC 2006 ...

Страница 159: ...failed to retrieve dependencydevicesdkrt jar This message indicates that the following requires system file is missing from the Master devicesdkrt jar Error Message DynamicDeviceDetector retrieveUrlJar missing filename in URL response DynamicDeviceDetector retrieveDriverDependencies failed to retrieve dependencysnapirouter jar This message indicates that the following requires system file is missi...

Страница 160: ...ceeded If excess shielding on the coax cable is exposed it may be inadvertently grounding out the connector Check for missing terminator s with improper impedance ratings If VA Freezes During File Transfers If VA appears to hang up during a file transfer operation it is likely due to an incorrect System Number assignment An incorrect System Number assignment will cause all transfers to time out gi...

Страница 161: ... Stop Bits 1 Flow Control None a Verify that the batteries in the remote control are fresh If the remote has inadequate power it may appear to capture some functions but could result in various anomalies or the inability to capture some functions b Try to minimize direct exposure of the IR window to strong light sources especially fluorescent c Minimize or eliminate other sources of IR emission in...

Страница 162: ...es must be reversed to get the proper polarity Try reversing these wires but replace them to the normal position if that does not help Settings Once the cabling has been verified the communication specifications must then be confirmed These specifications include baud rate parity data bits stop bits and flow control Some AMX devices use DIP switches to configure baud data and stop bits ex Mio Mode...

Страница 163: ...hardware handshaking SEND_COMMAND HSON Terminal PASS Mode In Terminal while connected to the Master s program port you can type PASS Where equals the device number While you cannot use the device name in Terminal remember to use D P S within NetLinx In this mode whatever you type on the keyboard will be sent directly out the RS 232 port as you type it Anything that is returned by the controlled de...

Страница 164: ...number to emulate Channel messages i e Push Release CHON and CHOFF for the specified D P S The Channel number range is 1 65535 8 Select the On or Off buttons to Emulate Channel ON CHON and Channel OFF CHOFF messages for the specified D P S 9 Select the Push button to Emulate a push release on the channel specified You can click and hold down the Push button to see how the device Master responds to...

Страница 165: ...alog as a secondary popup window 1 Configure a diagnostic filter using the parameters available within the Diagnostic Configuration dialog The Diagnostic Configuration dialog allows you to select both the notifications you wish to receive and the target devices within the Online Tree for these notifications There are several different types of asynchronous notifications that can be selected for a ...

Страница 166: ...information System Device Port Device Port System Use these fields to enter a device port sys tem D P S combination for the device that you want to enable notifications for The specified device then appear in the Device field within the Diagnostic Configuration Dialog A value of 0 for any option gives you all of the systems devices or ports This dialog also allows you to store recall presets NetLi...

Страница 167: ... signal to the far end device that states it is OK to send data The Clear to Send CTS connection is an input signal that receives the RTS from the far end When the RS 232 port is configured for hardware handshaking no data is sent until the port receives a high signal on the CTS pin from the RTS pin at the far end Similarly no data will be returned unless the RTS pin goes high indicating it is abl...

Страница 168: ...o to Start Settings Control Panel User Accounts to open the User Accounts dialog In the Users tab look for your User Name and see which Group you are assigned to If you see Restricted User then you ll have to contact your network administrator and have them change this setting 2 Are there any apostrophes in either the Project Name or in the file path of the directory that the project is compiled i...

Страница 169: ...mera The Custom AXI include file is used for making any custom coding changes for the system It resides in the Project s Include sub folder If a Custom AXI file is not already present in the Include folder VA creates a blank Custom AXI However if there is a Custom AXI file present in the Include folder it will used in the Project and will not be overwritten Channel Number Function Name Required 9 ...

Страница 170: ...ed 1 Play Yes 2 Stop Yes 3 Pause Yes 4 Skip Track Chapter Yes 5 Skip Track Chapter Yes 6 Scan Search Yes 7 Scan Search Yes 8 Record No 9 Power Standby No 10 0 or 10 No 11 1 No 12 2 No 13 3 No 14 4 No 15 5 No 16 6 No 17 7 No 18 8 No 19 9 No 20 10 or 100 No 21 Enter No 22 Channel No 23 Channel No 24 Volume No 25 Volume No 26 Mute No 27 Power On discrete No 28 Power Off discrete No 29 TV Video or TV ...

Страница 171: ...own No 47 Cursor Left No 48 Cursor Right No 49 Select No 50 Disc No 51 Disc No 52 Set Disc No 53 Set Track No 54 Mode No 55 Repeat No 56 Random Shuffle No 57 Program No 58 Time No 59 Best Favorite No 60 Scan Music Scan No 61 Jump Prev Recall No 62 Fader No 63 Delete Erase No 64 Check No 65 Clear Cancel No 66 ADLC No 67 Title Display No 68 Open Close Eject No 69 Continue No 70 Group No 71 Disc Skip...

Страница 172: ...nel Number Function Name Required 86 Track 17 No 87 Track 18 No 88 Track 19 No 89 Track 20 No 90 Track 21 No 91 Track 22 No 92 Track 23 No 93 Track 24 No 94 Track 25 No 98 10 No 99 20 No 100 Disc 0 direct No 101 Disc 1 No 102 Disc 2 No 103 Disc 3 No 104 Disc 4 No 105 Disc 5 No 106 Disc 6 No 107 Disc 7 No 108 Disc 8 No 109 Disc 9 No 110 Disc 10 No ...

Страница 173: ...19 9 Yes 21 Enter used with keypad Yes 22 Channel Up Yes 23 Channel Dn Yes 24 Volume Up No 25 Volume Down No 26 Mute No 27 Power On No 28 Power Off No 43 Cancel No 44 Menu Yes 45 Cursor Up Yes 46 Cursor Dn Yes 47 Cursor Left Yes 48 Cursor Right Yes 49 Menu Select OK Yes 50 Clear Yes 51 Info No 52 TV DSS Yes 53 Guide Yes 54 Favorite Yes 55 Prev Ch Go Back Recall Yes 56 Info Display No 57 Browse No ...

Страница 174: ... Layouts 162 VisualArchitect v1 1 CONFIDENTIAL AND PROPRIETARY COPYRIGHT AMX LLC 2006 Digital Satellite System Cont Channel Number Function Name Required 67 Surf No 68 DSS No 69 100 No 70 1000 No 71 Help No 72 Page Up No 73 Page Down No ...

Страница 175: ...arch No 8 Rec Yes 9 Power No 10 0 Yes 11 1 Yes 12 2 Yes 13 3 Yes 14 4 Yes 15 5 Yes 16 6 Yes 17 7 Yes 18 8 Yes 19 9 Yes 21 Enter Yes 22 Ch Yes 23 Ch v Yes 27 Power On discrete Yes 28 Power Off discrete Yes 44 Menu Yes 45 Cursor Yes 46 Cursor v Yes 47 Cursor Yes 48 Cursor Yes 49 Select Yes 50 Exit Yes 51 Clear No 52 Cancel No 53 Return No 54 TV VCR No 55 Jump Yes 56 Channel Guide Yes 57 Instant Repl...

Страница 176: ...ETARY COPYRIGHT AMX LLC 2006 Digital Video Recorder Cont Channel Number Function Name Required 63 Slow Motion No 64 Quick Skip Yes 65 Display Yes 66 Input No 67 Exp No 68 Help No 69 Info Display No 70 List No 71 Page Up No 72 Page Down No 73 Frame No 74 Frame No 75 Favorites No 76 Advance No ...

Страница 177: ...r No 10 0 No 11 1 No 12 2 No 13 3 No 14 4 No 15 5 No 16 6 No 17 7 No 18 8 No 19 9 No 27 On No 28 Off No 31 Input 1 No 32 Input 2 No 33 Input 3 No 34 Input 4 No 44 Menu No 45 No 46 v No 47 No 48 No 51 Auto Iris No 52 Iris Open No 53 Iris Close No 54 Upper Single Lamp No 55 Lower Lamp No 56 Auto Focus No 57 Focus Near No 58 Focus Far No 61 Zoom In No 62 Zoom Out No 66 Toggle Preset No 67 Preset 1 No...

Страница 178: ... 0 Yes 11 1 Yes 12 2 Yes 13 3 Yes 14 4 Yes 15 5 Yes 16 6 Yes 17 7 Yes 18 8 Yes 19 9 Yes 20 10 Yes 27 Power On No 28 Power Off No 42 A B No 43 A B Repeat No 44 Menu No 45 Cursor Yes 46 Cursor v Yes 47 Cursor Yes 48 Cursor Yes 49 Navigation Select Yes 50 Exit No 51 Title Menu Yes 52 T on Tosh T C Mitsu Title Chapter Yes 53 Clear Yes 54 Return Yes 55 Angle No 56 Subtitle On Off No 57 Subtitle Menu No...

Страница 179: ...o 67 Jump Back Last Resume Mark No 68 Reset No 69 Memory Condition No 70 Mode Pioneer Status Harman No 71 Continue No 72 Dimmer No 73 Chapter No 74 Program Pioneer No 75 Search Mode Sony No 76 Time Sony No 77 DNR No 78 Zoom No 79 Scan Speed No 80 Open Close No 81 Play Mode No 82 Random Shuffle No 84 Setup Action No 86 10 No 87 100 No 88 Cancel No 89 Audio No 90 Repeat Mode No 91 Disc Skip Disc Ski...

Страница 180: ...e Channel Layout Lighting Channel Number Function Name Required 10 Scene 10 No 11 Scene 1 No 12 Scene 2 No 13 Scene 3 No 14 Scene 4 No 15 Scene 5 No 16 Scene 6 No 17 Scene 7 No 18 Scene 8 No 19 Scene 9 No 28 All Off No 43 Scene 11 No 44 Scene 12 No 45 Scene 13 No 46 Scene 14 No 47 Scene 15 No 48 Scene 16 No 49 Raise No 50 Lower No ...

Страница 181: ...2 2 No 13 3 No 14 4 No 15 5 No 16 6 No 17 7 No 18 8 No 19 9 No 21 Enter No 24 Volume No 25 Volume No 26 Mute No 27 Power On No 28 Power Off No 44 Menu No 45 Cursor Up No 46 Cursor Down No 47 Cursor Left No 48 Cursor Right No 49 Select No 50 Exit No 51 Clear No 52 Return No 53 Aspect No 54 Picture Mute Yes 55 Freeze No 61 RGB1 No 62 RGB2 No 63 RGB3 No 64 RGB4 No 65 RGB5 No 66 Input 1 modular No 67 ...

Страница 182: ...82 Video 2 No 83 Video 3 No 84 Video 4 No 85 Video 5 No 86 Svideo 1 No 87 Svideo 2 No 88 Svideo 3 No 89 Svideo 4 No 90 Svideo 5 No 91 Toggling Input No 92 Toggling Input No 93 Toggling Input No 94 Toggling Input No 95 unassigned 96 Input unused format No 97 Input unused format No 98 Input unused format No 99 Input unused format No 100 Input unused format No 102 PIP No 103 PIP CH No 104 PIP CH No 1...

Страница 183: ...Contrast No 130 Contrast No 131 Contrast No 132 Focus No 133 Focus No 134 Focus No 135 Index No 136 Index No 137 Index No 138 Level No 139 Level No 140 Level No 141 Sharpness Aperture No 142 Sharpness Aperture No 143 Sharpness No 144 Tint No 145 Tint No 146 Tint No 147 Zoom No 148 Zoom No 149 Zoom No 150 Phase Hue No 151 Phase Hue No 152 Phase Hue No 153 Picture No 154 Picture No 155 Picture No 16...

Страница 184: ...es 26 Mute Yes 27 Main Power On discrete No 28 Main Power Off discrete No 43 MENU FUNCTIONS BELOW No 44 Menu No 45 Cursor Up No 46 Cursor Down No 47 Cursor Left No 48 Cursor Right No 49 Select center No 50 Menu Exit No 59 AUDIO INPUTS BELOW No 60 Audio Input 1 No 61 Audio Input 2 No 62 Audio Input 3 No 63 Audio Input 4 No 64 Audio Input 5 No 65 Audio Input 6 No 66 Audio Input 7 No 67 Audio Input 8...

Страница 185: ...el No 97 Down Dec Level No 100 SURROUND FUNCTIONS BELOW No 101 Surround On Off Yes 102 Surround On discrete No 103 Surround Off discrete Yes 104 Main Mode Select toggling No 105 Sub Mode Select No 106 Direct No 107 5 1 or 6 Channel No 108 Test Tone No 109 Delay Time No 110 Delay Time No 111 Delay Tim No 112 Mode No 113 Mode No 114 Center Mode No 115 Effect No 116 Effect No 117 Effect Level No 118 ...

Страница 186: ...Mode 10 No 131 Mode 11 No 132 Mode 12 No 133 Mode 13 No 134 Mode 14 No 135 Mode 15 No 136 Mode 16 No 137 Mode 17 No 138 Mode 18 No 139 Mode 19 No 140 SURROUND STEERING BELOW No 141 Rear Yes 142 Rear v Yes 143 Center Yes 144 Center v Yes 145 Sub Vol No 146 Sub Vol No 147 Balance Left No 148 Balance Right No 149 Ch Select No 150 Ch Level No 151 Ch Level No 152 Balance No 153 Center No 154 Rear No 15...

Страница 187: ...23 Tuner Station not Preset Yes 24 Volume No 25 Volume No 26 Mute No 44 Menu No 45 Cursor Up No 46 Cursor Down No 47 Cursor Left No 48 Cursor Right No 49 Select No 50 Menu Exit No 51 Cancel No 52 Clear No 53 Return No 54 Preset Bank Cycle No 55 Preset Bank 1 A No 56 Preset Bank 2 B No 57 Preset Bank 3 C No 58 Preset Bank 4 D No 69 Category Up XM No 70 Category Down XM No 71 period No 72 Bass Bass ...

Страница 188: ...nction Name Required 97 AM No 98 FM No 99 XM No 100 Band 4 TV WX SW No 156 Jump Prev Station No 157 Scan Scan No 158 Scan No 159 Seek Seek No 160 Seek No 161 Shift No 162 Band Yes 162 Band Cycle No 163 Direct Tune Mode No 163 Direct Tuning Mode Yes 164 Tuner Index Sony No 165 Tuner Index Sony No 166 FM Mode ST MONO No 168 Preset Yes 169 Preset Yes ...

Страница 189: ...t No 23 Tuner Ch Station not Preset No 24 Volume Yes 25 Volume Yes 26 Audio Mute Yes 27 Main Power On discrete No 28 Main Power Off discrete No 42 A B or Spkr A No 43 Spkr B No 44 Menu No 45 Cursor Up No 46 Cursor Down No 47 Cursor Left No 48 Cursor Right No 49 Select Center No 50 Menu Exit No 51 Cancel No 52 Clear No 53 Return No 54 Preset Bank Toggle No 55 Preset Bank 1 A No 56 Preset Bank 2 B N...

Страница 190: ...eble No 75 Treble No 76 Loudness No 77 Sleep No 78 Night Midnight No 79 Toggling AV INPUT No 80 Tape Monitor No 81 AV 1 No 82 AV 2 No 83 AV 3 No 84 AV 4 No 85 AV 5 No 86 AV 6 No 87 AV 7 No 88 AV 8 No 89 AV 9 No 90 AV 10 No 91 AV 11 No 92 AV 12 No 93 AV 13 No 94 AV 14 No 95 Up or Inc or No 96 Dn or Dec or No 97 AM No 98 FM No 99 XM No 100 Band 4 TV WX SW No 101 Surround On Off No 102 Surround On Di...

Страница 191: ...mer No 120 DISCRETE MODE RECALLS BELOW No 121 Mode 1 No 122 Mode 2 No 123 Mode 3 No 124 Mode 4 No 125 Mode 5 No 126 Mode 6 No 127 Mode 7 No 128 Mode 8 No 129 Mode 9 No 130 Mode 10 No 131 Mode 11 No 132 Mode 12 No 133 Mode 13 No 134 Mode 14 No 135 Mode 15 No 136 Mode 16 No 137 Mode 17 No 138 Mode 18 No 139 Mode 19 No 140 SURROUND STEERING BELOW No 141 Rear Vol Yes 142 Rear Vol Yes 143 Center Vol Ye...

Страница 192: ...nel Number Function Name Required 153 Center No 154 Rear No 155 Side No 156 Jump Prev Station No 157 Scan Scan No 158 Scan No 159 Seek Seek No 160 Seek No 161 Shift Or Bank Select No 162 Band or AM FM No 163 Direct Tuning No 164 Tuner Index No 165 Tuner Index No 166 FM Mode ST Mono No 167 Save No 168 Tuner Preset Yes 169 Tuner Preset Yes ...

Страница 193: ...Volume No 26 Mute mts No 28 Off discrete No 42 A B Source on Zenith Yes 44 Menu No 45 Select No 46 Select v No 47 Adjust Zenith No 48 Adjust Zenith No 49 Parental Control AU Authorize on Sci Atlanta No 50 Timer TCP Sleep on SA No 51 Clock No 52 Delete No 53 Select Event No 54 Alt No 55 PPV pay per view No 56 IPPV No 57 Credit No 58 Display No 59 PC PM No 60 F Function No 61 Program No 62 Scan step...

Страница 194: ...1 CONFIDENTIAL AND PROPRIETARY COPYRIGHT AMX LLC 2006 Set Top Box Cont Channel Number Function Name Required 68 move on screen control arrow No 69 Last Channel LC Pref Next No 71 Exit No 72 Code Learn access code No 73 DCR No 74 Guide No 75 Page Up No 76 Page Down No ...

Страница 195: ...cus No 57 Focus Near No 58 Focus Far No 100 Slide 1 No 101 Slide 2 No 102 Slide 3 No 103 Slide 4 No 104 Slide 5 No 105 Slide 6 No 106 Slide 7 No 107 Slide 8 No 108 Slide 9 No 109 Slide 10 No 110 Slide 11 No 111 Slide 12 No 112 Slide 13 No 113 Slide 14 No 114 Slide 15 No 115 Slide 16 No 116 Slide 17 No 117 Slide 18 No 118 Slide 19 No 119 Slide 20 No 120 Slide 21 No 121 Slide 22 No 122 Slide 23 No 1...

Страница 196: ...40 Slide 41 No 141 Slide 42 No 142 Slide 43 No 143 Slide 44 No 144 Slide 45 No 145 Slide 46 No 146 Slide 47 No 147 Slide 48 No 148 Slide 49 No 149 Slide 50 No 150 Slide 51 No 151 Slide 52 No 152 Slide 53 No 153 Slide 54 No 154 Slide 55 No 155 Slide 56 No 156 Slide 57 No 157 Slide 58 No 158 Slide 59 No 159 Slide 60 No 160 Slide 61 No 161 Slide 62 No 162 Slide 63 No 163 Slide 64 No 164 Slide 65 No 1...

Страница 197: ...5 No 185 Slide 86 No 186 Slide 87 No 187 Slide 88 No 188 Slide 89 No 189 Slide 90 No 190 Slide 91 No 191 Slide 92 No 192 Slide 93 No 193 Slide 94 No 194 Slide 95 No 195 Slide 96 No 196 Slide 97 No 197 Slide 98 No 198 Slide 99 No 199 Slide 100 No 200 Slide 101 No 201 Slide 102 No 202 Slide 103 No 203 Slide 104 No 204 Slide 105 No 205 Slide 106 No 206 Slide 107 No 207 Slide 108 No 208 Slide 109 No 2...

Страница 198: ...red 218 Slide 119 No 219 Slide 120 No 220 Slide 121 No 221 Slide 122 No 222 Slide 123 No 223 Slide 124 No 224 Slide 125 No 225 Slide 126 No 226 Slide 127 No 227 Slide 128 No 228 Slide 129 No 229 Slide 130 No 230 Slide 131 No 231 Slide 132 No 232 Slide 133 No 233 Slide 134 No 234 Slide 135 No 235 Slide 136 No 236 Slide 137 No 237 Slide 138 No 238 Slide 139 No 239 Slide 140 No ...

Страница 199: ...Yes 20 10 or 100 No 21 Enter Yes 22 Channel Yes 23 Channel Yes 24 Volume No 25 Volume No 26 Mute No 27 TV On discrete No 28 TV Off discrete No 43 MENU FUNCTIONS BELOW No 44 Menu No 45 Cursor Up No 46 Cursor Down No 47 Cursor Left No 48 Cursor Right No 49 Select No 50 Exit No 51 Jump Back Prev CH Recall No 52 Video Menu No 53 Cancel No 54 Clear No 55 Return No 56 Aspect No 57 period No 58 Picture M...

Страница 200: ...s or Focus No 77 Focus No 78 Index or Index No 79 Index No 80 Display No 81 Video 1 No 82 Video 2 No 83 Video 3 No 84 Video 4 No 85 Video 5 No 86 Video 6 No 87 Video 7 No 88 Video 8 No 89 Video 9 No 90 Sharp Aper or Sharp No 91 Sharpness Aperture No 92 Tint or Tint No 93 Tint No 94 Zoom or Zoom No 95 Zoom No 96 Phase Hue or Phase No 97 Phase Hue No 98 Picture or Picture No 99 Picture No 100 Favori...

Страница 201: ...t v1 1 CONFIDENTIAL AND PROPRIETARY COPYRIGHT AMX LLC 2006 TV Cont Channel Number Function Name Required 110 PIP Size No 111 PIP Split No 112 PIP Input No 113 Sleep No 114 1000 No 115 Freeze No 116 Page Up No 117 Page Dn No 118 Input Toggle Input No 119 Input No ...

Страница 202: ... toggling No 10 0 or 10 No 11 1 No 12 2 No 13 3 No 14 4 No 15 5 No 16 6 No 17 7 No 18 8 No 19 9 No 20 10 or 100 No 21 Enter No 22 Channel No 23 Channel No 24 Volume No 25 Volume No 26 Mute No 27 Power On discrete No 28 Power Off discrete No 29 TV Video or TV VCR No 30 TV No 31 Video1 or Line A or Input No 32 Video 2 or Line B or Input No 33 Video 3 No 34 RGB1 or Tape1 or DAT No 35 RGB2 or Tape2 or...

Страница 203: ... Display Info OSD No 59 Step Frame No 60 Step Frame No 61 Step Frame No 62 Slow No 63 Slow No 64 Slow No 65 Favorite No 66 Guide No 67 Jump Back Last Resume No 68 Reset Counter No 69 Memory No 70 Mode No 71 Continue No 72 Dimmer No 73 Record Speed No 74 Program Setup No 75 Page Up No 76 Page Down No 77 Search Speed No 81 Deck 2 Play No 82 Deck 2 Stop No 83 Deck 2 Pause No 84 Deck 2 Fwd No 85 Deck ...

Страница 204: ... 8 No 19 Input Key 9 No 21 Enter No 24 Volume up No 25 Volume Down No 26 Toggling Audio Mute No 27 Power On discrete No 28 Power Off discrete No 30 Input No 31 Video 1 Yes 32 Video 2 No 33 Video 3 No 34 RGB1 Yes 35 RGB2 No 36 RGB3 No 37 Svideo 1 Yes 38 Svideo 2 No 39 Svideo 3 No 43 Discreet Picture Mute On Yes 44 Discreet Picture Mute Off Yes 45 Toggling Picture Mute Yes 46 Audio Mute On No 47 Aud...

Страница 205: ...sed No 70 unused No 71 Brightness Up Yes 72 Brightness Down Yes 73 Color Up Yes 74 Color Down Yes 75 Contrast Up Yes 76 Contrast Down Yes 77 Sharpness Up Yes 78 Sharpness Down Yes 79 Tint Up Yes 80 Tint Down Yes 81 Phase Up No 82 Phase Down No 83 Zoom Zoom Tele Zoom Yes 84 Zoom Zoom Wide Zoom v Yes 85 Focus Focus Far Yes 86 Focus Focus Near Yes 87 Level No 88 Level No 89 Sync No 90 Sync No 91 Sync...

Страница 206: ...rojector Cont Channel Number Function Name Required 103 Info No 107 PIP No 108 PIP Position No 109 Swap PIP No 200 Select No 201 Select No 202 Standby toggle only if 9 27 28 are present No 203 Standby on only if 9 27 28 are present No 204 Standby Off only if 9 27 28 are present No 205 Select only if enter is already present No ...

Страница 207: ...WD 1 51 x 5 55 x 5 45 3 84 cm x 14 10 cm x 13 84 cm Weight 18 2 oz 518 2 g Front Panel Components SIGNAL LED Red indicator that blinks when the IRIS unit is receiving Remote Controller RC functions IR window Captures RC functions READY LED Green indicator that lights when the IRIS unit is ready to receive RC functions VERIFY Red indicator that lights when the IRIS unit is ready to verify RC functi...

Страница 208: ...y led goes off 4 A set of brackets briefly appears in the display to indicate the RC function is captured Then 01 appears and the Ready and Verify LEDs light 5 Hold the RC approximately 3 inches away from the IR capture window Press and hold the same key on the RC again to verify the IR function was captured correctly by the IRIS unit If the RC function is captured correctly a pair of brackets wil...

Страница 209: ...t RC Functions Using P3 p8 Modes Set the IRIS unit to the P3 P8 modes if you cannot capture an RC function in default or SP mode The P3 and P4 modes are special settings to capture RC functions To capture RC functions using P3 P8 modes 1 Simultaneously press and release the up down and send pushbuttons The message P1 appears in the display The IRIS unit is now in P mode 2 Use the up or down pushbu...

Страница 210: ...RC function is captured analyzed stored and verified Er Error RC function did not verify correctly Nd No Device Communication device error detected or the IRLIB program is not staged to receive RC functions NO Normal Operation Ready to capture RC OF P mode is off On P mode is on So Send OK RC function sent without errors to a PC running IRLIB SP Special Function Special mode to capture unusual RC ...

Страница 211: ... the IRIS unit is ready to capture a RC function IRIS Baud Rate And Display Digits IRIS Cables And Adapters Depending on your IRLIB programming configuration one or more cables may be required Connectors are shown from the wiring side Computer to NetLinx Control System DB 25 to DB 9 Computer to NetLinx Control System DB 9 to DB 9 Baud Rate And Display Digits Baud Rate Display Digits 300 03 600 06 ...

Страница 212: ...ton source selection 9 Power or on off 30 TV 10 0 or 10 31 Video1 Line A VCR1 VDP or input 11 1 channel digits or tracks for CD 32 Video2 Line B VCR2 or input 12 2 33 Video3 13 3 34 RGB1 or Tape1 14 4 35 RGB2 or Tape2 15 5 36 CD 16 6 37 Tuner 17 7 38 Phono 18 8 39 Aux 19 9 40 AM FM 20 10 or 100 41 Play play reverse 21 Enter used in conjunction with number typically 42 A B Problem Solution A Hand C...

Страница 213: ...ved keypad buttons FIG 129 FIG 129 AMX Icon 2 Character Map Digit 1Capital letter Y Digit 2 Digit 3 Digit 4 Digit 5 Digit 6 Equals Sign Capital letter E Capital letter I Capital letter Q Capital letter R Capital letter T Capital letter U Capital letter W Capital letter X Capital letter Z Lowercase b Lowercase c Lowercase e Lowercase i Lowercase m Lowercase n Lowercase q Lowercase r Lowercase t Low...

Страница 214: ...Appendix D AMX Icon 2 Character Map 202 VisualArchitect v1 1 CONFIDENTIAL AND PROPRIETARY COPYRIGHT AMX LLC 2006 ...

Страница 215: ... to use one or more wired Touch Panels in your Project you ll also add a Network Switch Mio Modero Keypads are Axcess devices so they don t require a Network Switch Supported Expansion Devices Visual Architect v1 1 supports the following AMX Expansion Devices NI 700 NI 2100 NI 3000 NI 4000 NXI w NXC ME260 64 NI 900 NI 2100 ICS NI 3100 NI 4100 NXF w NXC ME260 64 NI 2000 NI 3100 ICS All NetLinx Cent...

Страница 216: ...evices click to open the online documentation requires an active Internet connection Supported Third Party Device Classes Visual Architect v1 1 supports the following third party device classes NXF NXC COM2 AXD IR NXF MINI NXC VOL4 AXR IRSM NXF MHS NXC I O10 IRX DM NXS NMS NXC REL10 IRX SM NXC NH NXC IRS4 IRX PP38 NXC HS MIO IRRX PCS2 NXC HE AXR RF VSS2 MAX HT04 MAX MMS 01S MAX AOM MAX AVP MAX CSE...

Страница 217: ...te Deck Multi Window Video Processor CD Player Changer Other Disc Player Video Projector Digital Media Encoder Pool Spa Video Wall Digital Media Player Power Controller UPS Volume Controller Digital Media Server Pre Amp Surround Processor Weather Digital Satellite System DSS Radio Digital Video Recorder Receiver Document Camera Security System DVD Player Changer Sensor Heating Cooling System Set T...

Страница 218: ...4 4 FG423 45 150 Default include with NI 6 5 amp Power Supply w Phoenix connector PSN6 5 FG423 41 460 NetLinx IR Emitter Cable CC NIRC FG10 000 11 INCL Three included with this NI Serial to Screw Terminal Adapter STS FG959 50 Serial Programming Cable CC COM FG10 727 50 NI 2000 FG2105 01 700 2 8 amp Power Supply w Phoenix connector PSN2 8 FG423 17 120 4 4 amp Power Supply w Phoenix connector PSN4 4...

Страница 219: ...connector PSN4 4 FG423 45 150 Default include with NI 6 5 amp Power Supply w Phoenix connector PSN6 5 FG423 41 460 NetLinx IR Emitter Cable CC NIRC FG10 000 11 50 Two included with this NI Serial to Screw Terminal Adapter STS FG959 50 Serial Programming Cable CC COM FG10 727 50 NI 3100 FG2105 05 900 ICSNet Card NXA ICSNET FG2105 10 200 2 8 amp Power Supply w Phoenix connector PSN2 8 FG423 17 120 4...

Страница 220: ... 5 amp Power Supply w Phoenix connector PSN6 5 FG423 41 460 NetLinx IR Emitter Cable CC NIRC FG10 000 11 50 Two included with this NI Serial to Screw Terminal Adapter STS FG959 50 Serial Programming Cable CC COM FG10 727 50 NXC ME260 64 NXI FG2010 64 FG2101 750 1090 2 8 amp Power Supply w Phoenix connector PSN2 8 FG423 17 120 4 4 amp Power Supply w Phoenix connector PSN4 4 FG423 45 150 Default inc...

Страница 221: ... FG423 17 120 4 4 amp Power Supply w Phoenix connector PSN4 4 FG423 45 150 Default include with NI 6 5 amp Power Supply w Phoenix connector PSN6 5 FG423 41 460 NetLinx IR Emitter Cable CC NIRC FG10 000 11 50 None included Serial to Screw Terminal Adapter STS FG959 50 Serial Programming Cable CC COM FG10 727 50 NXC NH FG2060 180 NXC HS FG2061 160 NXC HE FG2062 110 NXC IRS4 FG2023 110 NetLinx IR Emi...

Страница 222: ...duct Engraving for 2 4 button sets MIO ELITE EN FG5796 50 75 MIO CLASSIC S sc FG5975 01sc TBD Set of 4 single buttons MIO CLASSIC SW sc FG5795 21sc 50 sc standard colors BK Black WH White BG Beige Set of 2 double buttons MIO CLASSIC DW sc FG5795 22sc 40 Set of blank buttons MIO CLASSIC BB sc FG5795 07sc 99 Accent Frame MIO ACCCP S sc FG5795 08sc 70 Engraving for full button set MIO CLASSIC S EN FG...

Страница 223: ... ELITE EN FG5796 50 75 MIO ELITE D sc FG5796 02sc TBD Set of 4 single buttons MIO ELITE SW sc FG5796 21sc 50 Set of 2 double buttons MIO ELITE DW sc FG5796 22sc 40 Set of blank buttons MIO ELITE BB sc FG5796 07sc 99 Accent Frame MIO ACCEL D sc FG5796 09sc 85 Engraving for full button set MIO ELITE D EN FG5796 12 300 Default Include w product Engraving for 2 4 button sets MIO ELITE EN FG5796 50 75 ...

Страница 224: ...TE SW dc FG5796 21dc 50 Set of 2 double buttons MIO ELITE DW dc FG5796 22dc 40 Set of blank buttons MIO ELITE BB dc FG5796 07dc 99 Accent Frame MIO ACCEL D dc FG5796 09dc 85 Engraving for full button set MIO ELITE DL EN FG5796 14 250 Default Include w product Engraving for 2 4 button sets MIO ELITE EN FG5796 50 75 MIO ELITE S mc FG5796 01mc TBD Set of 4 single buttons MIO ELITE SW cc FG5796 21cc 5...

Страница 225: ... cc FG5796 07cc 99 Accent Frame MIO ACCEL D cc FG5796 09cc 85 Engraving for full button set MIO ELITE DL EN FG5796 14 250 Default Include w product Engraving for 2 4 button sets MIO ELITE EN FG5796 50 75 MIO DMS ac FG2408 01ac 525 Rough In Box CB MIO DMS FG039 10 175 ac all colors 2 8 amp Power Supply with Phoenix connector PSN2 8 FG423 17 120 4 4 amp Power Supply with Phoenix connector PSN4 4 FG4...

Страница 226: ... 3300 TDS or WDS Table Top Docking Station MVP TDS FG5965 10 1 920 Wall Mount Docking Station Black MVP WDS FG5965 11 1 600 Wall Mount Docking Station Silver MVP WDS SL FG5965 21 1 600 Kickstand MVP KS FG5965 12 320 Battery Pack MVP BP FG5965 20 350 Stylus Set of 3 MVP STYLUS FG5965 30 50 802 11g wireless card NXA WC80211G CF FG2255 07 280 128MB Compact FLASH upgrade NXA CFSP128M FG2116 36 340 256...

Страница 227: ...15 80 NXT CV7 FG2258 01K 1500 TP 1400 BASE 1 TBD WC B 460 WC G 4 4 amp Power Supply w Phoenix connector PSN4 4 FG423 45 150 Default Include w CV7 6 5 amp Power Supply with Phoenix connector PSN6 5 FG423 41 460 USB Programming Cable CC USB FG10 5965 20 Audio Video Breakout box NXA AVB Ethernet FG2254 10 INCL Already included in NXT CV7 kit Rack Mount Kit for AVB AC RK FG515 80 128MB Compact FLASH u...

Страница 228: ...mpact FLASH upgrade NXA CFSP256M FG2116 37 680 512MB Compact FLASH upgrade NXA CFSP512M FG2116 38 1 200 1GB Compact FLASH upgrade NXA CFSP1GB FG2116 39 1 998 802 11b wireless card NXA WC80211B CF FG2255 03 258 802 11g wireless card NXA WC80211G CF FG2255 07 280 NXT CV10 FG2258 01K 1500 TP 1400 BASE 1 TBD WC B 460 WC G 4 4 amp Power Supply w Phoenix connector PSN4 4 FG423 45 150 Default Include w C...

Страница 229: ...0 FG2258 02K 1500 TBD WC B 460 WC G Set of 2 bezels with buttons black NXA BEZ 10B BL FG2258 30 160 Set of 2 bezels with buttons white NXA BEZ 10B WH FG2258 31 160 Set of 2 bezels with buttons beige NXA BEZ 10B BG FG2258 32 160 Set of 2 bezels with buttons light almond NXA BEZ 10B LA FG2258 33 160 Set of 2 bezels without buttons black NXA BEZ 10NB BL FG2258 40 160 Set of 2 bezels without buttons w...

Страница 230: ... RAM upgrade NXA EXM256M FG079 02 440 802 11b wireless card NXA WC80211B FG2255 02 258 Kensington Lock Bracket NXA KLB FG2259 10 145 Battery Base Kit NXA BASE B FG2255K 1 630 Battery Pack NXT BP FG2255 10 340 Quick Charger Kit NXT CHG FG2250 50K 1 320 NXT 1200V FG2250 60K 3200 TP 2700 BASE B 6 5 amp Power Supply w Phoenix connector PSN6 5 FG423 41 460 Default Include w 1200V Audio Video Breakout b...

Страница 231: ...16 43 680 512MB Compact FLASH upgrade NXA CFTPV512M FG2116 44 1 200 1GB Compact FLASH upgrade NXA CFTPV1GB FG2116 45 1 998 Kensington Lock Bracket NXA KLB FG2259 10 145 Battery Base Kit NXA BASE B FG2255K 1 630 Battery Pack NXT BP FG2255 10 340 Quick Charger Kit NXT CHG FG2250 50K 1 320 NXD 1200 VGVideo FG2251 61V 3500 TP 575 WC G 6 5 amp Power Supply w Phoenix connector PSN6 5 FG423 41 460 Defaul...

Страница 232: ... FG515 80 256MB Compact FLASH upgrade NXA CFTPV256M FG2116 43 680 512MB Compact FLASH upgrade NXA CFTPV512M FG2116 44 1 200 1GB Compact FLASH upgrade NXA CFTPV1GB FG2116 45 1 998 802 11g wireless card NXA PCI80211G FG2255 04 280 NXT CV15 FG2250 11K 5100 TP 2700 BASE B 6 5 amp Power Supply w Phoenix connector PSN6 5 FG423 41 460 Default Include w CV15 Audio Video Breakout box NXA AVB Ethernet FG225...

Страница 233: ...luded in 1500VG kit Rack Mount Kit for AVB AC RK FG515 80 256MB Compact FLASH upgrade NXA CFTPV256M FG2116 43 680 512MB Compact FLASH upgrade NXA CFTPV512M FG2116 44 1 200 1GB Compact FLASH upgrade NXA CFTPV1GB FG2116 45 1 998 802 11g wireless card NXA PCI80211G FG2255 04 280 NXT 1500 VGRGB FG2252 61RGB TBD TP 2700 BASE B 6 5 amp Power Supply w Phoenix connector PSN6 5 FG423 41 460 Default Include...

Страница 234: ... FLASH upgrade NXA CFTPV512M FG2116 44 1 200 1GB Compact FLASH upgrade NXA CFTPV1GB FG2116 45 1 998 Kensington Lock Bracket NXA KLB FG2259 10 145 Battery Base Kit NXA BASE B FG2255K 1 630 Battery Pack NXT BP FG2255 10 340 Quick Charger Kit NXT CHG FG2250 50K 1 320 NXD 1700 VGVideo FG2253 61V TBD TP 575 WC G 6 5 amp Power Supply w Phoenix connector PSN6 5 FG423 41 460 Default Include w 1700VG Rack ...

Страница 235: ... FG2255K 1 630 Battery Pack NXT BP FG2255 10 340 Quick Charger Kit NXT CHG FG2250 50K 1 320 NXD 1700 VGRGB FG2253 61RGB TBD TP 575 WC G 6 5 amp Power Supply w Phoenix connector PSN6 5 FG423 41 460 Default Include w 1700VG Rack Mount Kit for touch panel NXA RK17 FG2904 52 300 VESA Mount Back Shell MB TP17 FG033 50 750 Conduit Box CB TP17 FG034 10 175 Audio Video Breakout box NXA AVB RGB FG2254 11 I...

Страница 236: ...Appendix E Supported Devices Accessories by Type 224 VisualArchitect v1 1 CONFIDENTIAL AND PROPRIETARY COPYRIGHT AMX LLC 2006 ...

Страница 237: ... Device Model Details dialog for that device Use this dialog to view device specifications and download associated files including the Duet Module JAR file InConcert Resource Center Search Devices Select Search Devices in the InConcert Resource Center to access the Search fields shown in FIG 131 1 Use the Search Devices options to perform a search for the desired device using at least one of the f...

Страница 238: ...ch for either Remote Controls default setting or IR Files 3 Click Search to perform a search for all remote controls that meet the search criteria The results of the search are listed on this page sorted alphabetically by Remote Control 4 Scroll through the list of devices to find one that you want to include in your VA projects 5 Once you find the remote that you re looking for click on the Remot...

Страница 239: ...IG 134 The options on this page allow you to vote for the NetLinx device modules that you would like to see developed and released by AMX or request that a specific device module be developed To Vote Select up to three modules then click on the Vote button You may only vote once per month To Request If a module that you are interested in is not listed you may send a request to AMX by clicking on t...

Страница 240: ...Appendix F The InConcert Resource Center 228 VisualArchitect v1 1 CONFIDENTIAL AND PROPRIETARY COPYRIGHT AMX LLC 2006 ...

Страница 241: ...229 VisualArchitect v1 1 ...

Страница 242: ...s of AMX AMX reserves the right to alter specifications without notice at any time It s Your World Take Control 3000 RESEARCH DRIVE RICHARDSON TX 75082 USA 800 222 0193 469 624 8000 469 624 7153 fax 800 932 6993 technical support www amx com CONFIDENTIAL AND PROPRIETARY COPYRIGHT AMX LLC 2006 ...

Отзывы: