Upgrading Modero Firmware
78
NXD/T-1200V Wall/Flush Mount Touch Panel
Verify your NXA-BASE/B is securely attached to the bottom of the NXT panel.
Once the base is secured, side out the battery compartment and install the batteries into the battery base. Once
the batteries are installed, close the compartment.
Reconnect all rear connectors to the NXT panel.
1.
Complete the instructions for configuring the NetLinx Master for IP communication found in the
Step 1: Prepare
the Master for communication via an IP
section on page 72.
2.
Press the grey Front Setup Access button for
3 seconds
to open the Setup page.
3.
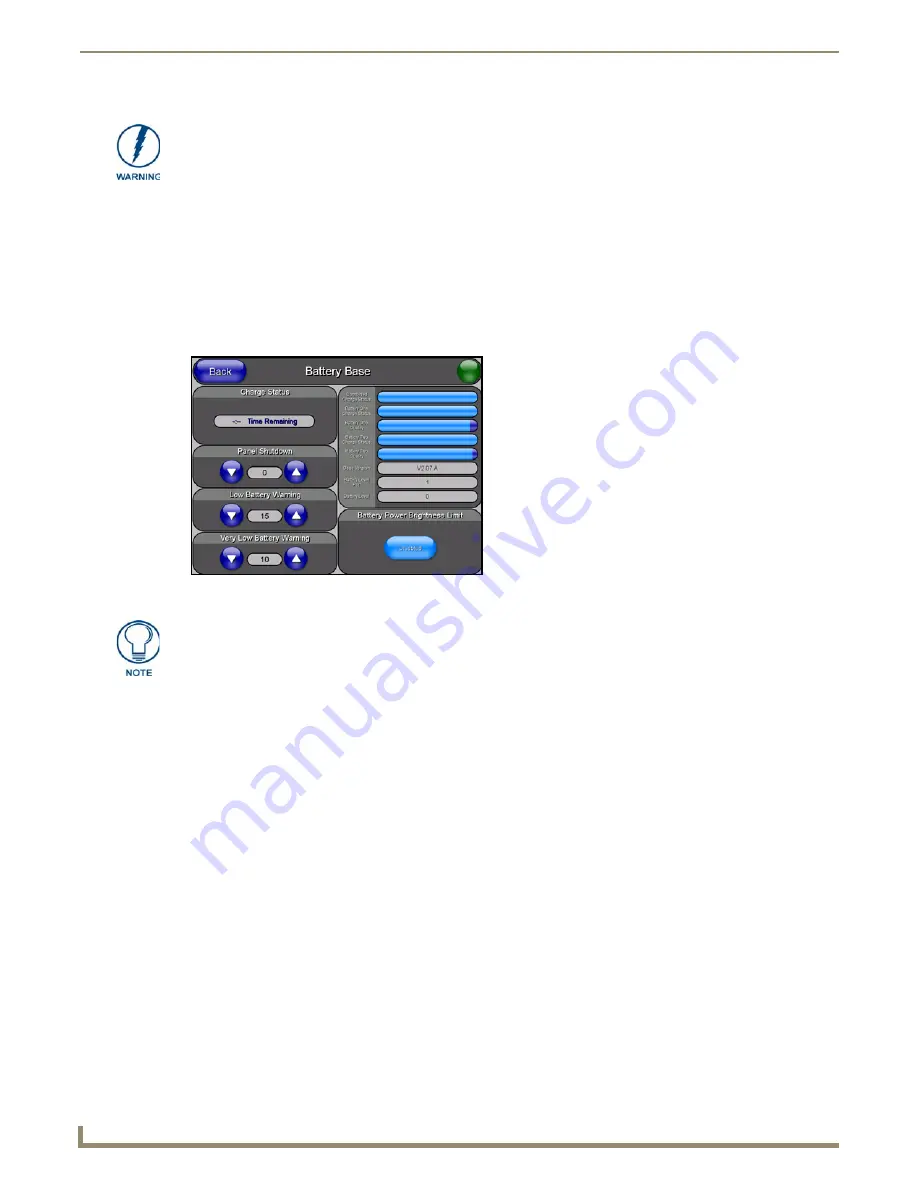
Press the
Battery Base
button to open the Battery Base page (FIG. 80).
Step 2: Upgrade the NXA-BASE/B firmware via an IP
1.
Click on the
OnLine Tree
tab in the Workspace window to view the devices on the System.
The default System value is one
.
2.
Right-click the associated System number (from the Workspace) and select
Refresh System
to detect of all devices
on the current system, establish a new connection to the Master, and refresh the System list with devices on that
system.
3.
After the Communication Verification dialog window verifies active communication between the PC and the
Master, verify the target panel appears in the
OnLine Tree
tab of the Workspace window.
The default Modero panel
value is 10001
.
The NXA-BASE/B will not appear on the system listing.
4.
Locate the latest Kit file by first logging in to
www.amx.com
and then navigate to
Tech Center
>
Firmware Files
and from within the
Modero
section of the web page locate the
Modero Battery Base
section of the website.
5.
Click on the desired Kit file link and after you’ve accepted the Licensing Agreement, verify you have downloaded
the Modero Battery Base Kit file to a known location.
6.
From within Studio, select
Tools
>
Firmware Transfers > Send to NetLinx Device
from the Main menu to open
the Send to NetLinx Device dialog (FIG. 81). Verify the panel’s System and Device number
values match those
values listed within the System folder in the
OnLine Tree
tab of the Workspace window.
DO NOT PLACE BATTERIES IN THE BASE BEFORE CONNECTING IT TO THE
NXT PANEL. Insert batteries into the NXA-BASE/B ONLY AFTER the base has been
installed onto the bottom of the NXT panel.
Having batteries in the base before connection can damage the battery base.
FIG. 80
Battery Base page
The battery base firmware is shown on the right of the Battery Base page.
Verify you have downloaded the latest firmware file from www.amx.com and then
save the Kit file to your computer.
Содержание Modero NXD-1200V
Страница 40: ...Touch Panel Accessories 28 NXD T 1200V Wall Flush Mount Touch Panel...
Страница 80: ...Configuring Communication 68 NXD T 1200V Wall Flush Mount Touch Panel...
Страница 92: ...Upgrading Modero Firmware 80 NXD T 1200V Wall Flush Mount Touch Panel...
Страница 164: ...Programming 152 NXD T 1200V Wall Flush Mount Touch Panel...
Страница 170: ...Appendix 158 NXD T 1200V Wall Flush Mount Touch Panel...
Страница 175: ...Troubleshooting 163 NXD T 1200V Wall Flush Mount Touch Panel...


