D000161-00 Rev. C
33
To Re-attach the enclosure:
1. It is easiest to attach the back of the enclosure
first and follow with the sides. Place the bottom
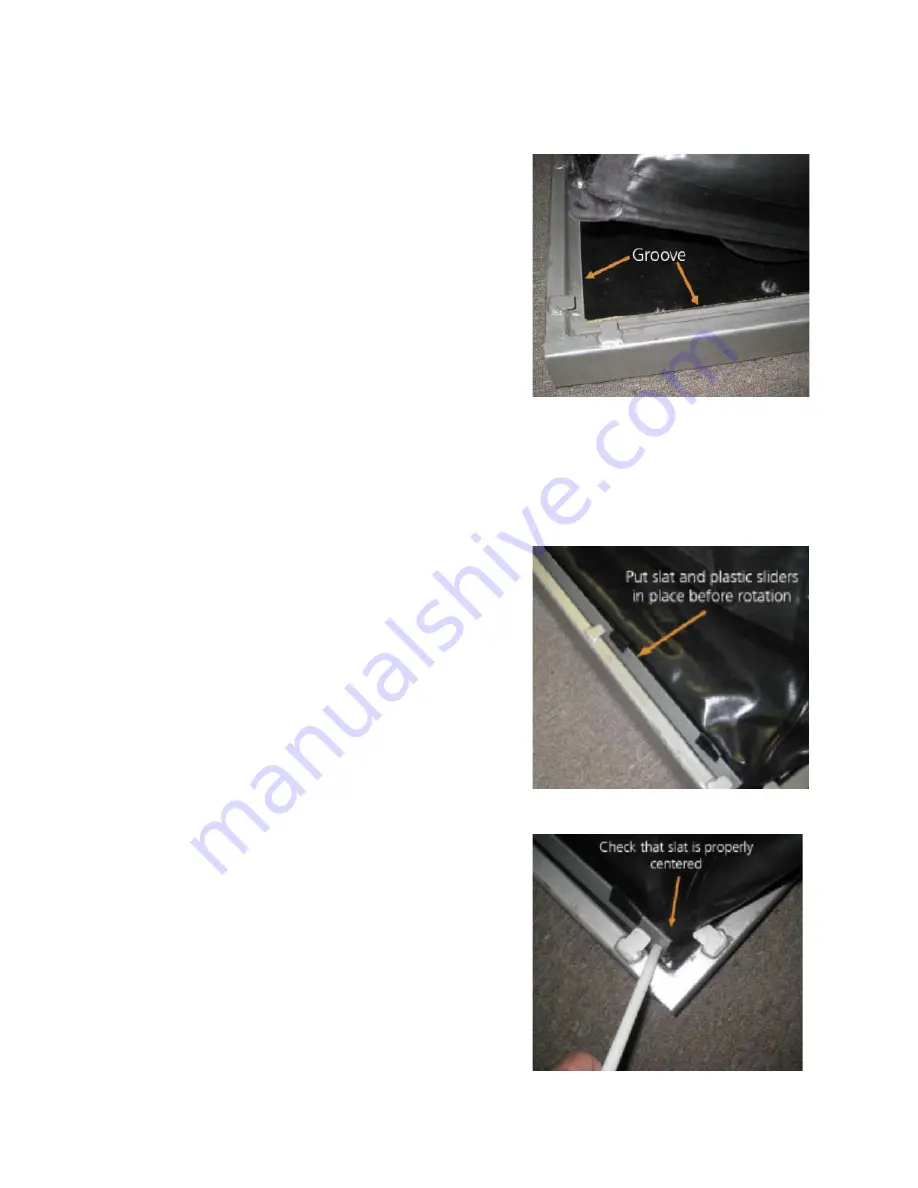
edges of the enclosure in the small groove
(Figure 26) between the outer edge of the wood
and the inside of the metal base. You will
notice that on the bottom edge of the enclosure
there is a cylindrical plastic rod that is sewn in
the enclosure and fits in the groove.
2. Place the bottom edge of the metal slats on the
enclosure side of the plastic rods located in the
hem of the enclosure. The rod should be
trapped between the slat and the outer frame.
Take the plastic sliders and place them on the
slat. You will notice that the sliders are tapered on one end. This is the side that should
be facing the metal tab. The slat will be angled toward the enclosure. Using your
hands, push down on the metal slat (pushing on the plastic sliders will be more
comfortable) to clear the metal tabs, then rotate the top edge of the slat outwards,
capturing the slat under the metal tabs.
Figure 27 shows the metal slat set in place. Plastic
sliders have been attached and the slat is ready to be
pushed down and rotated into place.
When you place a slat, ensure that it is centered
properly with regard to the metal tabs as shown in
Figure 28. This is the rear slat, and it has an equal
overhang on each end tab.
Figure 26
Figure 27
Figure 28


