90
-EN
When an optional camera is connected, the view video of camera can be
output to the monitor.
Front camera, Rear camera or Side camera can be connected to this unit.
Make the Camera Select setting (Front, Rear, Side or Other) according to
your connected camera. For details, see “Setting the Camera Input”
(page 46).
When using the optional Multi Camera Interface module, you can
connect up to 3 cameras: Front Camera, Rear Camera, and Side Camera.
When connecting the optional Multi Camera Interface module, you
need to set each camera to On/Off in “Setting Multi Camera to On/Off ”
(page 48).
When displaying the camera view while connected to the optional Multi
Camera Interface module, you can switch the camera view using the
switch button at the top of the screen.
Front camera:
When the HCE-C257FD is connected, conditions in front of the
vehicle, such as objects, people and other hazards, can be seen.
Rear camera:
If an HCE-C127D/HCE-C157D/HCE-C252RD camera is connected,
when the vehicle is reversed, the rear camera view (guide marks for
vehicle width and available distance) is displayed automatically on
the screen of this unit.
Side camera:
If the HCE-C259SD is connected, you can check for obstacles in the
blind spot on the passenger side.
Other camera:
Set when connecting to a camera other than the Front camera or Rear
camera, such as a room camera and side camera.
Rear Camera Operation
1
Press the
MENU
button.
The menu screen is displayed.
• You can also display the menu screen by touching
[
]
on the lower part of the Audio source screen or by swiping upward.
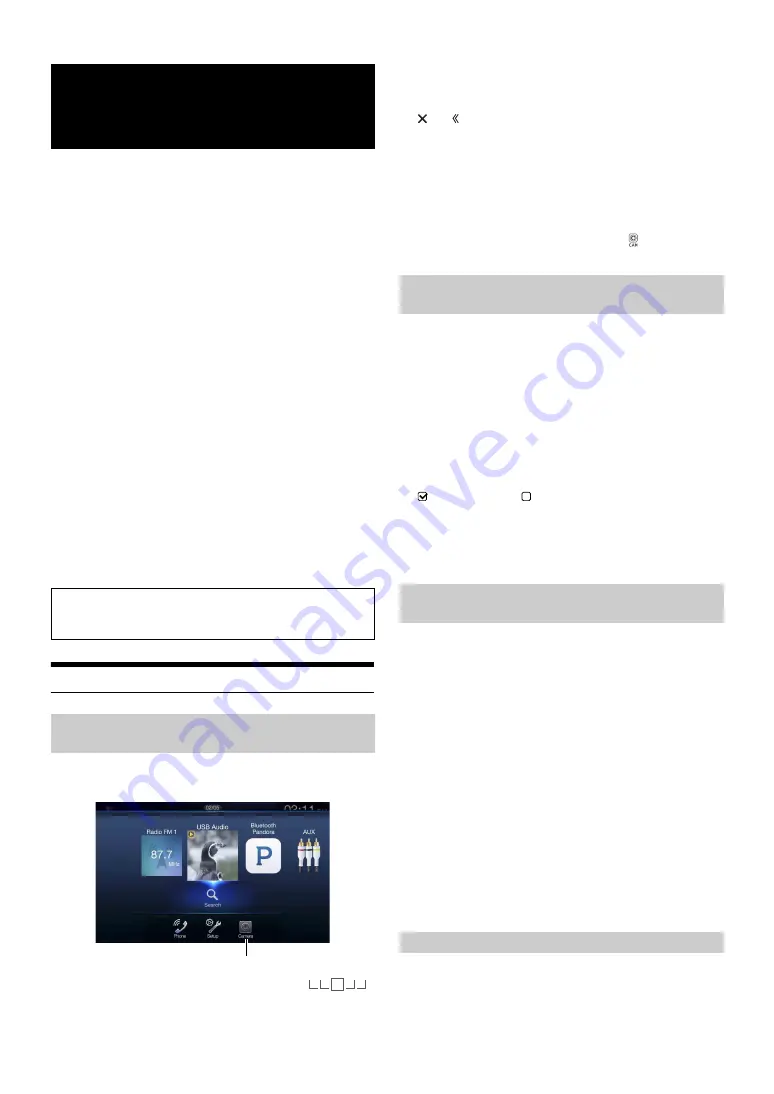
2
Touch
[Camera]
.
The Rear Camera view is displayed.
• Touch the screen while the camera image is being displayed, and touch
[
]
or
[ ]
to return to the main source screen or previous screen.
• You can perform a Guide Adjustment. For details, see “Adjusting the
Rear/Front/Side Camera Guide” (page 46).
• If you connect a Front Camera and Side Camera using the optional
Multi Camera Interface module, you can display the Rear camera
image using the
[Camera]
button only when you set “Setting a Default
Camera” (page 48) to” Rear”. If you connect a Front Camera and Side
Camera at the same time, touch
[Front]
or
[Side]
in the Rear Camera
image to switch the Camera image.
• You can also switch the Camera view by Pressing
(CAMERA)
button. (X110 only)
1
Shift the gear lever to the reverse (R) position.
The rear view image is displayed while the car remains in
reverse.
2
If you shift the gear lever to a position other than reverse
(R), the monitor returns to the previous screen.
• Never depend solely on the camera when backing up. Always turn and
look and only use the camera for additional assistance.
• This function is effective when the reverse wire is properly connected.
• If you use the optional Multi Camera Interface module, be sure to set
Rear Camera in “Setting Multi Camera to On/Off ” (page 48) to ”On”
(
). If setting to ”Off ” (
), you cannot display the Rear camera
image.
• If you set to Front or Side in “Setting a Default Camera” (page 48), the
Rear camera image is also displayed.
• You can perform a Guide Adjustment. For details, see “Adjusting the
Rear/Front/Side Camera Guide” (page 46).
If the camera has a view switch function, the Direct Change switch is
displayed.
1
Touch the screen when the image from the rear camera is
displayed.
The operation screen is displayed on the screen.
• After a 5-second time-out, the operation screen returns to the
camera display screen.
2
Touch
[Back]
,
[Panorama]
,
[Corner]
or
[Top]
.
The image pattern changes.
• For detailed information about image patterns, see the camera Owner’s
Manual.
• You can perform a Guide Adjustment. For details, see “Adjusting the
Rear/Front/Side Camera Guide” (page 46).
1
Touch the screen when the image from the camera is
displayed.
The operation screen is displayed on the screen.
• After a 5-second time-out, the operation screen returns to the
camera display screen.
Camera Operation
(Optional)
You can adjust the quality of the camera image.
Setting items: Brightness / Color / Contrast
See “Picture Quality Setup” (page 39).
Displaying the Rear Camera Image from the
Menu screen
[Camera] button
Displaying the rear view video while the car is
in reverse
Switching the Image Pattern for the Rear
Camera
[Back]:
Rear View
[Panorama]: Panorama View
[Corner]:
Corner View
[Top]:
Ground View
Guide Display ON/OFF Setting
Содержание INE-W967HD
Страница 27: ...For X108U INE W967HD For X110...
Страница 32: ...7 EN If this Message Appears 106 Specifications 109 END USER LICENSE AGREEMENT HERE 111 LIMITED WARRANTY...
Страница 156: ...User Manual Alpine Navigation System Navigation software for the Alpine Navigation System English March 2015 ver 1 0...
Страница 245: ...HERE Maps Update 68 29530Z26 A Y_240x180...
Страница 251: ......
Страница 252: ......


