Chapter 1
3
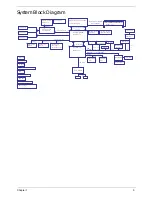
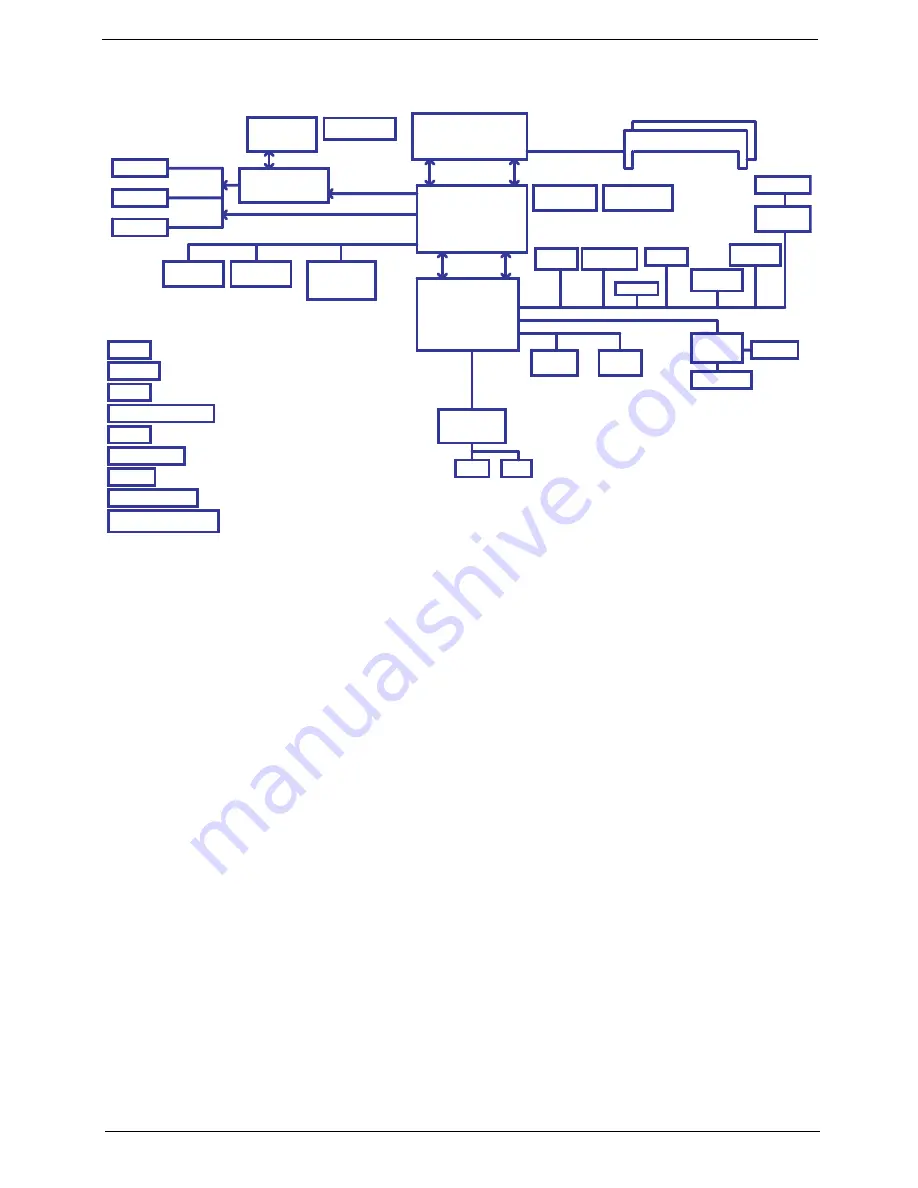
System Block Diagram
Power On/Off CKT.
CRT Conn.
LPC BUS
uFCBGA-528
Int.KB
USB conn
X 2
A link Express2
DC/DC Interface CKT.
AMD S1G1 Processor
3.3V 48MHz
yper Transport Link
16 x 16
Fan Control
Power Circuit
uPGA-638 Package
ATI RS780MN
BIOS
HD Audio
ATI SB710
ENE KB926
LVDS Conn.
BT Conn
3.3V 24.576MHz/48Mhz
RTC CKT.
SATA HDD
Conn.
port 0
Camera
Port 1
Port 6
USB
CDROM
Conn.
PCI-Express 1x
port 1
Port 3
Port 12
Port 5
MINI Card 1
WLAN
Port 0
Dual Channel
BANK 0, 1, 2, 3
200pin DDRII-SO-DIMM X2
1.8V DDRII 667/800
Memory BUS(DDRII)
Clock Generator
SLG8SP626VTR
Thermal Sensor
ADM1032
ATI M92-S2 LP
VRAM 512MB
64M16 x 4
PCI-Express 8x
DDR3
uFCBGA-528
uFCBGA-631
HDMI Conn.
HDA Codec
ALC269X-GR
Phone Jack x2
Digital MIC
LID SW/Cap sensor Board
Gen1
5 in 1 socket
Card Reader
RTS5159
Port 4
Port 8
Mini Card 1
(WLAN)
Mini Card 2
(WWAN)
To IO Board
USB conn X 2
Port 0
Port 2
S-ATA
MINI Card 2
WWAN
Port 2
Port 1
Realtek RTL8111CA
To IO board
LAN(GbE)
IO Board
PWR Board
TP Board
LED
Содержание Aspire 5534 Series
Страница 6: ...VI ...
Страница 10: ...X Table of Contents ...
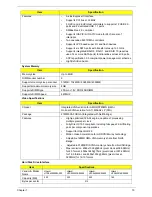
Страница 31: ...Chapter 1 21 Pack capacity 4400 mAh Number of battery cells 6 Package configuration 3S2P Item Specification ...
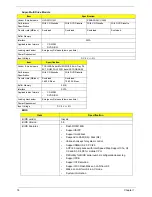
Страница 32: ...22 Chapter 1 ...
Страница 51: ...Chapter 2 41 ...
Страница 52: ...42 Chapter 2 ...
Страница 65: ...Chapter 3 55 ...
Страница 71: ...Chapter 3 61 6 Open the Keyboard FFC securing latch as shown then disconnect the FFC and remove the Keyboard ...
Страница 79: ...Chapter 3 69 ...
Страница 81: ...Chapter 3 71 5 Lift the Power Board from the Lower Cover ...
Страница 83: ...Chapter 3 73 6 Lift the right side speaker out from the Lower Cover as shown ...
Страница 89: ...Chapter 3 79 7 Disconnect the I O Board Cable from the I O Board ...
Страница 97: ...Chapter 3 87 ...
Страница 103: ...Chapter 3 93 ...
Страница 107: ...Chapter 3 97 6 Disconnect the LCD cable as shown and remove the cable from the LCD Panel ...
Страница 110: ...100 Chapter 3 ...
Страница 125: ...Chapter 3 115 3 Grasp the Thermal Module by the CPU heat sink and place onto the Mainboard as shown ...
Страница 197: ...Chapter 6 187 ...
Страница 224: ...214 ...


