background image


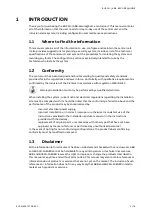
2CSM6007 30D0901_REVG | 01.02.2021


Busch-/ABB-secure@home


System Manual


Types of Central Unit


With GSM


SAS-W1.1E


SAS-W1.11E


SAS-W1.1F


SAS-W1.11F 


SAS-W3.1E


Basic


SAS-W2.1E


SAS-W2.11E


SAS-W2.1F


SAS-W2.11F


Содержание SAS-W1.1E

Страница 1: ... 2CSM600730D0901_REVG 01 02 2021 Busch ABB secure home System Manual Types of Central Unit With GSM SAS W1 1E SAS W1 11E SAS W1 1F SAS W1 11F SAS W3 1E Basic SAS W2 1E SAS W2 11E SAS W2 1F SAS W2 11F ...

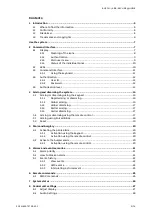
Страница 2: ...14 3 1 1 Rapid arming or disarming 14 3 1 2 Global arming 16 3 1 3 Global disarming 17 3 1 4 Partial arming 17 3 1 5 Partial disarming 17 3 2 Arming or disarming using the remote control 17 3 3 Arming using Forced Block 18 3 4 Reset 19 4 Panic and burglary 20 4 1 Activating the panic alarm 20 4 1 1 Activation using the keypad 20 4 1 2 Activation using the remote control 20 4 2 Activate the burglar...

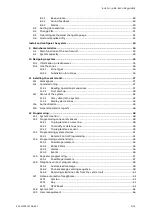
Страница 3: ...42 11 3 1 Arm disarm the system 43 11 3 2 Display alarm zones 44 11 4 Authentication 45 11 5 General and alarm reports 46 12 Programming 48 12 1 System creation 48 12 2 Programming zones and sensors 48 12 2 1 To programme a new zone 48 12 2 2 To modify or delete a zone 49 12 2 3 To programme a sensor 49 12 3 Programming system devices 51 12 3 1 Remote Control Programming 51 12 4 Programming extern...

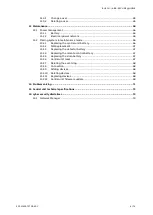
Страница 4: ...13 2 2 SIM Replacement 67 13 2 3 Replacing the detector battery 67 13 2 4 Replacing the remote control battery 67 13 2 5 Replacing the siren battery 67 13 2 6 Central unit reset 67 13 2 7 Deleting the events log 68 13 2 8 Connection 68 13 2 9 Adding devices 68 13 2 10 Deleting devices 68 13 2 11 Replacing devices 68 13 2 12 Central unit firmware update 69 14 Problem solving 71 15 Central unit tech...

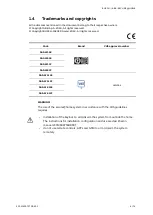
Страница 5: ...ng the system current national electrical regulations regarding the installation site must be complied with It should be noted that the conformity referred to above and the performance of the product may be compromised by incorrect electrical power supply incorrect installation or incorrect improper or otherwise inconsistent use of the instructions provided in the installation and use manual or in...

Страница 6: ... Brand VdS approval number SAS W1 1E SAS W2 1E SAS W1 1F SAS W2 1F SAS W1 11E H121004 SAS W1 11F SAS W2 11E SAS W2 11F WARNING The use of the secure home system in accordance with the VdS guidelines requires installation of the keylock to arm disarm the system from outside the home The instructions for installation configuration and use are described in manual 2CSM600756D0901 do not use remote con...

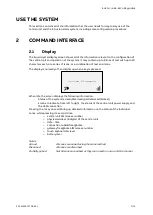
Страница 7: ...ights up when a key is pressed When idle the screen displays the following information Status of the system armed disarmed partial armed Note1 2 icons to indicate from left to right the status of the central unit power supply and the GSM connection Pressing the key once will bring up detailed information on the status of the individual zones while pressing it a second time o central unit FW releas...

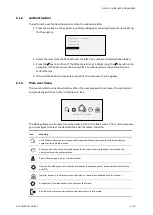
Страница 8: ...M Card with PIN not removed GSM modem in energy saving mode GSM diagnostics in progress GSM supervision in progress Intrusion alarm system System disarmed System armed in Notification mode Alarm armed in Home mode Alarm armed in Away mode Exit delay activated on at least one sensor 24h active zone Central unit power supply Indicates the presence of 230V and battery power supply Battery powered onl...

Страница 9: ...en the central unit automatically switches to the Arm disarm icon The key allows you to leave the screen and return to the idle screen The arrows allow you to navigate to select the desired icon and therefore function Icon Meaning Arm Disarm Allows you to access the Arming and Disarming menu for the entire security system or for individual zones Status and list of events Provides access to the men...

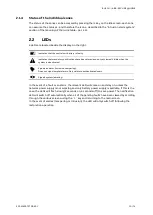
Страница 10: ...n the system is deactivated Signals an alarm intrusion tampering Does not signal burglar alarms Only visible to authenticated users Signals system jamming In the event of a fault or an alarm the relevant LED will come on and stay on unless the network power supply is not working and only battery power supply is available If this is the case the LEDs will flash slowly 2 seconds on 6 seconds off to ...

Страница 11: ...hanumeric keys that allow you to enter numbers or letters Exit from the current work session without saving Removes a setting or character depending on the context standard keypad has 20 keys Allow you to move between menu options and icons It confirms the entered or selected value When pressed anywhere in the displayed menu saves the data and moves to the upper menu level Alphanumeric keys that a...

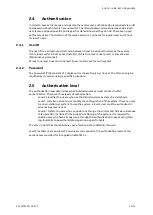
Страница 12: ...e PIN can only be modified by its owner using a specific procedure 2 5 Authorisation level The authorisation level determines what individual users can and cannot do after authentication There are three levels of authorisation Level 2 classifies the users who use the intrusion alarm system on a daily basis Level 3 Installer can set up or modify the configuration of the system There can only be one...

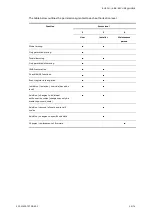
Страница 13: ...arming Only permitted arming Total disarming Only permitted disarming I HAS restoration Check I HAS functions Event register interrogation Inhibition isolation override based on level Addition changes to individual authorisation codes changes can only be made to your own code Addition removal of users and level 2 codes Addition changes to specific site data Changes replacement of firmware ...

Страница 14: ... is for global disarming For further information regarding the installation configuration and use of the keylock please refer to manual 2CSM600756D0901 This chapter sets out the procedures for arming and disarming the intrusion alarm system using the keypad and remote control It also explains the procedures to be implemented if the central unit rejects the arming operation due to faults detected i...

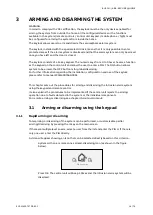
Страница 15: ...The rapid arming command can be customised in this case the central unit performs this configuration instead of the pre defined configuration global away mode arming For model SAS W3 1E these functions can also be carried out via the following keys Global arming Global disarming Favourite 1 If there are multiple users select a user from the list and enter the PIN or if there is only one user enter...

Страница 16: ...Using the arrow keys select Arm Away to arm the system in Arm Away al mode Arm Stay to arm the system in Arm Stay mode Notification to arm the system in Notification mode and confirm your selection using the ok key The central unit will beep 3 time and the intrusion alarm zones will be armed If any event reports are stored in the memory the zones will not be armed Instead the first unseen event in...

Страница 17: ...ome mode to arm the system in Home mode Notification to arm the system in Notification mode and confirm your selection using the ok key The central unit will beep 3 time and the intrusion alarm zones will be armed If you wish to arm other zones repeat the entire procedure for each zone to be armed 3 1 5 Partial disarming Partial disarming of the of the intrusion system can be performed by Users PI...

Страница 18: ...contact on a door or window is open An anti burglar device is active if it is signalling a burglary attempt E g a remote control when the burglary button is pressed However a level 2 user can override the block for the zones they are authorised for and arm the intrusion alarm system By overriding the block the central unit will ignore any causes preventing normal arming of the system and will proc...

Страница 19: ...smoke alarm flooding alarm central unit battery etc A zone reset has to be carried out in order to reset sensor faults Alarm memory and Supervision The reset operation is recorded in the events log To reset the system or an individual zone proceed as follows 1 Log in as a level 2 user 2 Select Status and Events and press OK 3 Select Status and press OK 4 Select Alarm Reset select System to reset t...

Страница 20: ... Use the arrow keys to select the Panic icon and press ok To stop the sirens before the programmed time has elapsed disarm the system 4 1 2 Activation using the remote control Press the remote control button programmed to activate the Panic event To stop the alarm by interrupting the programmed siren sound press the remote control button programmed to disarm the system See the remote control manua...

Страница 21: ...control or remotely When an alarm is blocked the sound signals sirens and phone reports voice message and SMS will stop Total disarming blocks all types of alarms while partial disarming may or may not block the alarm as shown in the table below Type of alarm Disarming Total Alarm zone Zone not in alarm mode Intrusion Alarm block Alarm block Continuous alarm Tampering Alarm block Alarm block Conti...

Страница 22: ...main events 3 to examine the secondary events 4 The detailed events screen will open The events are displayed in order of most recent to oldest Use the and keys to scroll through the events To read the information relating to the event see the Interpreting a stored event paragraph 5 3 2 SMS events Pressing 4 SMS calls up a window that shows the last SMS received The screen shows The mobile phone n...

Страница 23: ...r who armed the system Device used for the operation Previous zone status Status following arming Disarming Disarmed system zone Name or ID of the user who disarmed the system Device used for the operation Previous zone status Status following disarming Burglar alarm Name or ID of the user performed the operation Device used for the operation Intrusion alarm Type of Sensor Sensor Position Tamperin...

Страница 24: ...rk power supply Battery Level Network power supply return Battery Level No 230V Network time OFF minutes Voice call Alarm type Telephone ID calls 1 Send SMS Alarm type telephone IDs recipients 1 In bold if the call was successful i e the recipient picked up normal if the call was unsuccessful Secondary events optional Event type Info 4 Info 5 Info 6 Info 7 Second screen Intrusion pre alarm Type of...

Страница 25: ...hentication on the central unit keypad All commands require authentication with the exception of status requests and the scene Level 2 users can send SMS commands Commands are sent using coded SMS messages to which the central unit replies with a response SMS or clear confirmation unless it has been specifically instructed not to send a response A separate SMS must be sent for each command The gen...

Страница 26: ...l strength in Dbm the network registration status and the operator ID code the operator codes are listed in standard ITU E 212 5 Select Zones and Sensors the various zones are displayed and within each zone information on the status of the programmed sensors is displayed 6 System Devices displays the status of system devices such as Sirens and Repeaters 7 Alarm Reset allows you to remove all the a...

Страница 27: ...1 Log in as a level 2 user 2 Use the arrow keys to select the Options icon and press ok 3 Press 1 Adjust display 4 Use the arrow keys to move and select Yes or No using the arrow keys to activate or deactivate automatic off When automatic off is activated the display illumination switches off 60 seconds after the last key was pressed Options 1 Adjust display 2 Set audio 3 Change date and time 4 Ch...

Страница 28: ...ress 2 Sound feedback and then press the number of the command for which you wish to configure sound feedback The options are 1 Arming partial or total system arming 2 Disarming total or partial disarming of the anti intrusion system A new screen appears You can now choose how many if any beeps to activate for the command Local Includes the central unit keypad remote control and connector Remote t...

Страница 29: ...med Technological i e any of the technological alarms that might be configured flooding gas leak etc even with the anti intrusion system deactivated WARNING The Tampering setting is not compliant with EN 50131 1 Zones filter allows you to select the zones to be taken into account in the event of an alarm only for intrusion alarms and sensor tempering alarms Factory settings include all zones If th...

Страница 30: ... time switchover and vice versa To set the date and time 1 Log in as a level 2 user 2 Use the arrow keys to select the Options icon and press ok 3 Press 3 Change Date and time 4 Enter data and time using the numerical keys use the arrow keys to move Confirm the date and time entered by pressing ok Options Options 1 Display settings 2 Audio Settings 3 Change date and time 4 Change PIN 5 Other 6 Fav...

Страница 31: ...vel 2 user 2 Use the arrow keys to select the Options icon and press ok 3 Press 4 Change Pin 4 Set the current PIN the new PIN 2 twice and press OK to save Options 1 Display settings 2 Audio Settings 3 Change date and time 4 Change PIN 5 Other 6 Favorite Change PIN User 1 PIN New PIN Repeat PIN ...

Страница 32: ...uent need to reset If disabled the LED will never switch on even if there are stored notifications or notifications that still have not been viewed by the user iii Select All to exclude both Force Block and LED iv Select None to keep the pre defined settings WARNING Exclusion of the Force Block and exclusion of the LED do not comply with the EN 50131 1 standard Language select the desired language...

Страница 33: ...tem zone choose the type of arming from among the following Away mode Home mode Notification Disarmed No action This custom setting once saved will be executed every time a Quick Entry command is executed instead of the default settings Favorite1 weapon all zones in Indoor mode Favorite2 weapon all zones in Pre alarm mode Options 1 Display settings 2 Audio Settings 3 Change date and time 4 Change ...

Страница 34: ...anic reports external device implementation commands alarm notifications via voice messages or SMS to the programmed telephone numbers system remote control via SMS integration of the Home Automation Busch ABB free home system 9 2 System capacity The central unit manages up to 8 programmable zones each of which can contain up to a maximum of 64 detectors for an overall total of 64 across the syste...

Страница 35: ...form complex wiring operations One disadvantage is that greater care is required when positioning the devices in order to obtain the best radio connection The quality of a radio connection is directly proportional to the power of the signal that reaches the device This power is affected by the distance between the devices the power of the radio signal decreases with each square of distance and any...

Страница 36: ...ns can be configured WARNING The technical zone 24h and Pre alarm and Internal Alarm modes do not comply with the EN 50131 1 standard The functions relating to domestic security for example flooding detectors smoke detectors gas detectors and technological detectors in general and the Home Automation functions are not covered by EN 50131 1 and EN 50131 3 standards 10 2 2 Subdivision into zones Sub...

Страница 37: ...ully operational the first access level is always level 2 This can be followed by level 3 authentication if you need to access the installer menu As standard the first log in must always be performed by a level 2 user followed by a level 3 user for the functions that require it When a level 2 user logs in the menu described in paragraph 2 1 3 Main user menu appears When you access the installer se...

Страница 38: ...g creation of users acquisition of security devices creation of zones etc The following procedure lets you program the system WARNING IMPORTANT KEEP THE PIN IN A SAFE PLACE For security reasons special maintenance software has to be used if the PIN is lost INFO Sequence 3 is displayed only when the secure home central unit is connected via a BUS cable to a free home System Access Point ...

Страница 39: ... refer to the relative instruction sheet INFO The image represents a generic device The configuration can be performed on all the secure home devices INFO Points 6 7 and 8 are skipped if connected with free home INFO The configuration steps may vary according to the characteristics of the installed security device ...

Страница 40: ...evices remote controls sirens repeaters etc are not assigned to any specific zone Once the zone has been created and the safety device assigned to it the central unit returns to screen number 5 INFO It is possible to acquire a new device by inserting Battery into a new sensor and following the procedures indicated in screen 5 to 8 otherwise select Finish Setup to complete the installation ...

Страница 41: ...he sensor to improve communication or add a wireless repeater Fault tampering blinding failure etc check the sensor To find out the details of the installed device select the corresponding item ex 01 IR Garage and confirm with the key To return to screen 14 and continue with the programming go back using the button ...

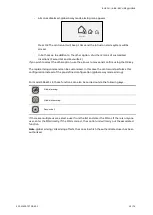
Страница 42: ...following messages All zones armed all zones are armed in the same way All zones disarmed all zones are disarmed Mixed armed the zones are armed in different modes or some are disarmed 2 The battery icon displayed may indicate one of the following statuses Battery connected and charging the central unit is connected to the 220V network Battery not connected the central unit is connected to the 220...

Страница 43: ...e system From the Idle Screen it is possible to arm disarm the system quickly by pressing the button INFO The default GLOBAL ARM will put the entire system in Arm Away mode until a preferred mode combination of zone activation is defined associated with this command ...

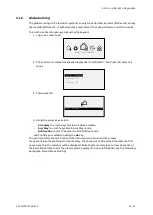
Страница 44: ... in the Central Unit and notifications for example push or SMS excluding the use of outdoor sirens Away Mode in case of alarm all the signals provided by the system will be activated including the indoor and outdoor sirens Scrolling further down you get to the page that shows the system status INFO If you need to scroll more pages press and hold the key to scroll down quickly and get faster to the...

Страница 45: ...rm is generated on the tenth attempt 4 If the authentication process is successful the main user menu screen appears described in chapter 2 3 5 Select the icon and enter a valid PIN to access the Installer screen Installer access level 3 Icon Meaning Zones and Sensors This provides access to the zones and sensors programming menu System test Provides access to the system test menu System devices T...

Страница 46: ...eral and alarm reports The central unit manages alarm situations or faults using the following reports cause LED or device buzzer Central unit Siren Voice message 1 SMS 1 LEDs Display Sound Sound Flash Notification alarm Home mode alarm Away mode alarm System tampering alarm with external system activated System tampering alarm with external system deactivated Sensor tampering alarm with external ...

Страница 47: ...ay Sound Sound Flash Device fault Central unit battery low Technical support with Radio fault Home mode anti theft arming Away mode anti theft arming Notification mode anti theft arming Anti theft disarming factory enabled report compliant with EN 50131 1 regulations optional programmable report 1 if included on the device ...

Страница 48: ...d services telephones required to create and configure users and for the final system test During the work system the menus can be navigated in reverse by pressing the key without needing to log in for each operation WARNING If you inadvertently leave the main menu and return to the idle system screen you will need to log in again 12 2 Programming zones and sensors 12 2 1 To programme a new zone 1...

Страница 49: ...eters displayed in normal characters rather than in bold are read only These are Address hexadecimal address of the detector Type generic name of the detector Signal detector radio signal level measured in dBm decibel mW Repeater ID of the repeater used if the detector does not communicate with the central unit directly but rather via the repeater Not set means that the detector communicates direc...

Страница 50: ...e alarm using a command device without triggering the report or to enter the protected areas and disarm the alarm system located within those areas The entry delay time must only be applied to detectors that cover the route between the entry point door garage shutter etc and the command device If different values are set on multiple sensors the exit delay time applied is the highest of these value...

Страница 51: ...the device At this point the remote control configuration can be set this is different for the 2 types 12 3 1 1 Numerical remote control configuration All 5 keys for this type of remote control codes SAD W2 1F and SAD W2 11F can be configured at the user s discretion Icon Name Factory configuration Customisable Key 1 Panic Key Yes LED No Key 2 Global Away mode arming Key Yes LED Yes Key 3 Global H...

Страница 52: ...available methods This does not apply when the disarming type is selected The cyclical mode is not available for special functions The factory default is that only the buttons on the remote controls activate the mode shown on the button or the programmed function With the cyclic mode option the remote control cyclically activates and deactivates the respective status after each key press The alarm...

Страница 53: ...he and keys can be customised Icon Name Factory configuration Customisable Panic key Panic Key Yes LED No Away mode Key Global arming in away mode Key No LED No Home mode Key Global arming in home mode Key No LED No Key Status Request in the case of stand alone control unit free home button if the control unit is connected to free home Key Yes LED No Disarming Key Total disarming Key No LED No To ...

Страница 54: ... None not set Display notation Description Away mode Away mode arming Home mode Home mode arming Notification mode Notification mode arming Disarmed Disarming Not set No Action The LEDs cannot be programmed and have the following meaning Colour LED Meaning LED 2 Red On if the system is armed in Away mode LED 3 Red On if the system is armed in Home mode LED 4 On Red if at least one zone associated ...

Страница 55: ... the time interval between one check and another Exclude Yes No Enables exclusion of the external siren Anti masking Yes No enables the anti jamming protection to be excluded Tamper Yes No When set to YES the Siren sounds in the event of central unit tampering or jamming otherwise this is ignored Technological Alarm Yes No When set to NO the technological alarms will not sound even if the paramete...

Страница 56: ...gical Sweep Bitonal None High Low 10s 30 s 3 m 9 m YES NO External Activation 1 long beep 3 short beeps none 1 long flash 3 short NO Deactivation 1 long beep 3 short beeps none 1 long flash 3 short NO To ensure compliance with EN 50131 1 and EN 50131 3 standards siren activation time must be greater than 90 seconds and less than 15 minutes without prejudice to local or national regulations to the ...

Страница 57: ... Ok The central unit is waiting for the Service PIN press the Service PIN consulting the repeater s manual 12 5 1 Possible parameters Name Allows you to set a label Exclude Yes No Allows you to exclude the repeater Supervision It allows to select the frequency with which the control unit ensures that the repeater functions No 15 45 The parameter that is set is the time interval between one control...

Страница 58: ...number The maximum length is 16 digits o Press the ok key the following video will appear Interruptible if set to Yes it means that if the voice call is successfully answered the next number will not be called Audio Message refers to the customised message to be added to the pre defined voice message Events o Select Events and for each event choose between SMS Only Voice Call Only Voice Call SMS N...

Страница 59: ... Battery VOICE SMS Input VOICE SMS Disarming VOICE SMS Jamming VOICE SMS Hardware Fault VOICE SMS Radio Fault VOICE SMS VOICE indicates a voice message SMS indicates a text message after 15 minutes of continuous power outage maximum delayed allowed under EN50131 1 and EN50131 3 standards is 60 min Carried out once a day at 18 00 This event must be enabled on at least one of the programmed telephon...

Страница 60: ...he voice message 12 6 2 Phone message sending sequence SMSs are immediately sent to all configured numbers Voice calls follow these rules The numbers programmed for voice calls are called in order If the phone number is busy and there is no answer after 4 rings the central unit cancels the call and moves on to the next phone number on the list Once the first cycle of calls is complete all of the a...

Страница 61: ...SAS W3 1E 12 7 1 Version 1 To check the version 2 Access the Programming menu and log in as a level 3 user 3 Select the free home pairing icon 4 Press 1 Version information on the free home FW version will appear 12 7 2 Key Perform points 1 and 2 from the previous paragraph and press 2 Key A video opens showing 32 digits that uniquely identify the gateway on the central unit These codes are sent j...

Страница 62: ...g occurs at a reduced level of 6 dB as required under the EN50131 5 3 standard To test the alarm system 1 Log in and go to the Test System screen 2 Press OK Select the subsystem that you wish to test and enter the corresponding number If the subsystem does not contain devices the selection will be ignored 3 Based on the subsystem selected new windows will open and it may be necessary to perform ac...

Страница 63: ...g Sirens as a subsystem select the relevant device from the list and press the OK key In the new window in the Test line select the type of sound and press OK The selected siren will sound as selected at a medium volume for 10 seconds and its LEDs will flash Contacts When you select contacts a list of all available telephone numbers will appear The configured numbers are marked with the symbol Sel...

Страница 64: ...n Levels paragraphs When the menu is opened a list of existing users will appear To create a new user select New User press OK and select the level from the following window 2 User 3 Installer 4 Maintenance and press OK Label Assign a name to the user e g name surname or both for easier identification The name can be up to 16 alphanumerical characters long Characters are entered using the keypad M...

Страница 65: ...perate Press OK to confirm 12 9 2 Deleting a user To delete a user Log in and Enter User Management Select a user and select Delete PIN from the next window Press OK to confirm The PIN ID will appear number 2 in the example figure and you will be asked to confirm deletion Use the arrow keys to confirm deletion YES or cancel it NO The chosen option will be highlighted in black Press the OK key to c...

Страница 66: ...ontinuous power outage the central unit will report a network power outage event The USB terminal will remain active When network power is restored the GSM module will resume full functioning After 15 minutes of uninterrupted network power the central unit will report restoration of network power 13 2 Placing system in maintenance mode To place the system in maintenance mode simply activate the Te...

Страница 67: ...is working properly 13 2 5 Replacing the siren battery 1 Enter the System Test menu and perform the siren test procedure as described in the dedicated section 2 From now on you have 5 minutes to open the siren without causing it to sound tampered with 3 Open the siren according to the instructions in the manual replace the old battery and close it again 4 Afterwards perform a siren test procedure ...

Страница 68: ... in the Programming chapter 13 2 10 Deleting devices To delete a device that is no longer needed 1 Log in as a level 2 user go to the installer screen and log in as a level 3 user select Programming 2 Select the zone and type of device that you wish to remove and press OK 3 A detailed window will appear allowing you to check that you have selected the correct device 4 If you have selected the corr...

Страница 69: ...n the USB key 4 Log in as a level 2 user go to the installer screen and log in as a level 3 user select the Maintenance icon 5 Log in as a level 4 user If no level 4 users exist the central unit will ask you to create one 6 When a new screen appears press 1 Update FW from USB 7 Remove the central unit from its support frame 8 Put the USB key with the new firmware in the USB port at the back of the...

Страница 70: ...he Signature is valid follow these steps 1 Click with the right mouse button on the received cab file 2 Select ABB Asea Brown Boveri and click on the Details button 3 A new window opens like the one below On the top line you can see that the certificate is valid ...

Страница 71: ... that it is connected Icon No mains power 2 Check the mains power supply LED lit 3 The battery is faulty or not connected Replace or connect the battery LED on Radio channel jamming Check whether an electronic device or electromagnetic source of disturbance is blocking radio communication between the central unit and the devices LED lit 3 There are alarm reports that have not yet been viewed View ...

Страница 72: ...e secondary events log When the secondary events list is accessed GSM related faults are shown on a screen like the one below The following table summarizes the possible types of GSM errors Fault Type GSM Status Description Note 1 SMS Spam Clean The control unit has detected incorrect incoming messages and is removing them This may take a few minutes 2 No SIM GSM OFF SIM Card not inserted or inser...

Страница 73: ...ONS Generator 230 Vc a 10 0 60 Hz frequency Type A Feeder Current Stand by 45 mA In alarm mode 85 mA Buffer battery NiMh 6 V 1600 mAh rechargeable battery Ensures compliance with the EN 50131 1 standard par 9 Vertical flame propagation test for cables Compliant with standards IEC 60332 1 2 for cables with a section of 0 5 mm or greater and IEC 60332 2 2 for cables with a section of less than 0 5 m...

Страница 74: ...interface which should be connected to a secure network It is your sole responsibility to provide and continuously ensure a secure connection between the product and your network or any other network as the case may be and to establish and maintain appropriate measures such as but not limited to the installation of firewalls application of authentication measures encryption of data installation of...

Отзывы: