41
Important
: If you do not see the Download button, you can enable it by going to Solo App home screen >
Settings > Map Tile Provider and choosing Map Box.
5. Use standard touch-screen gestures to find the map area to cache (that is, the area you’re planning to fly in),
then, to save the map, tap the “Pan and zoom ...” message at the bottom of the screen. During caching, a
progress bar appears, and then the message “Map area saved!” appears shortly above the “Disconnected
...” message.
6. Proceed to the map area with your Solo, start flying, and access the map as usual. If the map is full-screen,
and you have a live video feed, the video appears in the picture-in-picture (PiP) rectangle near the top-left
corner of the screen. To return to the main flying screen, tap the PiP rectangle (whether or not it’s displaying
video).
6.1.3
Camera Controls and Settings
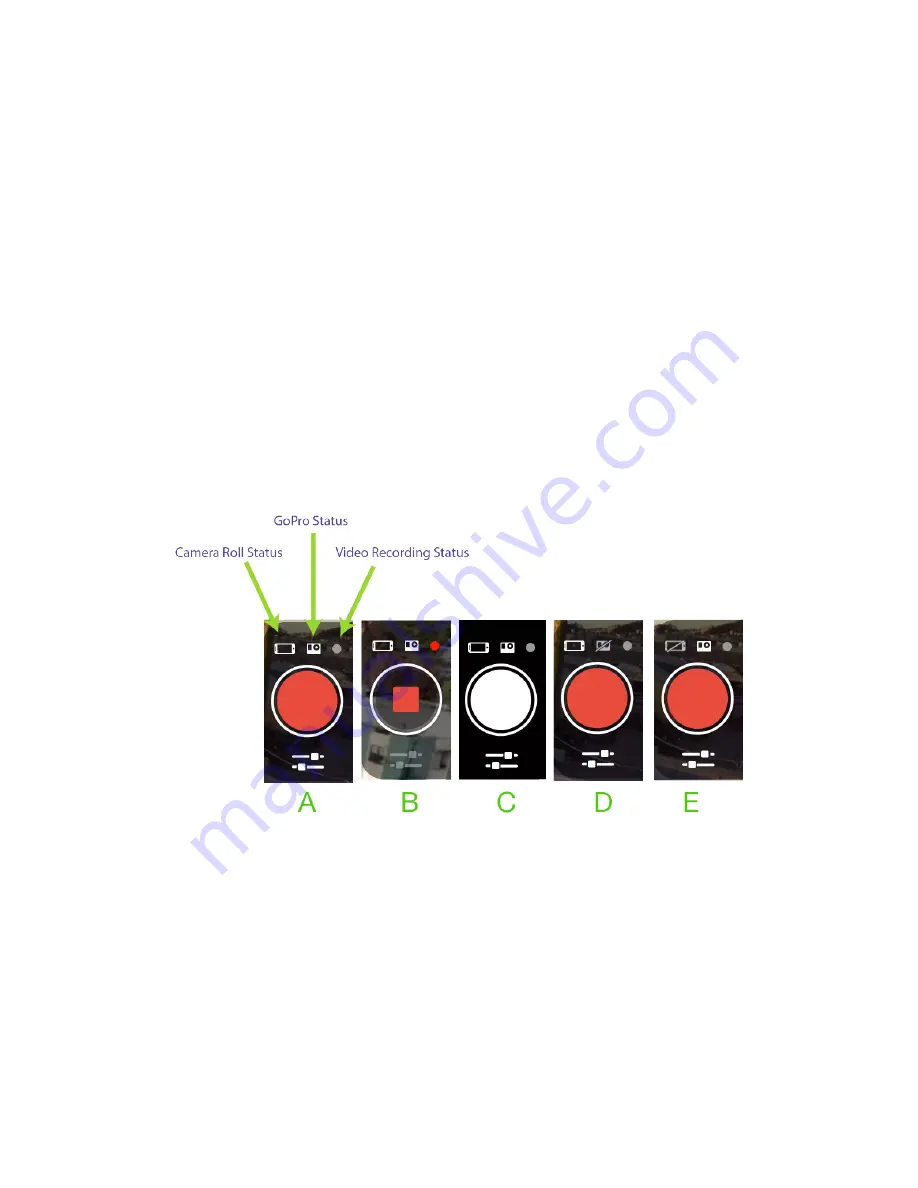
The Record button on right side of the main App screen lets you start and stop recording with the GoPro camera
(3-Axis Gimbal only). When Video Mode is active the button is red, and when Photo Mode is active it’s white. When
recording video, the red circle changes to a smaller square and the small “LED” icon above the button pulses red.
To stop recording, tap the square button.
The area just above the button contains status icons. From left to right, these are Camera Roll (recording video to
the mobile device), GoPro (recording video to the camera), and video-recording status.
Below the button is a sliders icon that provides access to camera settings. The following illustration shows different
states of the record button and associated icons:
Figure 6.1.3.1: Camera button states
• A: Video mode, not recording
• B: Video mode, recording (note camera settings disabled)
• C: Photo mode
• D: Video mode, GoPro recording disabled (camera might be off or missing memory card)
• E: Video mode, Camera Roll recording disabled by Camera Settings control
Содержание Solo
Страница 1: ...User Manual ...
Страница 81: ......


