


To record a WAV file:
1.
Connect an audio input for sampling as
described on the previous page.
2.
Push the HOME button to display the Pads
screen.
3.
Touch a pad to select it. With the pad selected,
press the right arrow button. If the pad is
empty, bitbox micro will display the Load and
Record screen. If the pad is already loaded,
bitbox micro will display the Waveform screen.
If you are on the Waveform screen, press the
Pad Mode icon to the left of the WAV file name
at the top of the screen and then touch New
Recording. You will now see the Load and
Record screen.
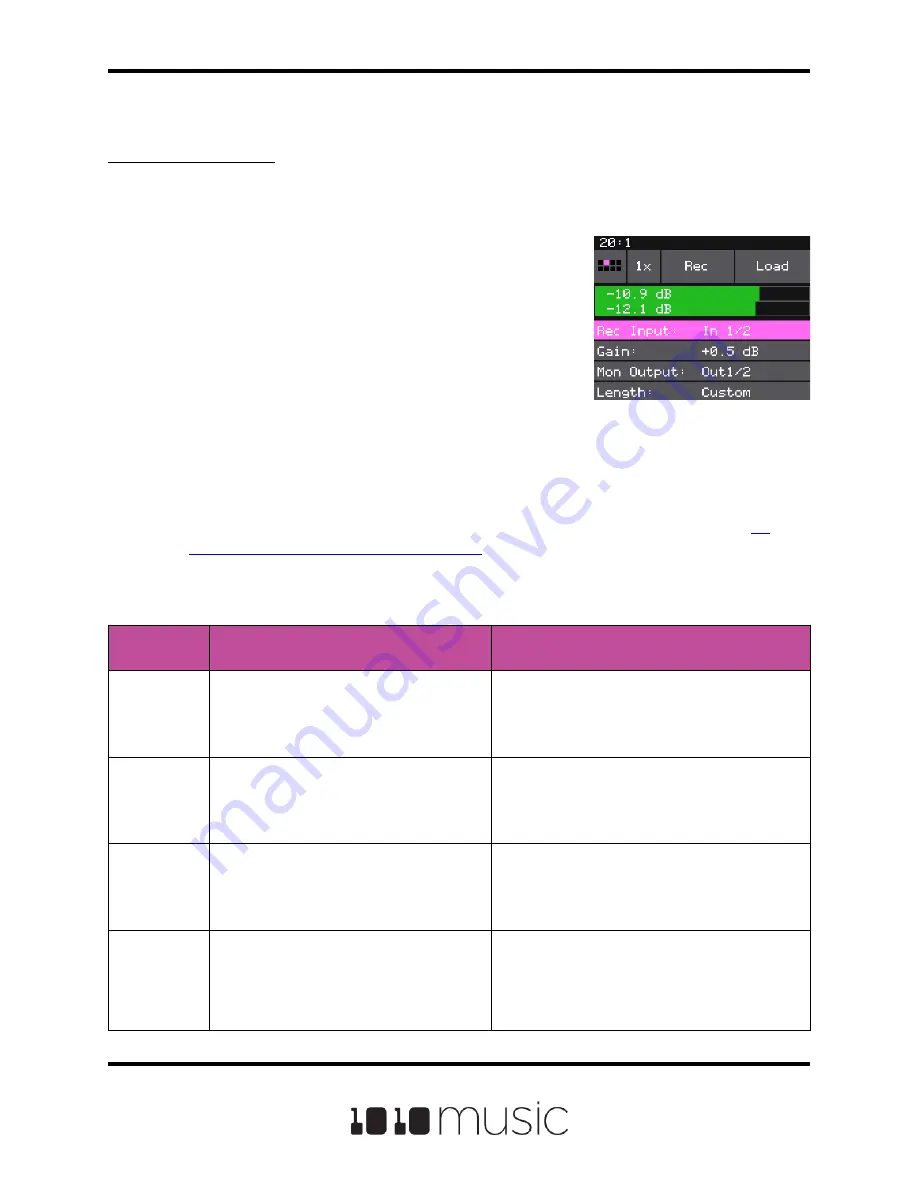
WAV File Load and
Record Screen
4.
Just above the recording parameters, you will see a VU meter that shows the
audio input levels if you have set up the inputs correctly. Refer back to
Connect an Audio Input for Sampling
if needed.
5.
Configure your recording session by selecting values for the following
parameters:
Copyright 1010music LLC 2020
Page 39 of 88
Bitbox Micro User Manual 1.0.7
Recording
Parameter
Description
Range of Values
Rec Input
Choose which input to record.
You can choose one or both audio inputs,
or you can choose to resample the signal
being sent to outputs 1 and 2.
In 1/2, In 1, In2, Resam
Gain
The VU meters represent the level of the
signal to be recorded. You can adjust the
gain to get the desired level and avoid
clipping.
-96.0 dB to + 20.0 dB
Mon Output
The output where you will be able to
monitor the incoming signal being
recorded.
Out 1/2, Out 3/4, Out 5/6, Out 1, Out 2, Out 3,
Out 4, Out 5, Out 6
Length
This parameter allows you to specify a
length of time that you want to record, in
terms of notes and bars.
When Custom is selected, touch the Stop
button to stop recording.
Custom, 1/4, 1/2, 1 bar, 2 bars, 4 bars, 8 bars,
16 bars, 32 bars, 64 bars, 128 bars


