© 2016 ZOLL Data Systems, Inc. All rights reserved.
73
CONFIDENTIAL TRADE SECRETS – DO NOT DISCLOSE.
Z
O
L
L
D
o
c
u
m
e
n
t
a
t
i
o
n
3.
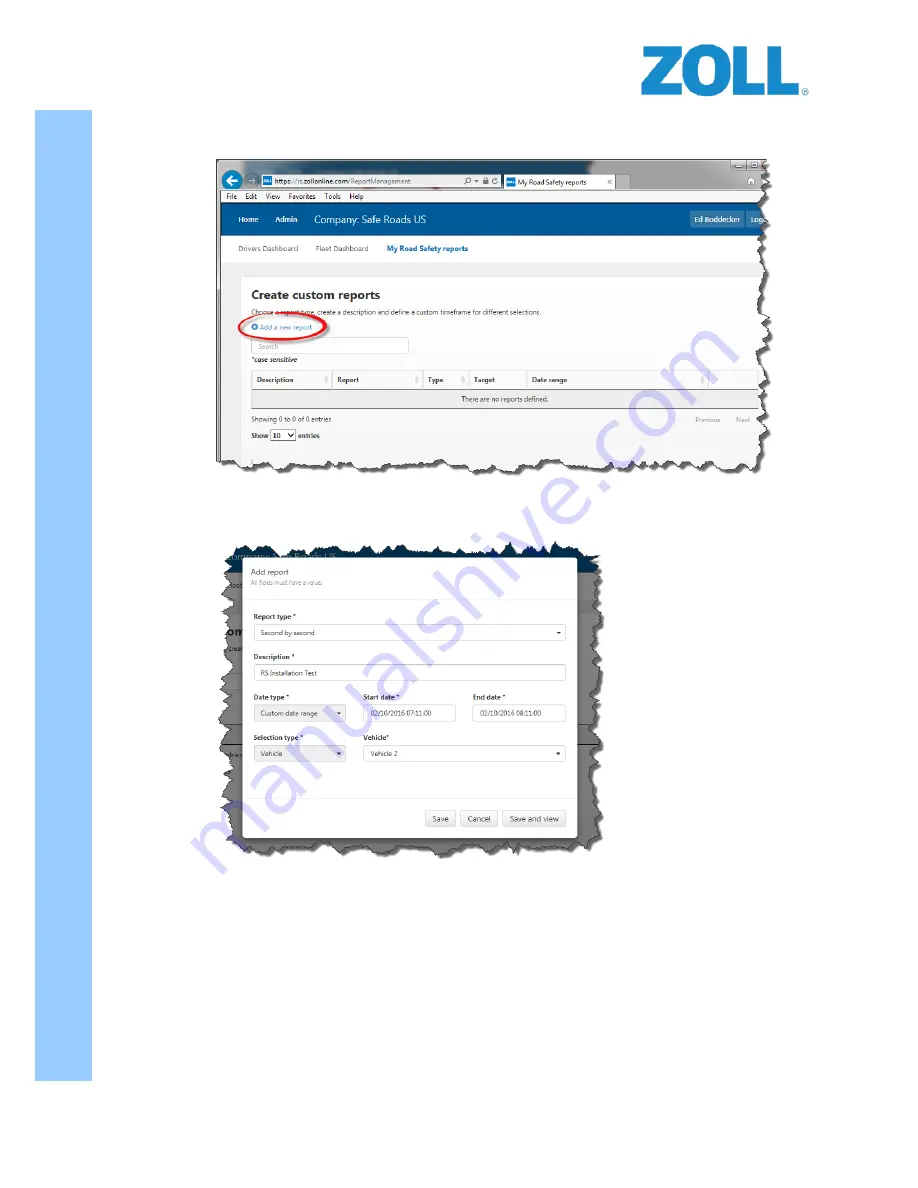
If this is a new installation and this is the first time you’re accessing this area, it’s likely the screen will look
like this:
If this is the case you’ll want to click the “Add a new report” link.
4.
Next the “Add report” dialog box appears:
a.
Here you’ll define your test report using the following criteria:
i.
Type – The report type should be “Second by second” to see the exact data being sent
to the system.
ii.
Description – Something like “RS Installation Test” will work fine. This report can be
removed after the installation is complete.
iii.
Start Date & End Date – The range being set can only be a maximum of one hour. Set a
timeframe that covers a period you know the vehicle was being driven and should have
been sending data.
iv.
Vehicle – Select the vehicle of which you wish to check the status.
v.
Data type & Selection type – These fields are inactive for this type of report.
b.
Once the values have been entered, press the “Save and view” button.


