29
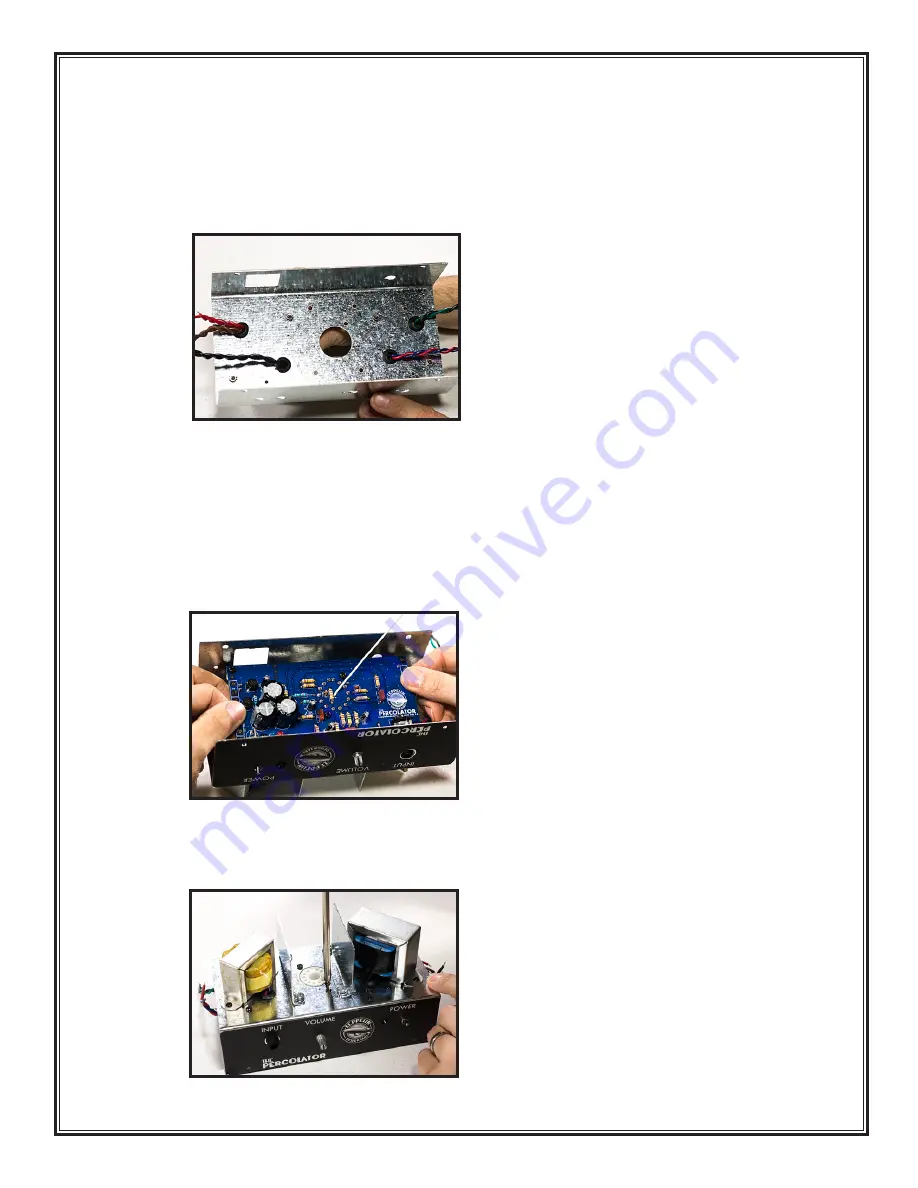
7. Install the PCB (Part # PC23):
a. Flip the chassis over so the fins and transformers are resting on the table top, and the front
of the chassis is facing you. Bend all the transformer wires to the outside of the chassis so
that they don’t get in the way of the placement of the PCB.
71
b. Carefully place the circuit board in the chassis with the standoffs down (the standoffs resting
on the top of the chassis) and the component side of the board up. The input jack side of the
board should be closest to you. Slide the PCB forward as the input jack, pot, and switch fit
through the holes on the front of the chassis and the tube socket is seated in its chassis
hole.
72
You may have to hold the board at an angle while sliding it forward to get
everything to fit properly. Make sure all the transformer wires are between the front and
back standoffs. The standoffs should line up with the screw holes on top of the chassis.
c. Affix the PCB to the chassis with six machine screws (Part # SC38) placed through the chassis
holes into the standoffs.
73
Don’t over tighten or cross-thread these screws.
71
72
73
Summary of Contents for THE PERCOLATOR
Page 83: ...83 That s it The baffle board is done Set it aside until the cabinet is complete 284 285 286...
Page 89: ...89...
Page 90: ......


