


HFA3 Instructions for Use
2660021166131 Rev. A 2018-11
4-23
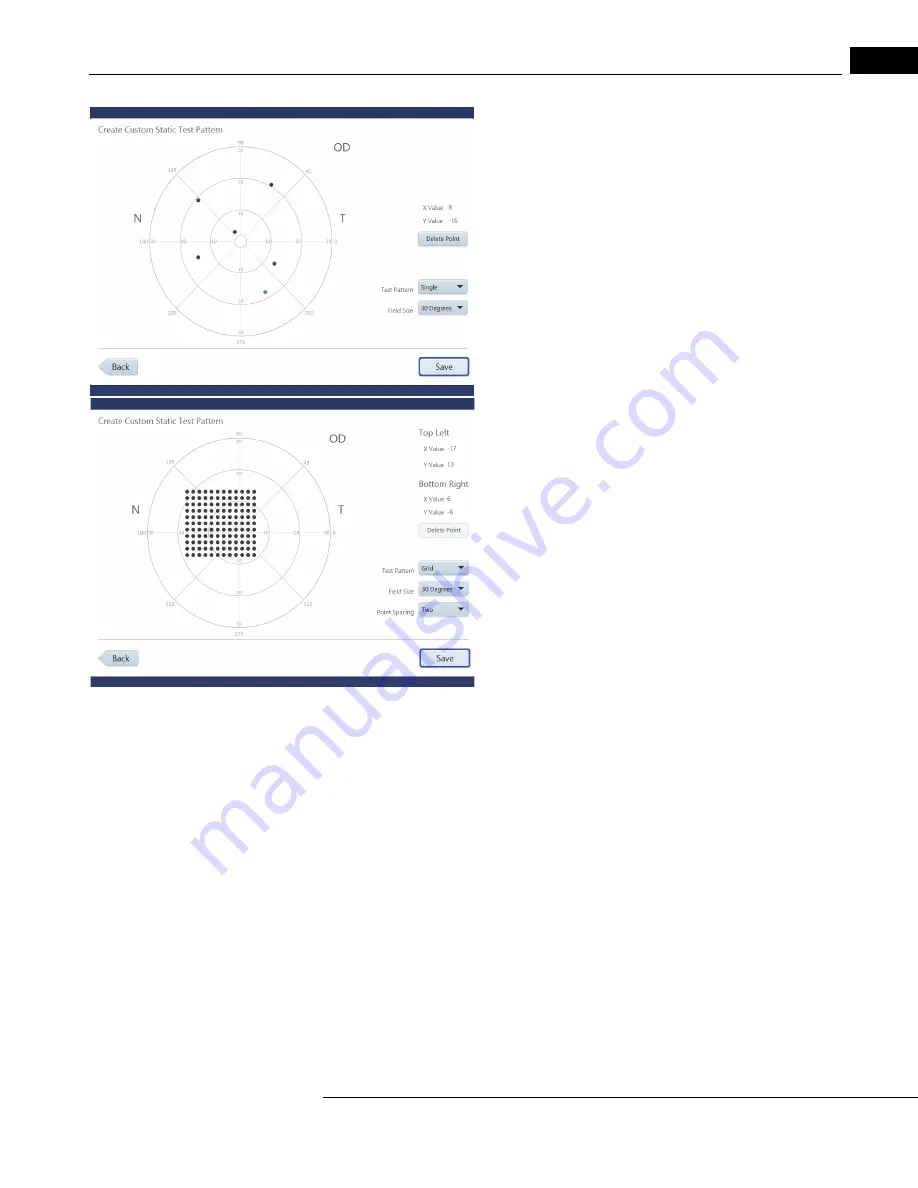
Create a Single Point Pattern
Set the Test Pattern to Single. Create single points by touching the
test pattern on the screen directly, or by using a mouse.
1. Move your finger or the mouse, while holding the mouse button
down, to position the point at the desired X, Y value.
2. Release your finger from the screen or mouse button to fix the
point.
Note: The newest point created will be highlighted in blue.
3. Select Save when all the points have been created.
4. Confirm that you have entered all the points for the test.
5. Place cursor in the text box and enter a name for the pattern.
6. Select Save to save the pattern. Select Cancel to cancel the
pattern.
Create a Grid Point Pattern
Set the Test Pattern to Grid:
1. Position the first point with your finger or mouse and release, as
described in
“Create a Single Point Pattern,” on page 4-23
.
2. Position and fix the second point. A grid of evenly spaced points
will be created between the two points. X, Y values of the Top Left
and Bottom Right points in the grid are displayed.
3. When the pattern is complete, select Save.
Note: Highlighting one of the grid points will display its X, Y values
under Top Left.
4. Confirm that you have entered all the points for the test.
5. Place cursor in the text box and enter a name for the pattern.
6. Select Save to save the pattern. Select Cancel to cancel the
pattern.
The created pattern is now displayed in Custom Static Patterns, as well as the Test Patterns
drop-down menu located under Test Parameters on the Patient screen and located under Test
Profiles in
“Specific Settings,” on page 3-13
.
Create Kinetic Test Pattern
1. Select Create Kinetic Test Pattern. A message displays stating that the pattern created will
specify the right eye (OD). A mirror image of the pattern will be created for the left eye (OS).
2. Select OK.
3. Select Yes to randomize the order of the meridians for presentation of stimuli. Select No to
maintain the order in which the meridians were entered.
4. Choose and add stimuli to the test pattern in the Create Custom Kinetic Test Pattern screen.
This screen has the same functionality as the Manual Kinetic Test screen. See
Test (Manual Kinetic),” on page 4-16
5. Select Save.
6. Select Yes if all points have been entered. Select No to return to the Create Custom Kinetic Test
Pattern screen.
7. Enter a name for the Custom Test Pattern and select Save.
The created pattern is now displayed in Custom Kinetic Patterns, as well as the Test Patterns
drop-down menu located under Test Parameters on the Patient screen and located under Test
Profiles in
“Specific Settings,” on page 3-13
.


