background image

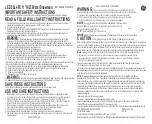
Instruction #1035971B - Page 2 of 15

MEASURE AND MARK THE FRONT BRACKETS.

3

4

DRILL THE HOLES.

With the front brackets in place 

measure and set them equal distance 

from the corner of windshield, then 

mark the rear-most holes with a marker.


5

CREATE A PIVOT POINT.

Put the front bracket in 

place and insert a rivet 

through the hole you 

drilled in the previous step.

2X

2X

Ă

Drill a pilot hole with the 1/8” drill bit where you 
made the mark. 

Ă

Lubrication may be helpful. 

Ă

Do not drill through lower bracing.

Ă

The rivets require a 1/2” depth. If 1/2” depth is not 
available the brackets will have to be moved and 
pilot hole plugged.

Ă

Then use the 3/16” drill bit to drill the hole to 3/16”.

Ă

Repeat the process on the other side of the 
vehicle. 

Ă

Carefully blow or brush aside the swarf (metal 
debris) on each side to prevent scratching the 
paint.

2X

Do not flare 

rivets yet!

IMPORTANT WARNING! 

It is critical that all yakima racks and accessories be properly and securely attached 

to your vehicle. Improper attachment could result in an automobile accident, and could cause serious bodily 

injury or death to you or to others. You are responsible for securing the racks and accessories to your car, 

checking the attachments prior to use, and periodically inspecting the products for adjustment, wear, and 

damage. Therefore, you must read and understand all of the instructions and cautions supplied with your 

yakima product prior to installation or use. If you do not understand all of the instructions and cautions, or 

if you have no mechanical experience and are not thoroughly familiar with the installation procedures, you 

should have the product installed by a professional installer such as a qualified garage or auto body shop.

1

REMOVE THE DITCH MOLDING.

Pry up and remove the ditch molding 

on both sides of your vehicle.

2X

2

DECIDE WHERE YOU’LL PLACE THE BRACKETS.

Ă

Consider your desired crossbar spread (32” is  
recommended). 

Ă

Inspect the ditch and look for any obstructions. 

Ă

Avoid any spot welds.

Ă

Look for a flat spot.

Ă

Find a location in the ditch where brackets can 
be installed parallel.  

This is critical for tower 

functionality

.

Ă

Choose areas where the adjoining roof panel has 
underside bracing.

Brackets must contact 

metal surface.

  Remove 

body filler or sealant from 

each bracket location with 

a nylon scraper or similar.  

Coat any chipped paint with 

automotive touch up paint.

Summary of Contents for Landing Pad 21

Page 1: ...vy Duty Rivet Tool Riveteuse industrielle Remachadora profesional para remaches ciegos Tape Measure Ruban mesurer Cinta para medir nylon scraper grattoir en nylon raspador de nylon Pen Marqueur Marcad...

Page 2: ...eath to you or to others You are responsible for securing the racks and accessories to your car checking the attachments prior to use and periodically inspecting the products for adjustment wear and d...

Page 3: ...drill the hole to 3 16 Repeat the process on the other side of the vehicle Carefully blow or brush aside the swarf metal debris on each side to prevent scratching the paint 2X Do not flare rivets yet...

Page 4: ...eat the process on the other side of the vehicle starting with the rearmost hole Carefully blow or brush aside the swarf metal debris on each side to prevent scratching the paint Without moving the br...

Page 5: ...g with the forward most hole Carefully blow or brush aside the swarf metal debris on each side to prevent scratching the paint 2X 16 15 MARK THE REAR HOLES SET THE BRACKETS TO BE PARALLEL Measure the...

Page 6: ...h aside the swarf metal debris on each side to prevent scratching the paint APPLY SILICON AROUND THE HOLES 19 21 SET THE RIVETS IN PLACE MEASURE AND CUT THE DITCH MOLDING 6X 6X 4X 6X INSTALL THE RIVET...

Page 7: ...ongest length of fasteners that will not bottom out Guide the fasteners through the Landing Pad and into the threaded mounting points on the bracket The pad has 4 of toe adjustment to fine tune the po...

Page 8: ...KIMA rack and accessories before entering automatic car washes To review your vehicle s specific weight limit and load limitations for accessories visit yakimatech com For additional product support v...

Page 9: ...NTRA NER DES BLESSURES GRAVES OU M ME LA MORT VOUS OU D AUTRES PERSONNES VOUS TES RESPONSABLE DE L INSTALLATION DU PORTE BAGAGES ET DES ACCESSOIRES SUR VOTRE V HICULE D EN V RIFIER LA SOLIDIT AVANT DE...

Page 10: ...uer la position des trous du centre et de l avant 7 CREE UN PUNTO DE PIVOTE AJUSTE LOS SOPORTES PARA QUE QUEDEN PARALELOS Coloque el soporte delantero en su lugar e introduzca un remache a trav s del...

Page 11: ...er le foret de 5 mm 3 16 po pour agrandir le trou t R p ter l op ration de l autre c t du v hicule t Retirer d licatement les rognures de m tal en soufflant ou avec un pinceau pour viter de rayer la p...

Page 12: ...re selon les instructions qui accompagnent les pieds t Ouvrir le capot d un des pieds et le soulever tout en gardant l autre pied engag t En tenant le pied au dessus du patin Landing Pad terminer le s...

Page 13: ...8 925 4621 du lundi au vendredi entre 7h et 16h heure du Pacifique Retirer le porte bagage et les accessoires YAKIMA avant d entrer dans un lave auto automatique NE PAS D PASSER LA LIMITE DE CHARGEMEN...

Page 14: ...pose la manutention et l utilisation de ce produit doivent tre conformes aux instructions visant le produit et le v hicule En plus d observer les pr sentes instructions v rifier les instructions visan...

Page 15: ...os En caso de que el l mite de velocidad no est indicado recomendamos no superar los 130 km h Cuando se transportan cargas sobre el techo se debe circular a una velocidad que tenga en cuenta todas las...

Reviews: