18
Setting the SCU-LAN10
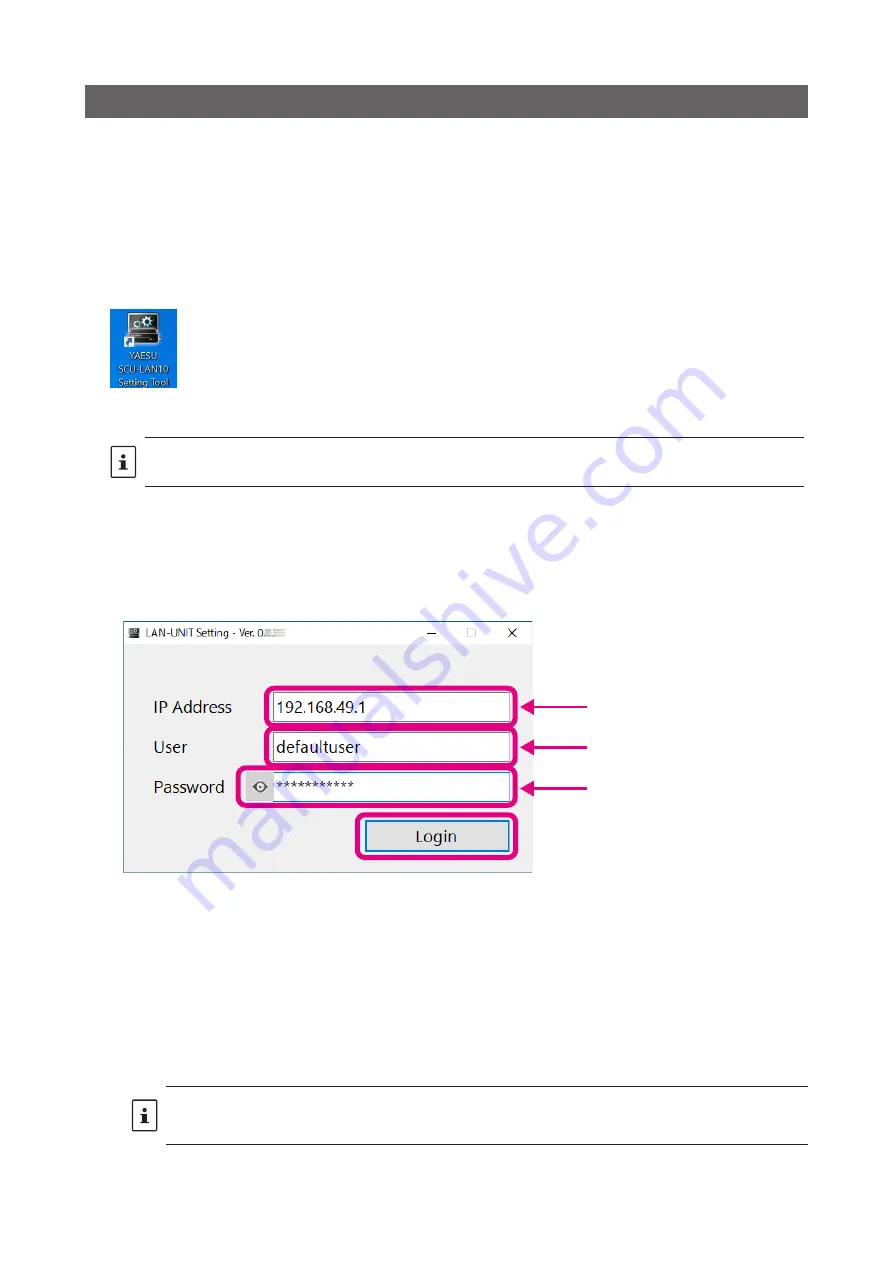
Start the setting software “
SCU-LAN10 Setting Tool
” and perform the initial setting of SCU-LAN10 from a
personal computer.
The following procedure uses Windows 10 operations as an example.
1. Turn the transceiver
ON
.
Make sure that only the POWER indicator (green) on the SCU-LAN10 is blinking. (It takes about 12 sec-
onds.)
2. Click the Windows
Start
button and click the [
YAESU SCU-LAN10 Setting Tool
] icon in the “
Yaesu Mu-
sen
” group to start the setting software.
The initial login screen is displayed.
You can also double-click the [
YAESU SCU-LAN10 Setting Tool
] icon on the desktop to start the setting software.
3.
When setting the SCU-LAN10 for the first time, enter the following and click the [
Login
] button.
IP Address
:
192.168.49.1 (Automatically entered)
User
:
defaultuser (Automatically entered)
Password
:
defaultuser (Enter the same “defaultuser” as User)
When logging in for the first time or later, enter the previously set value.
Enter “defaultuser”
Automatically entered
Automatically entered
• If you log in successfully, the “
New Account
” screen will be displayed automatically only for the first
time.
• If “
login error!
” Is displayed, the password may not have been entered correctly, or the computer's
network settings may be incorrect. Also, check the connection between the PC and the LAN cable of
SCU-LAN10.
• If the settings saved in SCU-LAN10 are lost after the second time, reset SCU-LAN10 and start over from
step 3. If "login error!" Is still displayed, check the communication status by referring to “
procedure of network communication with SCU-LAN10 by ping (pin) command
To reset the SCU-LAN10. Press and hold the [
RESET
] button on the front panel of the SCU-LAN10 with the thin-tipped
bar for about 5 seconds until only the STATUS indicator (red) blinks. Please note that resetting will restore the SCU-
LAN10 settings to the factory default settings.


