background image

WorkCentre Pro 421 User Guide 

3-11

Co

py

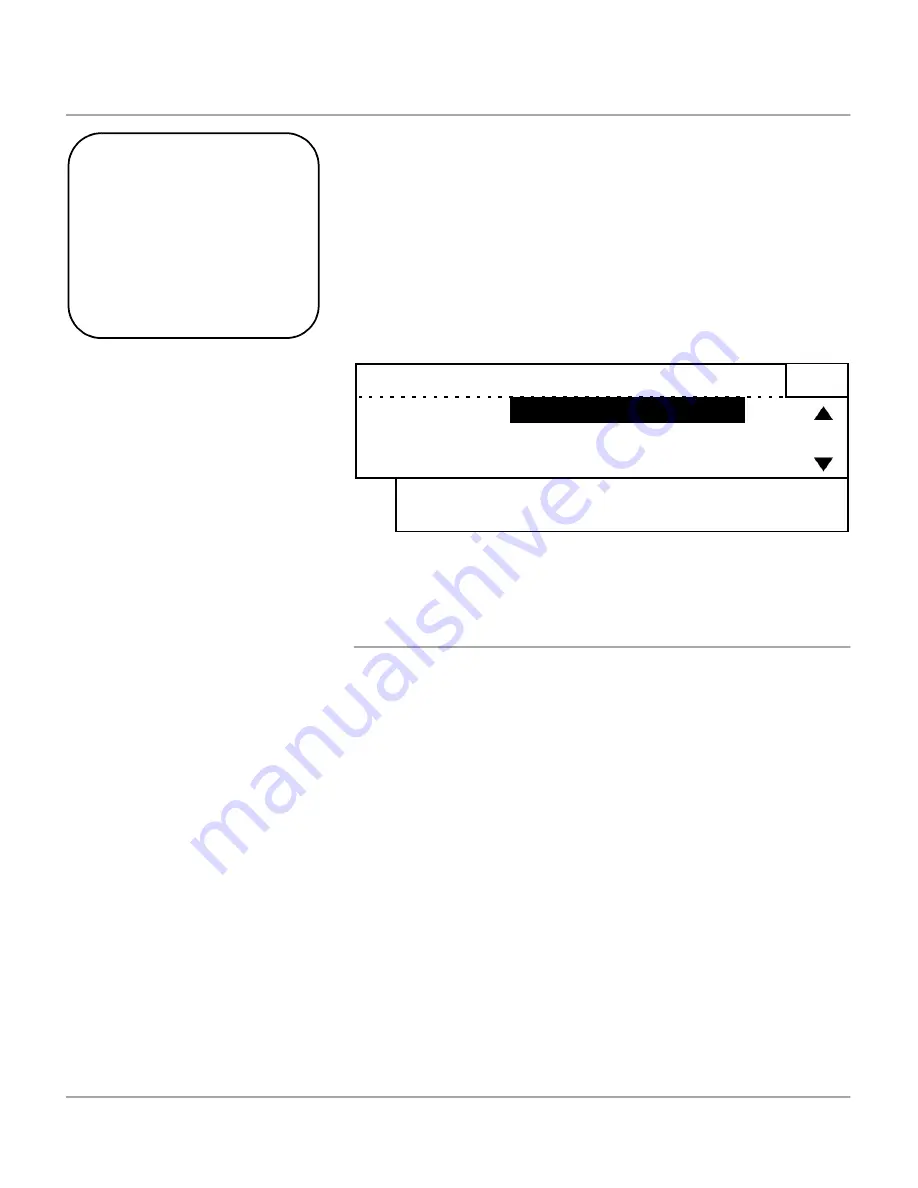
Reduce/Enlarge

Reduce/Enlarge Options

100%

Size for size copies.

Auto%

Automatically reduces/enlarges an image to fit on the paper 
size selected.

Preset%

Displays the most frequently used preset reduce/enlarge 
settings.

The preset Reduce/Enlarge settings for Europe are:

71%

-

A3 to A4

94%

-

A4 to 8.5 x 11 inch

97%

-

8.5 x 11 inch to A4

141%

-

A4 to A3

200%

In addition to 100% size for size copies, reduced or 
enlarged copies can be produced by choosing one of the 
Reduce/Enlarge options.

Quick Pathway

½

Reduce/Enlarge

½

100%

½

Auto%

½

Preset%

½

Variable%

½

Whole Image

½

Load originals.

½

Press the [Reduce/Enlarge] 
key.

½

Select the Reduce/Enlarge 
option required for the job 
using the scroll keys.

½

Press [Start].

Ready to copy

Reduce/
  Enlarge:

100%

Auto%
Preset%

1

Variable%
Whole Image

Summary of Contents for WorkCentre Pro 421

Page 1: ...WorkCentre Pro 421 User Guide 604P10712...

Page 2: ...hereinafter granted including without limitations material generated from the software programs which are displayed on the screen such as icons screen displays looks etc Xerox The Document Company th...

Page 3: ...Related Information Sources 1 9 2 Product Overview 2 1 System Overview 2 2 Using Department Codes 2 2 Identifying the Machine Configurations and Components 2 4 WorkCentre Pro 421E 2 4 WorkCentre Pro 4...

Page 4: ...s Start 3 8 Using Job Interrupt 3 9 Standard Copy Features 3 10 Lighten Darken 3 10 Reduce Enlarge 3 11 Paper Supply 3 13 Original Type 3 14 Added Features 3 15 Output 3 16 2 Sided 3 18 Bound Original...

Page 5: ...36 5 Maintaining the Product 5 1 Cleaning 5 2 Cleaning the WorkCentre Pro 421 5 2 Document Glass and Constant Velocity Transport Glass 5 3 Control Panel Keyboard LCD Display 5 3 Document Feeder and Ou...

Page 6: ...7 3 Timers 7 5 Interrupt Key 7 9 Speaker Volume 7 10 Department Codes 7 11 Printing Reports 7 19 Department Code Report 7 20 Settings Report 7 21 Changing the Initial Setup 7 23 Date Time 7 24 Locali...

Page 7: ...10 Canadian Certification A 13 Environmental Compliance A 14 Energy Star A 14 9 Appendix B Specifications B 1 Machine Specifications B 2 Hardware Configuration B 2 Machine Weight B 2 Accessibility B...

Page 8: ...Table of Contents viii Xerox WorkCentre Pro 421 User Guide...

Page 9: ...1 About This Guide 1 About This Guide Thank you for purchasing the WorkCentre Pro 421 The WorkCentre Pro 421 is designed for ease of use but to use your machine to its fullest potential take some time...

Page 10: ...tructions for using the copy features available Print Chapter 4 Describes the procedure for printing from a PC and an overview of the printer driver features Maintaining the Product Chapter 5 Provides...

Page 11: ...1 3 About This Guide Specifications Appendix B Provides information on the machine specifications Use this chapter to ensure all materials being used are within specification Index Refer to the Index...

Page 12: ...make a note of the machine serial number _______________________________________ The serial number is located inside the front door You will be provided with the Xerox Welcome Centre or local represen...

Page 13: ...is synonymous with the machine Orientation There are two types of orientation referred to in this guide Image Orientation and Feed Orientation Image Orientation Image Orientation describes the direct...

Page 14: ...es of feed orientation Long Edge Feed LEF When observed from the front of the machine originals or media with the long edges to the left and right of the document feeder or paper tray Short Edge Feed...

Page 15: ...Refer to Document Glass and Constant Velocity Transport Glass on page 5 3 for information about cleaning the document glass For more information about the network options available refer to the System...

Page 16: ...the edges This separates any sheets of paper that may be stuck together and reduces the possibility of paper jams Cautions Cautions are statements that suggest mechanical damage may be the result of a...

Page 17: ...1 User Guide 1 9 About This Guide Related Information Sources Information available for the WorkCentre Pro 421 consists of This User Guide The Quick Start Guide The Customer Training CD The System Adm...

Page 18: ...1 10 WorkCentre Pro 421 User Guide...

Page 19: ...e Pro 421 User Guide 2 1 Product Overview 2 Product Overview This chapter provides an overview of the WorkCentre Pro 421 s hardware features and operation The Control Panel is discussed and each key i...

Page 20: ...You can change the default settings of the machine by pressing the Machine Status key HINT Refer to Machine Defaults Setups on page 7 1 for detailed instructions on how to change these setups NOTE De...

Page 21: ...ode Paper Auto Output Collated Added Features L D Auto R E 100 1 Each digit entered is displayed as an asterisk on the screen Press Enter If the code is correct access to the function is provided If t...

Page 22: ...nctions available for your machine Not all configurations are available in all markets The configurations shown may change following the publication of this document WorkCentre Pro 421E This is a basi...

Page 23: ...ith an automatic document feeder a single paper tray a bypass tray and a stand Additional Memory can be purchased as an option Output Tray Document Glass under ADF Automatic Document Feeder ADF Front...

Page 24: ...a duplex automatic document feeder a single paper tray a bypass tray and a stand Additional Memory can be purchased as an option Document Glass under DADF Duplex Automatic Document Feeder DADF Front C...

Page 25: ...x unit a duplex automatic document feeder two paper trays a bypass tray and a stand Additional Memory can be purchased as an option Document Glass under DADF Duplex Automatic Document Feeder DADF Fron...

Page 26: ...duplex automatic document feeder two paper trays and a bypass tray Additional Memory can be purchased as an option Document Glass under DADF Duplex Automatic Document Feeder DADF Front Cover Control P...

Page 27: ...the narrow strip of glass located at the left side of the document glass When originals are fed from the document feeder ADF or DADF the CVT glass automatically scans the images into memory This does...

Page 28: ...procedure to insert additional memory cards into the memory slots CAUTION Switch off the power and disconnect the power cord from the outlet prior to installing additional memory These components may...

Page 29: ...Adjusts the brightness and darkness of the LCD display When it is turned clockwise the LCD becomes lighter and turned anticlockwise the LCD becomes darker 2 Lighten Darken Select to adjust the image c...

Page 30: ...o 9 Use these keys to enter numeric values when programming features and settings 10 Energy Saver Press to enter the Sleep Mode Once selected the light next to the key is illuminated To exit Sleep Mod...

Page 31: ...ng the originals 15 Enter key Enters or saves the selected value displayed on the LCD screen 16 Exit Exits to the previous screen without saving any changes made to the current screen 17 Scroll Keys U...

Page 32: ...oltage information refer to Appendix B Specifications The machine will begin to warm up when the switch is powered on The power switch is located on the front of the machine Powering Off The power is...

Page 33: ...feature which significantly reduces the power consumption during periods of inactivity The Power Save feature operates in two modes Standby Mode Sleep Mode Energy Saver The Energy Saver light illumin...

Page 34: ...customer changeable within the range of 1 to 240 minutes For more information refer to Changing the Default Time Setting on page 7 5 Sleep Mode Energy Saver As delivered the machine automatically swit...

Page 35: ...chine Features This key gives access to the screens which enable users to programme features Machine Status This key gives access to information such as paper tray size settings machine defaults print...

Page 36: ...1 Machine default values and various setups may be changed Press Features on the control panel to display Ready screen Ready to copy Paper Auto Output Collated Added Features L D Auto R E 100 1 Press...

Page 37: ...o be printed Report options are Department code Settings report Initial setup Contains the default options which should be setup when the machine is first installed Date Time Localization Language Mac...

Page 38: ...umber when ordering supplies and calling for service Xerox supply number Displays the telephone number you should call to order supplies for your WorkCentre Pro 421 Total print counter Displays the to...

Page 39: ...job As delivered the machine will have the factory default copy settings These copy settings are customer changeable This chapter also gives step by step instructions on how to change the default copy...

Page 40: ...sided originals A duplex automatic document feeder DADF for multiple single or double sided originals A document glass for single originals or bound originals Automatic Document Feeder ADF and Duplex...

Page 41: ...paper tray required Remove all staples and paper clips before placing the originals into the document feeder If necessary adjust the sliding guides to the paper size required Insert the originals neat...

Page 42: ...eder or the document glass cover if fitted Position the original face down on the document glass Align it with the registration arrow in the rear left corner Lower the document feeder or document glas...

Page 43: ...re Pro 421 User Guide 3 5 Copy 2 Press the Features Key Features Key Press Features Ensure that the Ready to Copy screen is displayed Ready to copy Paper Auto Output Collated Added Features L D Auto R...

Page 44: ...er The initial Copy screen displays the new selection For the Original Type feature the options available are displayed on the Control Panel with an illuminated LED identifying which option is selecte...

Page 45: ...be entered using the numeric keypad Use the numeric keypad to enter the number of copies required The quantity entered is displayed in the top right corner of the LCD screen The default copy quantity...

Page 46: ...e job completing a message will be displayed Follow the message to resolve the problem If the original is not a standard size the machine may not be able to detect the size automatically and the Selec...

Page 47: ...ument feeder Place your new original s on the document glass or in the document feeder Select the quantity and program any features you may require from the following Lighten Darken Reduce Enlarge Pap...

Page 48: ...to be made to the image quality of the output There are 7 levels of lightness and darkness that can be set press or to change these levels Toner Saver Produces a lower standard of image quality output...

Page 49: ...s for Europe are 71 A3 to A4 94 A4 to 8 5 x 11 inch 97 8 5 x 11 inch to A4 141 A4 to A3 200 In addition to 100 size for size copies reduced or enlarged copies can be produced by choosing one of the Re...

Page 50: ...he ADF or DADF the reproduction ratio of 50 to 200 can be specified Use the scroll key to choose a specific reduction or enlargement in 1 increments If you keep the scroll key pressed down you can sel...

Page 51: ...sing Auto Paper allows the machine to select the paper tray based on the default setting or the size of original being copied The machine does not automatically detect the size of the paper in the tra...

Page 52: ...that contain halftones and different images Photo Used for scanning continuous tone photographs and high quality high frequency halftones Use the Original Type settings to define the type of images b...

Page 53: ...TE When certain features are selected other features may become unavailable and will appear on the screen lighter or grayed out Some options are not available in all Markets and for every machine conf...

Page 54: ...sets see above and separates them from each other for easy retrieval Uncollated This option delivers the copies to the tray in the order based on the total number of copies for each original The order...

Page 55: ...o select Output and press Enter Use the scroll key to select Collated Place the first original on the document glass and press Start Remove the original and place the second original on the document g...

Page 56: ...es from single sided originals 1 2 Sided Double sided copies from single sided originals 2 2 Sided Double sided copies from double sided originals 2 1 Sided Single sided copies from double sided origi...

Page 57: ...t NOTE On completion of copying a bound original ensure the document glass cover is fully closed Place the bound original face down on to the document glass Close the cover until it rests on the bound...

Page 58: ...ature is unavailable On Both Pages Copies both pages of an open bound document and places each page on a separate sheet of paper On Binder Erase Erases between 4 and 30 mm 0 16 and 1 2 inches from the...

Page 59: ...0 28 inches Right Margin Shifts the image to the left The image can be shifted between 4 and 15 mm 0 16 and 0 6 inches default is 7mm 0 28 inches NOTE Ensure that the originals are in the same orienta...

Page 60: ...he feature is unavailable On Erases a specific amount from each edge of the copy Erases between 4 and 20 mm 0 16 and 0 8 inches from each edge Default is 10 mm 0 4 inches Edge Erase Off On 1 NOTE Ensu...

Page 61: ...s Off The feature is unavailable On With this option the 2 Up feature is enabled Select 1 1 for single sided output or 1 2 for double sided output 2 Up Off On 1 NOTE Originals must be loaded long edge...

Page 62: ...8 5 x 11 inch originals are automatically reduced to A5 or A6 8 5 x 5 5 or 5 5 x 4 25 inch size according to the size of the paper in the selected paper tray Using A4 8 5 x 11 inch copy paper will re...

Page 63: ...ed scanning A3 11 x 17 inch portrait originals should be placed with the bottom edge to the left of the machine A4 8 5 x 11 inch portrait originals should be placed with the bottom edge to the front o...

Page 64: ...t Annotation Options Off The feature is unavailable Page number Prints page numbers on the feed edge of the paper on the right Page Date Time Prints the page number current date and the time based on...

Page 65: ...is set to Off NOTE There are a number of features which are not available with Build Job Any features not available will be grayed out Load only the first page section into the document feeder or plac...

Page 66: ...e Select original size screen displays If required use the scroll key to select the original size and press Start Select original size 8 5x11 A4 A5 1 This message will appear when the first page or se...

Page 67: ...scroll key to select Done and press Enter Repeat the steps above for each section of the job Setting Done Lighten Darken Auto Edge Erase Off 1 After the last page section has been scanned use the scr...

Page 68: ...mber of features which are not available with Stored Job Any features not available will be grayed out To Store a Job Program the job features which require storing Use the scroll key to select Added...

Page 69: ...Features Ensure Stored Job is selected and press Enter Ensure Retrieve is selected and press Enter Select the required job in the list and press Enter Press the Exit key to return to the Ready to Cop...

Page 70: ...ardstock or labels through the Bypass Tray maximum 1 sheet NOTE To avoid overheated or distorted transparencies do not copy onto transparencies without selecting Transparency as the Paper Type NOTE Wh...

Page 71: ...Use the scroll key to select Added Features Use the scroll key to select Menu map and press Enter Ready to copy 1 2 sided Bound Original Image Shift 1 1 sided Off Off Edge Erase 2 Up Booklet Annotati...

Page 72: ...e Copy Defaults table provided on the following pages customize the Copy default settings to meet your copying needs NOTE Some options are not available in all Markets and for every machine configurat...

Page 73: ...ng selected will become the default setting Copy defaults 01 Reduce Enlarge 02 Original type 03 Lighten Darken 04 Output 05 Sides imaged When you have finished customizing the settings press the Featu...

Page 74: ...uces one sided copies from one sided originals 2 1 2 Produces two sided copies from one sided originals 3 2 2 Produces two sided copies from two sided originals 4 2 1 Produces one sided output from tw...

Page 75: ...he drivers contain a variety of feature options which enable you to customize your print jobs A GDI Graphics Device Interface printer driver is available for the WorkCentre Pro 421 copier products Cus...

Page 76: ...tre Pro 421 is configured and connected to the network your PC or Workstation can be set up to print using the customized Xerox Network Printer Drivers which are provided with the machine Xerox GDI Pr...

Page 77: ...he graphics shown in the following instructions may not exactly match those in your driver Available features are dependant on machine configuration and the driver being used Please refer to the infor...

Page 78: ...MicroSoft PowerPoint are widely used document creation applications NOTE If your print requirements involve printing particularly large print jobs you may need to purchase additional memory cards for...

Page 79: ...applications the Printer Driver features may be accessed via a Setup option The printer driver features are displayed in the Properties window Select the features required for the print job using the...

Page 80: ...ties window closes and the application Print window displays To send the job for printing select OK in the application Print window To exit the Print option without sending the job for printing select...

Page 81: ...to wait for the job to finish processing and be printed before you can use the WorkCentre Pro 421 again Job processing wait Paper Auto Output Collated Added Features L D Auto R E 100 1 If this message...

Page 82: ...e instructions provided below to access the Print Default settings Press the Machine Status key located to the right of the LCD The Machine Status menu displays the settings options Ensure Default set...

Page 83: ...You must only delete your own jobs from the Print Queue If there is a problem with another user s job contact your System Administrator for assistance Select Yes to cancel the job or No to retain the...

Page 84: ...is suspended due to the paper size mismatch when Detect Paper Mismatch is Enabled If your print job is suspended due to paper size mismatch use these instructions to clear it from the machine Press t...

Page 85: ...inter default setting Use the instructions below to forcibly print the data remaining in the memory of the printer when a job has been cancelled from the PC Select Yes to force a form feed or No and p...

Page 86: ...ss or in the document feeder Select the quantity and choose any programming features you may require from the following Lighten Darken Reduce Enlarge Paper Supply Original Type Image Shift and Edge Er...

Page 87: ...dialog These new settings remain in effect until you change them Cancel Closes the dialog and returns all settings in the tabs to the values that were in place before you opened the dialog Any changes...

Page 88: ...mouse button on a control the Help system will give you more detailed information The following buttons are available on all Help screens Contents Displays the main Table of Contents for the Help Syst...

Page 89: ...various features and options on other printer driver tabs The printer graphic and the relevant drop down lists on the Paper Output tab change to show the new options Installable Options Optional Tray...

Page 90: ...n the catch tray This is standard with Network connected printers Job Separator Tray An optional tray that which divides the output tray into two sections upper and lower NOTE The Offset Catch Tray an...

Page 91: ...Offset Catch Tray Enabling this option often makes it easier to sort and handle documents when you are printing several copies Copies Use the Copies box to indicate how many document sets you want to...

Page 92: ...cument Body Enables you to specify the size and source of paper to use for your overall print job Size Size enables you to set the paper size for your job The Size list box includes all the paper size...

Page 93: ...Different The settings you specify appear in the Paper Summary Box on the Paper Output dialog The settings you select on this tab will override any front cover settings in the application You cannot...

Page 94: ...g in the Paper Output dialog Collation The Collation field enables you to specify whether multi page documents should be printed collated or uncollated Uncollated Two or more copies of a document are...

Page 95: ...age that is wider than it is tall Output Destination Select the printer output location to which you wish to print your document The list box shows all of the valid options for your printer You can ma...

Page 96: ...print documents in booklet form or to print multiple page images on one side of a page Each page can be printed with or without a page border Choose between Normal and Multiple up page formats Normal...

Page 97: ...a single sheet of paper Indicate the required number of page images per side in the Multiple up list box Multiple up 1 Page up 2 Pages up 4 Pages up 6 Pages up 8 Pages up 16 Pages up Draw Outlines Pr...

Page 98: ...g for images that you want to have a smooth realistic and photographic appearance The Photographic Images setting provides soft contrasts between various shades of gray This setting also works well fo...

Page 99: ...ptimize text printing performance Download as Bitmap This option sends each TrueType character to the printer as an individual bitmap Use this option if you have a large number of TrueType fonts on a...

Page 100: ...int more slowly than vector images and become distorted when scaled Resolution The resolution setting affects the amount of detail that is reproduced on graphic images Graphics resolution is measured...

Page 101: ...to conserve the amount of toner used to print a document The print quality is reduced but the print speed may be enhanced This setting is recommended for verifying document content and layout Smoothi...

Page 102: ...e company letterhead can be created as a page overlay and stored in the printer Whenever a letter is printed the page overlay command for the letterhead can be sent to the printer and the letterhead w...

Page 103: ...ill be stored as an overlay file OVP in the default page overlay directory on your computer Select Yes to confirm that you want to create an overlay The file will appear in the Overlays list the next...

Page 104: ...age Overlay Selecting this option causes you to be prompted to confirm that you want to download a page overlay each time an overlay is sent to the printer If the option is unchecked the selected page...

Page 105: ...Move enables you to move the selected fonts to the printer port Copy Copy enables you to copy one or more of the fonts from the Available Fonts list to the Installed Fonts list or vice versa The copy...

Page 106: ...the printer memory RAM If you choose this option fonts are discarded when the printer is restarted Add Fonts Add Fonts enables you to select and load scalable typefaces fonts or font support files for...

Page 107: ...from the list All subsequent documents will print with the same watermark until you select None from the list Watermark Add Type the required watermark text in the Content Text box and select Add to c...

Page 108: ...ter or outline of the watermark text characters will be printed When this checkbox is enabled it affects all watermarks in the watermark list Content Text Type the words you want to use for a watermar...

Page 109: ...horizontal scroll bars to modify the watermark s center position on the page You can choose to measure in inches or millimeters mm Center Select Center to reset the position to the center of the paper...

Page 110: ...talled Machine Status can be used to change these settings to meet your individual requirements Using the instructions below and the Printer Defaults table provided on the following pages customize th...

Page 111: ...5 Detect paper mismatch 06 Restore factory settings When you have finished customizing the settings press the Features key to return to Ready mode Default settings 01 Machine defaults 02 Copy defaults...

Page 112: ...nt Postscript fonts 5 Event log list A list of all the printing errors which the machine has logged is printed 6 NIC status print Used by the System Administrator to identify the status of the Network...

Page 113: ...intaining the Product 5 Maintaining the Product There will be times when the machine will require maintenance tasks to be carried out This chapter provides step by step instructions for maintaining th...

Page 114: ...cally listed as approved in this documentation They can cause poor performance and create a dangerous condition Use supplies and cleaning materials only as directed in this documentation Keep all clea...

Page 115: ...ning documents Control Panel Keyboard LCD Display Regular cleaning keeps the Control Panel Keyboard and LCD Display free from dust and dirt To remove finger prints and smudges clean the control panel...

Page 116: ...poor quality output with uneven faint degraded print or a white line appearing in the direction of the paper feed the Transfer Corotron Wire may be dirty Refer to the following steps for cleaning ins...

Page 117: ...WorkCentre Pro 421 User Guide 5 5 Maintaining the Product Remove the cleaning tool from its storage space on the machine The Transfer Corotron Wire Cleaning Tool has two shoulders Shoulders...

Page 118: ...5 6 WorkCentre Pro 421 User Guide When positioning the cleaning tool over the Transfer Corotron Wire ensure that the two shoulders are facing away from the machine...

Page 119: ...shoulders are located under the plastic guard Hold the cleaning tool upright and slide it along the Transfer Corotron Wire from left to right If the cleaning tool is positioned correctly it will slid...

Page 120: ...below To obtain supplies contact your local Xerox office giving your company name the product number and its serial number Use the space below to keep a record of the telephone number Supplies Telepho...

Page 121: ...message to replace the toner When this message appears install a new toner cartridge WARNING When ordering a new Toner Cartridge make sure the correct cartridge is ordered for the WorkCentre Pro 421...

Page 122: ...ch to unlock and release the Toner Cartridge Holding the cartridge as shown slide it out of the machine The used Toner Cartridge should be recycled Follow the instructions given in the cartridge retur...

Page 123: ...o 421 User Guide 5 11 Maintaining the Product Remove the new Toner Cartridge from the box and its wrapper Vigorously shake the cartridge from side to side Pull the tab to remove the sealing tape from...

Page 124: ...ner Cartridge into the machine until it clicks in place After installing the Toner Cartridge pull the Charger Wire Cleaning Lever out of the Drum Cartridge until it stops and then push it back in agai...

Page 125: ...WorkCentre Pro 421 User Guide 5 13 Maintaining the Product Close the Front Cover...

Page 126: ...copies The kit contains a new Drum Cartridge and a new Ozone Filter CAUTION Do not expose the green drum to light for an extended period Never expose the drum to direct sunlight or touch the drum surf...

Page 127: ...WorkCentre Pro 421 User Guide 5 15 Maintaining the Product Release the handle to open the Side Cover Remove the Toner Cartridge using the instructions Replacing the Toner Cartridge on page 5 9...

Page 128: ...out of the machine for an extended period Lift the coloured handle and gently pull the Drum Cartridge from the machine As you withdraw the Drum Cartridge support it by holding the coloured handle on...

Page 129: ...WorkCentre Pro 421 User Guide 5 17 Maintaining the Product Remove the new Drum Cartridge from the box Back Left Front Right Front Back...

Page 130: ...o 421 User Guide Remove the protective packaging from the Drum Cartridge as shown in the following illustrations Remove the card from the right of the Drum Cartridge Remove the card from the left of t...

Page 131: ...WorkCentre Pro 421 User Guide 5 19 Maintaining the Product Remove two pieces of tape tape tape 1 2 3 Pull tabs numbered 1 3 to remove more protective material...

Page 132: ...5 20 WorkCentre Pro 421 User Guide Pull tab to unfold protective paper pull Completely remove all the paper and associated tape...

Page 133: ...ide 5 21 Maintaining the Product Hold the handle and tilt the Drum Cartridge Remove the plastic strip along the bottom left Pull remaining tab on the left of the Drum Cartridge to remove the last piec...

Page 134: ...22 WorkCentre Pro 421 User Guide Slide the new Drum Cartridge into the machine until it clicks into place Reinstall the Toner Cartridge using the instructions Replacing the Toner Cartridge on page 5...

Page 135: ...ceptacle from the machine After reinstalling the Toner Cartridge pull the Charger Wire Cleaning Lever out of the Drum Cartridge until it stops and push it back in again several times This process clea...

Page 136: ...be entered from the Control Panel in the Machine Status menu HINT Before loading paper into the paper trays fan the edges This separates any sheets of paper that may be stuck together and reduces the...

Page 137: ...on of the paper continue on to the next step If you wish to load paper of a different size or orientation you will need to change the position of the paper guides and input the new paper size and orie...

Page 138: ...Press the lever down to the right to unlock the guides To release the front guide push down on the tab shown as 2 on the photo and slide the front and rear guides to their new position 2 1 To adjust t...

Page 139: ...paper size and are locked firmly in place Press the lever at the back of the tray down to the left to lock the front and rear guides in position Close the paper tray On the control panel press the Ma...

Page 140: ...se the scroll keys and to select the paper size and orientation you have installed in the tray and then press the Enter key Machine status 01 Default settings 02 Print report 03 Initial setup Default...

Page 141: ...WorkCentre Pro 421 User Guide 5 29 Maintaining the Product Press the Features key to return to the Ready mode The tray is now set up correctly and ready to use Features key...

Page 142: ...of the machine To change the paper size for the Bypass Tray it must be selected from the Control Panel Load the media in the Bypass tray Slide the guide until it is just touching the edge of the stac...

Page 143: ...1 Basic Troubleshooting 6 Basic Troubleshooting This chapter provides information for solving problems which may occur with your WorkCentre Pro 421 Tables listing Error Messages and Codes problems and...

Page 144: ...on the LCD IMPORTANT Follow the step by step procedures shown on the message display to clear the fault Use the scroll key to proceed to the next step and press Enter Access Areas The following diagr...

Page 145: ...messages Clear paper jam Open side cover 1 3 Clear paper jam Remove jammed paper 2 3 Remove any paper visible in this area Rotate the green wheel toward you and remove any jammed paper as it appears...

Page 146: ...e until you are ready to use it Paper must be loaded correctly in the tray you select for the job The orientation of the paper in the paper tray must match the orientation of the originals Check the f...

Page 147: ...Document Feeder ADF DADF Jam Clear misfed original Push jam access button 1 12 Clear misfed original Open jam access cover 2 12 Clear misfed original Turn green wheel 4 12 Clear misfed original Open...

Page 148: ...g Error Codes Press the Stop and the number 8 key at the same time to display the Error Code The Error Code indicates the location of the fault refer to page 6 9 in this section Customer Support Telep...

Page 149: ...The Drum Cartridge has reached its end of life Replace the Drum Cartridge See Replacing the Drum Cartridge Check Drum The Drum Cartridge is not properly installed Reinstall the Drum Cartridge Toner is...

Page 150: ...wice to restore the idle state Check the POWER FAILURE LIST that was output for information on any lost communication Add paper Paper has run out in all cassettes or all cassettes have been removed Lo...

Page 151: ...am inside the machine Open the side cover and exit cover and remove any jammed paper Also if you have a job separator or an offset catch tray open the cover and remove any jammed paper Close all cover...

Page 152: ...move any jammed paper Close cover E14 Tray 2 feed jam Open the Tray 2 side cover and remove any jammed paper Close cover Optional Trays transport jams E31 Paper jam inside Main unit during Tray 2 feed...

Page 153: ...he Paper Feed Processor tray 2 and remove any jammed paper Close all covers ADF DADF Paper transport jam E71 E72 E73 E74 ADF or DADF document jam Open the ADF or DADF cover and remove any jammed paper...

Page 154: ...erature and humidity changes in the WorkCentre Pro 421 s environment When a change occurs allow the WorkCentre Pro 421 at least two hours to adjust its settings to the new environment depending on the...

Page 155: ...de 7 1 Machine Defaults Setups 7 Machine Defaults Setups As delivered the machine has the factory default settings This chapter lists the settings that are customer changeable and step by step instruc...

Page 156: ...e Status Default settings Machine defaults To access the Machine Defaults menu while in the Ready mode press the Machine Status key located to the right of the LCD The Machine Status menu displays the...

Page 157: ...fault paper tray condition that you want to set then press the Enter key NOTE If Automatic Reduction Enlargement is selected and you choose Auto paper as the default tray selection Reduction Enlargeme...

Page 158: ...elect the tray you have changed then press the Enter key Use the scroll keys and to select the paper size and orientation you have installed in the tray and then press the Enter key Paper tray size 01...

Page 159: ...any features that may have been selected and returns to the Standby mode Use the scroll key to select Timers and press Enter Machine defaults 01 Paper trays 02 Timers 03 Interrupt key Use the scroll k...

Page 160: ...s cover or document feeder Use the scroll keys or to select the required value between 15 300 seconds The following values are selectable 15 30 45 60 75 90 105 120 135 150 180 210 240 270 and 300 seco...

Page 161: ...Use the scroll keys or to select the required value between 1 and 240 minutes The following values are selectable 1 2 3 4 5 10 15 20 25 30 35 40 45 50 55 60 70 80 90 100 110 120 150 180 210 and 240 m...

Page 162: ...ect the required value between 3 and 240 minutes The following values are selectable 3 5 10 15 20 25 30 35 40 45 50 55 60 70 80 90 100 110 120 150 180 210 and 240 minutes Press Enter Press Features ke...

Page 163: ...or disable the Interrupt function Select Interrupt key using the scroll key and press Enter Machine defaults 04 Speaker volume 05 Department code 01 Paper trays 02 Timers 03 Interrupt key Select Enab...

Page 164: ...Speaker volume using the scroll key and press Enter Machine defaults 01 Paper trays 02 Timers 03 Interrupt key 04 Speaker volume 05 Department code Select the volume option required using the scroll...

Page 165: ...on for setting up individual Department Codes Each Department Code also has a 2 digit Department Number and a Department Name assigned The Department Number assigned to the Master Code is preset as 01...

Page 166: ...aker volume 05 Department code To enable the Department code function select On and press Enter Department codes 1 On 2 Off Using the numeric keypad enter a 5 digit master code and press Enter Master...

Page 167: ...s 02 Timers 03 Interrupt key 04 Speaker volume 05 Department code Select On and press Enter to access the setup screens Department codes 1 On 2 Off Select Modify current codes to setup new Department...

Page 168: ...nt codes Department number 06 Enter master code Using the numeric keypad enter the first 2 digit Department Number you want to setup between 2 and 99 Press Enter Department codes Enter master code 1 o...

Page 169: ...ts 01 Paper trays 02 Timers 03 Interrupt key 04 Speaker volume 05 Department code Select On and press Enter to access the setup screens Department codes 1 On 2 Off Select Modify current codes to modif...

Page 170: ...artment codes Enter master code 1 or Enter department code 2 99 6 A message displays Unavailable Already assigned The modify options then display Department codes Department number 06 Unavailable Alre...

Page 171: ...and press Enter Department codes 1 Delete 2 Modify 3 Retain Department codes Department number 06 Enter department code To exit without making any changes select Retain and press Enter Department code...

Page 172: ...nt Code For instructions on printing the Department Code Report refer to page 7 20 Press the Features key Using the numeric keypad enter your Department Code Enter department code Paper Auto Output Co...

Page 173: ...nd for every machine configuration Therefore feature numbering can vary Quick Pathway Machine Status Default settings Print report To access the Print Report menu while in the Ready mode press the Mac...

Page 174: ...ly that user s department The following information is printed on the Department Code Report To Print the Department Code Report Item Description Dept nbr Department Number Dept code Department Code f...

Page 175: ...each machine function and the current settings Memory size Total pages Scanned Printed Machine defaults Paper trays Tray1 Tray2 Bypass Timers Time out Standby mode Sleep mode Interrupt key Speaker vol...

Page 176: ...Activity Report NOTE The firmware identification number is located at the top of the Settings Report Refer to this number when calling for service Select Settings report and press Enter Print report 0...

Page 177: ...al Number Customer Support NOTE Some options are not available in all Markets and for every machine configuration Therefore feature numbering can vary Quick Pathway Machine Status Initial setup To acc...

Page 178: ...nd press Enter Initial Setup 01 Date Time 02 Localization 03 Language 04 Machine serial number 05 Customer support 06 Network Ensure Setting is selected and press Enter Date Time 01 Setting 02 Time fo...

Page 179: ...change Enter a new digit using the numeric keypad or scroll to a new entry using the scroll keys or When you have changed all the required settings press Enter Setting YYYY MM DD day HH MM 2001 04 01...

Page 180: ...month using numeric digits or the month name Select Date Format using the scroll key and press Enter Date Time 01 Setting 02 Time format 03 Date format 04 Month format Select the format option requir...

Page 181: ...orkCentre Pro 421 User Guide 7 27 Machine Defaults Setups Select the option required using the scroll key and press Enter Press Features key to return to the Features mode Month format 1 Numeric 2 Nam...

Page 182: ...ments in inches or millimetres Select Localization using the scroll key and press Enter Initial Setup 01 Date Time 02 Localization 03 Language 04 Machine serial number 05 Customer support 06 Network S...

Page 183: ...s Enter Initial Setup 01 Date Time 02 Localization 03 Language 04 Machine serial number 05 Customer support 06 Network Select the required Language using the scroll key and press Enter Press Features...

Page 184: ...age 1 4 Select Machine serial number using the scroll key and press Enter Initial Setup 01 Date Time 02 Localization 03 Language 04 Machine serial number 05 Customer support 06 Network The machine ser...

Page 185: ...ey and press Enter Initial Setup 01 Date Time 02 Localization 03 Language 04 Machine serial number 05 Customer support 06 Network Ensure Customer support number is selected and press Enter Customer su...

Page 186: ...number using the scroll key and press Enter Customer support 01 Customer support number 02 Xerox supply number Use the numeric keypad to enter your Xerox supply telephone number and press Enter Press...

Page 187: ...Pro 421 on your network This task must be performed by a trained System Administrator Instructions for configuring the network settings and installing the machine on a network are provided in the Sys...

Page 188: ...y located to the right of the LCD The Machine Status menu displays the settings options Select Menu map using the scroll key and press Enter Machine status 01 Default settings 02 Print report 03 Initi...

Page 189: ...efore feature numbering can vary Quick Pathway Machine Status Self test To access the Menu map press the Machine Status key located to the right of the LCD The Machine Status menu displays the setting...

Page 190: ...Mode Auto test 01 Auto test Completed03 Date format Use the scroll key to select Individual test Press Enter Self test 01 Auto test 02 Individual test 03 Print test result Using the scroll key to sel...

Page 191: ...lt Use the scroll key to select Print test result Press Enter Self test 01 Auto test 02 Individual test 03 Print test result The Printing accepted message displays and the test results are printed Pre...

Page 192: ...chine Status Customer support number To access this option press the Machine Status key located to the right of the LCD The Machine Status menu displays the settings options Select Customer support nu...

Page 193: ...e Status Machine serial number To access this option press the Machine Status key located to the right of the LCD The Machine Status menu displays the settings options Select Machine serial number usi...

Page 194: ...achine Status Xerox supply number To access this option press the Machine Status key located to the right of the LCD The Machine Status menu displays the settings options Select Xerox supply number us...

Page 195: ...athway Machine Status Total print counter To access this option press the Machine Status key located to the right of the LCD The Machine Status menu displays the settings options Select Total print co...

Page 196: ...sions To access this option press the Machine Status key located to the right of the LCD The Machine Status menu displays the settings options Select Machine revisions using the scroll key and press E...

Page 197: ...rsonal injury This WARNING Mark alerts users to heated surfaces WARNING This product must be connected to a protective earthing circuit This product is equipped with a 3 wire type plug provided with a...

Page 198: ...e aerosol cleaners Follow the instructions in this User Guide for proper cleaning methods Never use supplies or cleaning materials for purposes other than those for which they were intended Keep all s...

Page 199: ...O9002 Quality system If you need additional safety information concerning this XEROX product or XEROX supplied materials you may call the following number EUROPE 44 0 1707 353434 USA CANADA 1 800 928...

Page 200: ...99 5 EC on radio equipment and telecommunications terminal equipment and the mutual recognition of their conformity A full declaration defining the relevant directives and referenced standards can be...

Page 201: ...evice pursuant to Part 15 of the FCC Rules These limits were designed to provide reasonable protection against harmful interference when the equipment is operated in a commercial environment This equi...

Page 202: ...ted in such a manner as to prevent so far as reasonably practical danger This includes ensuring all electrical equipment connected to such electrical systems safely constructed maintained and operated...

Page 203: ...st others manufacturers or suppliers of such electrical systems However rest assured that all XEROX equipment which XEROX Limited and its authorized distributors supplies to customers conforms with al...

Page 204: ...TEST PROCEDURES AND TEST EQUIPMENT MAY PROVIDE MISLEADING RESULTS AND MAY CAUSE DEATH PERSONAL INJURY AND OR DAMAGE TO PROPERTY QUESTION I would like to carry out my own safety tests on the XEROX equ...

Page 205: ...product has been designed to work with the national PSTNs and compatible PBXs of the following countries Austria Germany Luxembourg Sweden Belgium Greece Netherlands Switzerland Denmark Iceland Norwa...

Page 206: ...for the entity business or individual sending the message This facsimile machine provides the local ID and name features required for the FCC regulation To satisfy the FCC regulation the telephone num...

Page 207: ...nauthorized jack You may safely connect the machine to the following standard modular jack USOC RJ 11C Use the standard line cord with modular plugs provided with the installation kit to connect it An...

Page 208: ...may make changes to its communications facilities equipment operations or procedures Such action must be reasonable required in the operation of their business and consistent with FCC rules They must...

Page 209: ...me situations Repairs to certified equipment should be made by an authorized Canadian maintenance facility designated by the supplier Any repairs or alterations made by the user to this equipment or e...

Page 210: ...ENERGY STAR guidelines for energy efficiency Your WorkCentre Pro 421 will be delivered with the timer for switching to Low Power Mode Standby from the last copy print out set at 15 minutes The time t...

Page 211: ...als and certifications These specifications are designed to provide for the safety of users and to ensure that the machine operates in a fully functional state Use the specifications listed in this ch...

Page 212: ...American Product Digital copier with an automatic duplex unit ADU a duplex automatic document feeder DADF two paper trays a bypass tray and a stand WorkCentre Pro 421Pi Digital copier and printer wit...

Page 213: ...041 mm 41 inches Copy Speed A4 21 cpm A3 12 cpm Letter 8 5 x 11 21 cpm Legal 8 5 x 14 14 cpm Ledger 11 x 17 12 cpm Copy Magnifications Zoom range 25 to 400 in 1 increments Fixed Ratios Warm up Time Le...

Page 214: ...hts 60 90 g m2 16 24 Ibs Paper Sizes A5 to A3 5 5 x 8 5 to 11 x 17 inch Bypass Tray Capacity 100 sheets of 80 g m2 20 lb per tray 30 transparencies 1 cardstock labels Paper Weights 60 163 g m2 16 100...

Page 215: ...k A4 XEROX 3R91798 Letter 8 5 x 11 XEROX 3R3004 There maybe some performance degradation when using these media types NOTE All the Bypass Tray recommended media should only be fed from the Bypass Tray...

Page 216: ...downloaded printer driver software The PC requirements are shown below Parallel port on the PC must be set to bi directional IEEE 1284 Parallel Cable 10 metres or 30 feet maximum NOTE You cannot have...

Page 217: ...3 2 Specifications B 4 Automatic Test 7 35 B Basic Troubleshooting 6 1 Error Messages and Codes 6 7 Image Quality Problems 6 12 Booklet 3 24 To Produce a Booklet 3 25 Bound Original 3 19 Off 3 20 On...

Page 218: ...0 Using Job Interrupt 3 9 Copy Counter 7 41 Copy Defaults Changing Defaults 3 34 Reduce Enlarge 3 35 Sides Imaged 3 36 Copy Magnifications B 3 Copy Walk up Screen 2 2 Copy Changing Defaults 3 34 Copyi...

Page 219: ...argin 3 21 Off 3 21 Right Margin 3 21 Individual Department Codes 7 13 Individual Test 7 36 Information Sources 1 9 Initial Setup Defaults Customer Support 7 31 Date Time 7 24 Language 7 29 Localizati...

Page 220: ...ter driver 4 22 Notes conventions 1 8 Numeric Keys 2 12 O OCT 2 9 Off 2 14 Offset Catch Tray OCT 2 9 Offset Function printer driver 4 17 On 2 14 Optional Memory 2 10 Ordering Supplies 5 8 Part Numbers...

Page 221: ...out tab 4 35 Collation 4 20 Copies 4 17 Fonts 4 31 Front Cover 4 19 Graphics 4 26 Grayscale 4 24 Image Options 4 24 Image Orientation 4 21 Installable Options 4 15 Installed Fonts 4 31 Layout 4 22 Mem...

Page 222: ...B 5 Copier Speed paper tray 1 B 3 Copy Magnifications B 3 Duplex Automatic Document Feeder DADF B 4 Electrical B 5 GDI Print Driver B 6 Hardware Configuration B 2 Machine Weight B 2 Paper Supply B 4 S...

Page 223: ...arm up Time B 3 warning light 2 13 Warning lights control panel 2 11 Warnings conventions 1 8 Watermarks printer driver 4 33 WorkCentre Pro 421DE 2 5 options 2 5 WorkCentre Pro 421DEi 2 6 options 2 6...

Page 224: ...Index viii Xerox WorkCentre Pro 421 User Guide...

Reviews: