8-28
Phaser 34
25
Laser Printer Service Manual
3.
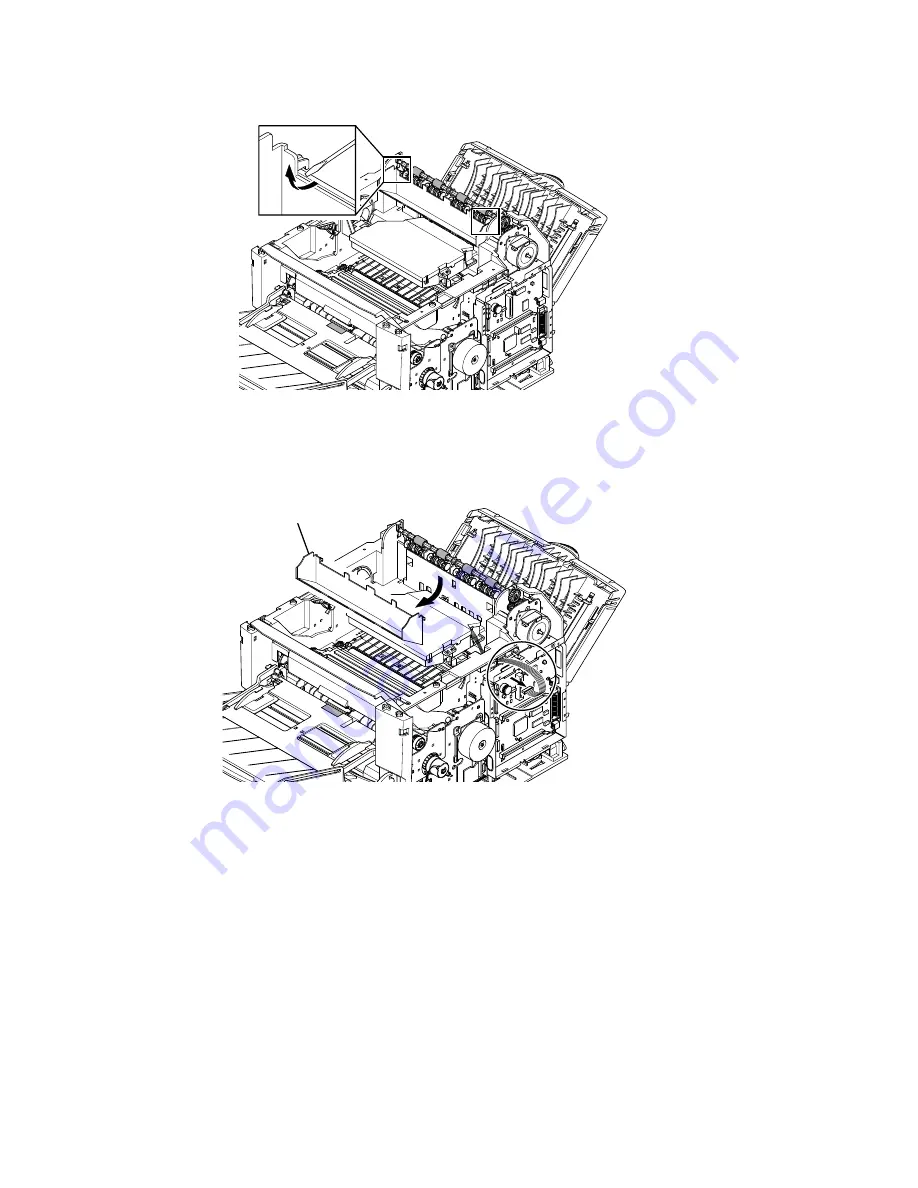
Using a small flat bladed screwdriver, release the latch hook on each side of the
Intermediate Output Tray.
4.
Remove the Intermediate Output Tray (item 1) towards the front of the printer.
5.
Remove 3 screws securing the Laser Assembly to the printer chassis and lift the
Laser sufficiently to access the harness.
Caution
Be careful not to touch the window on the underside of the Laser Assembly.
6.
Carefully peel back the foam pad securing the laser harness to the bottom of the
Laser Assembly and disconnect the 2 harness connectors from the Laser.
Note
If the foam pad is damaged during removal, it is not critical to unit
performance.
-
1
-
Summary of Contents for Phaser 3425
Page 1: ...Service Manual P h a s e r L a s e r P r i n t e r 3425 ...
Page 2: ......
Page 14: ...xii Phaser 3425 Laser Printer ...
Page 20: ...xviii Phaser 3425 Laser Printer ...
Page 29: ...General Information 1 9 Consumables 1 Print Cartridge 1 ...
Page 48: ...2 14 Phaser 3425 Laser Printer Service Manual ...
Page 93: ...6 Chapter Adjustments and Calibrations In this chapter Margin Calibration Resetting NVRAM ...
Page 98: ...7 4 Phaser 3425 Laser Printer Service Manual ...
Page 144: ...8 46 Phaser 3425 Laser Printer Service Manual ...
Page 145: ...9 Chapter Parts Lists In this chapter Using the Parts List Print Engine Parts Xerox Supplies ...
Page 175: ...10 6 Phaser 3425 Laser Printer Service Manual ...
Page 179: ......
Page 180: ......


