


Xerox
®
DocuMate
®
3115
User’s Guide
68
Please refer to the technical note, at the end of this section, for information about how this setting
works with other options in the OneTouch Scan Configuration you are modifying.
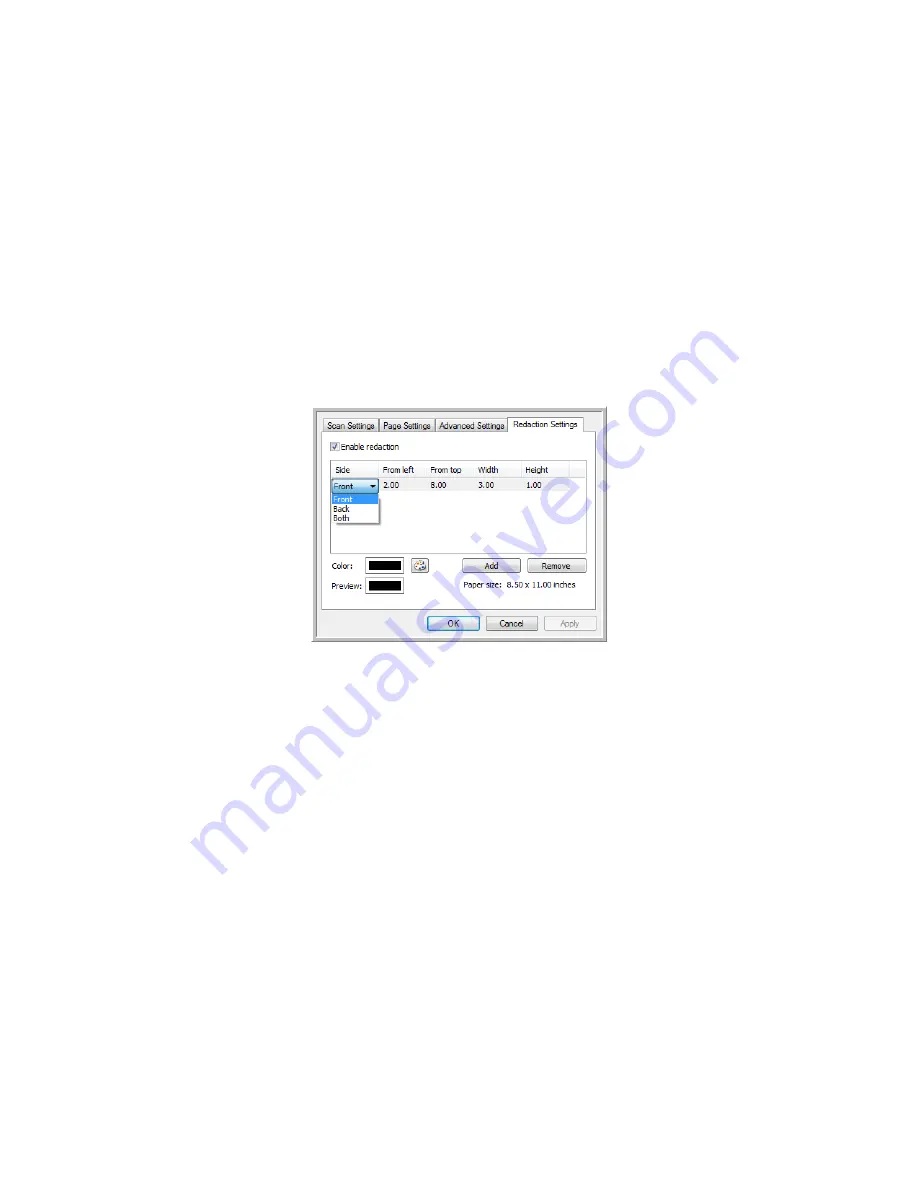
Enable redaction
—select this option to enable redaction when scanning. You might use this option if
you want to remove a logo or image that appears on each page that you are scanning. You can choose
what color to fill in the redacted area in the scanned image, and set multiple areas. If you are scanning
in Duplex mode, you can specify the area separately for the front and back side of the pages.
Click
Add
to add a line item to the area list in this window. You can redact multiple areas from the
scanned image, click the
Add
button again to continue adding line items to the list. Select an item in
the list then click the
Remove
button to remove the specified redaction area from the list.
Side
—click once on the word
Front
to show the Side option list. If you are using a simplex (one-sided)
scanner, only the Front option will be available. If your scanner supports duplex (two-sided) scanning,
the options
Front
,
Back
, and
Both
will be available in the list.
•
Front
—this is the Simplex side of the page. The area(s) specified for the Front will only apply to
the Simplex side of the page when scanning in Duplex. Therefore, if you scan 4 double-sided
pages, the resulting image file(s) will have redacted areas on pages 1, 3, 5, and 7.
•
Back
—this is the Duplex side of the page. The area(s) specified for the Back will only apply to the
Duplex side of the page when scanning in Duplex. Therefore, if you scan 4 double-sided pages, the
resulting image file(s) will have redacted areas on pages 2, 4, 6, and 8.
•
Both
—select this option if you want to specify an area that appears in the same place on both
sides of the page, such as a company logo, so you don’t have to specify the same area separately
for both the front and back.
Summary of Contents for DocuMate 3115
Page 1: ...Xerox DocuMate 3115 OneTouch 4 6 May 2013 05 0796 100 User s Guide...
Page 8: ...Table of Contents Xerox DocuMate 3115 User s Guide 8...
Page 18: ...Xerox DocuMate 3115 User s Guide 18...
Page 24: ...Xerox DocuMate 3115 User s Guide 24...
Page 32: ...Xerox DocuMate 3115 User s Guide 32...
Page 190: ...Xerox DocuMate 3115 User s Guide 190...
Page 218: ...Xerox DocuMate 3115 User s Guide 218...
Page 223: ......


