


Service Guide
63
Switch scan test
Use this test to check the operation of the printer’s switches and sensors.
1.
Enter the diagnosis mode by pressing and holding the
Menu
(1)
and
Enter (4)
keys as you turn on the printer.
2.
Press the
Menu (1, 5)
keys to scroll through the list of test until
SWITCH
SCAN
appears on the upper display.
3.
Press the
Item (2,6)
keys to scroll through the list of sensor tests, called
SWITCH SCAN tests. The table below list the SCAN test items and
which sensors and switches and test by that menu item.
4.
Pressing the
Value (3)
key activates the currently displayed switch scan
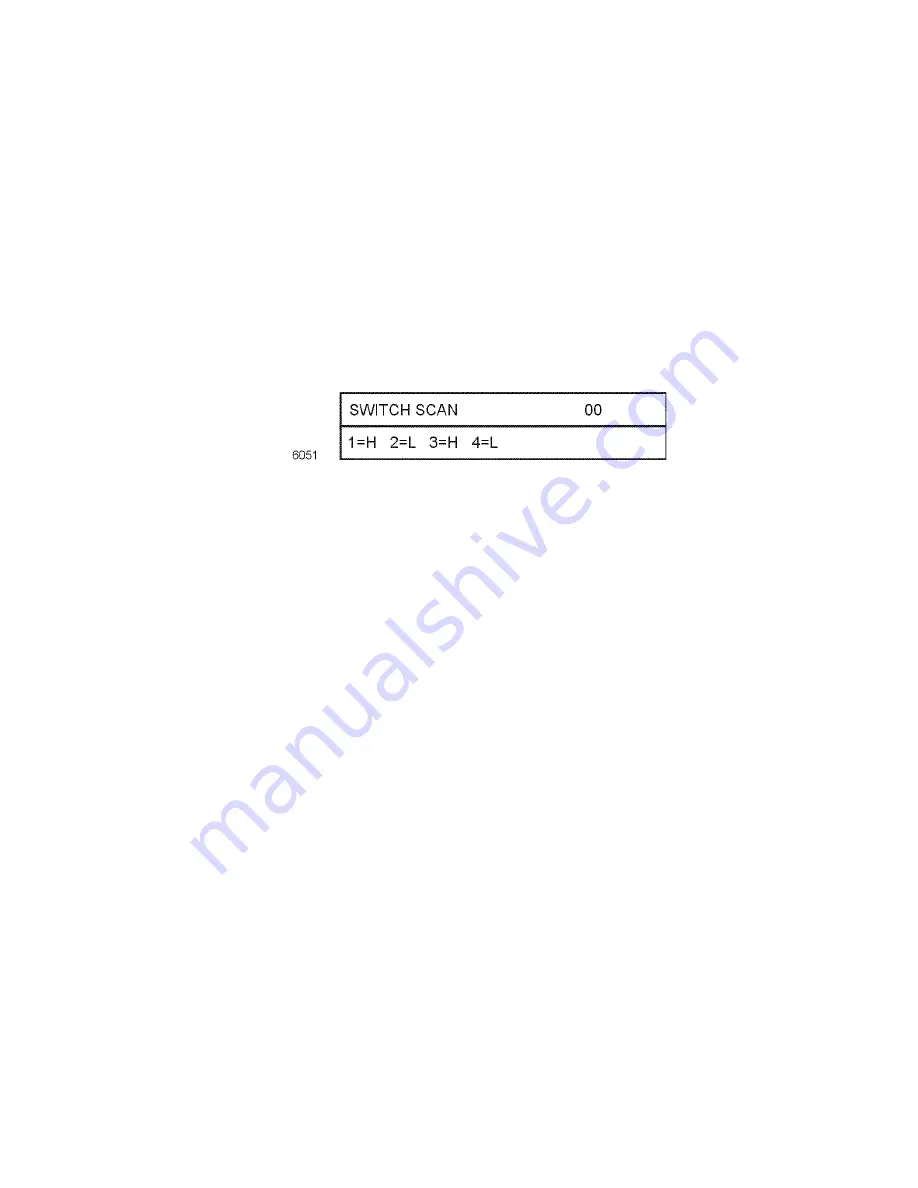
test. The SWITCH SCAN number begins to blink, and the
corresponding logic state (High or Low) of the particular switches or
sensors scanned by the test (listed as 1=, 2=, 3=, and 4=) are displayed.
5.
With a test active, you can manually actuate the sensors being scanned
and look for a change at the control panel.
6.
Press
Value (7)
to stop the current test.
7.
Repeat steps 2 through 5 as required.
8.
To exit the switch scan test mode, press
Enter (4)
.
Summary of Contents for 2135N - Phaser Color Laser Printer
Page 73: ......
Page 93: ......
Page 97: ......
Page 99: ......
Page 165: ......
Page 174: ...Service Guide 161 Figure 4 Printer chassis FRUs 2 of 2 3 4 1 2 9 7 10 6 11 8 5 12 0725 04 13...
Page 176: ...Service Guide 163 Figure 5 Paper tray and paper tray guides FRUs 7 4 2 1 0725 05 5 6 3 8 9...
Page 180: ...Service Guide 167 Figure 8 LowerTray Assembly FRUs 1 2 5 6 7 8 9 3 4 4 4 0725 07...
Page 185: ......
Page 197: ...NOTES...
Page 198: ...NOTES...
Page 199: ...NOTES...


